Windows Server Update Services (WSUS) 2012: Installation
Windows Server Update Services (WSUS) gives administrators control over how and when updates are distributed and installed on a private network, allowing organizations to test updates before they are applied in production and reducing the risk of an update causing a service outage. Although it’s possible to rely on Microsoft Update to patch your networked computers, there’s no centralized administration, reporting, or ability to target specific groups of machines, so it’s only suitable for home computers or small businesses with no access to IT support.
In this article, I’ll go over the installation of WSUS 2012 and its prerequisites. Later, in another article, I’ll go further and discuss configuring WSUS 2012. Finally, in part three, I’ll go over WSUS 2012, reporting, and PowerShell.
Windows Server Update Services Prerequisites
Before you begin installing the WSUS role on Windows Server 2012, the server should meet the following prerequisites:
- Microsoft .NET Framework 4.0 must be installed on the WSUS server.
- The Network Service account must have full access to the %windir%\Microsoft.NET\Framework\v4.0.30319\Temporary ASP.NET Files and %windir%\Temp file paths.
- The account you use to install WSUS must be a member of the Local Administrators group.
The Microsoft .NET Framework 4.0 is installed by default on Windows Server 2012, so unless you have specifically removed it, you don’t need to do anything other than check that it’s installed. The Temporary ASP.NET Files folder is installed as part of Internet Information Services (IIS), which is a requirement for WSUS and is installed as an additional component during the WSUS setup process. Therefore, unless IIS is already installed on your server, you can add the Full Control permission for the NT Authority\Network Service account after WSUS has installed.
Installing the WSUS role
In this example, I’m going to install WSUS in a single server topology that gets its updates from Microsoft Update and then distributes them to the rest of the network, and use WSUS with the default Windows Internal Database (WID). WSUS supports the use of other databases, such as Microsoft SQL Express 2008 R2 (or higher) and Microsoft SQL Server 2008 (or later), either on the same server as WSUS or on a different domain joined server (but not a domain controller). If you have access to a supported instance of Microsoft SQL Server, Microsoft recommends using it instead of WID.
- Log on to Windows Server 2012 as a local administrator.
- Open Server Manager from the Start screen or Task Bar icon on the desktop.
- In Server Manager, select Add Roles and Features from the Manage menu.
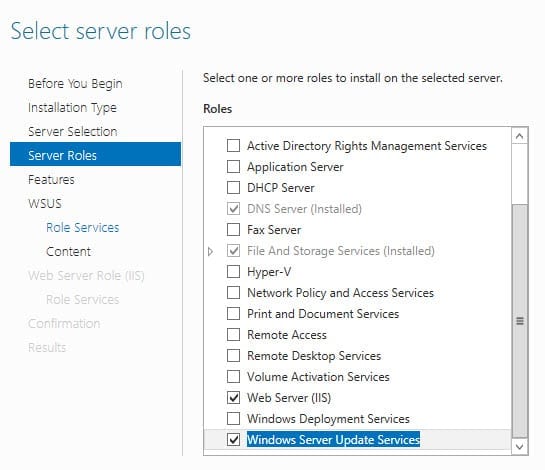
- Click Roles in the left pane of the Add Roles and Features wizard.
- Select Windows Server Update Services at the bottom of the roles list. Then click Add Features in the pop-up dialog to add additional components that are required by WSUS. Click Next in the Add Roles and Features wizard.
- Click Next on the Features screen, then Next on the Windows Server Update Services screen.
- On the Role Services screen, check WID Database and WSUS Services. Then click Next.
- On the Content location selection screen, enter a path where WSUS will store updates. In this example, I’ve already created a local folder (c:\WSUS Updates) for this purpose. Click Confirmation in the left pane of the Add Roles and Features Wizard.
- Click Install on the Confirmation screen.
- Once the installation has completed, click Close.
- Find the Temporary ASP.NET Files folder in the %windir%\Microsoft.NET\Framework\v4.0.30319\ directory and give the Network Service account Full Control. Do the same for the Temp folder in %windir% (usually C:\Windows).
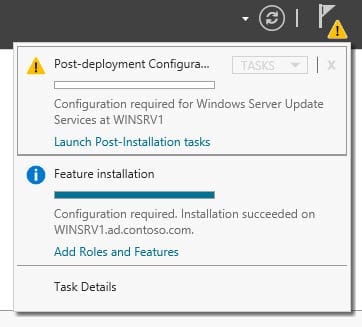
- In the top right of Server Manager, click the yellow warning icon and then select Launch Post-Installation tasks. After a few minutes, you should see that the post installation tasks have completed.
Windows Server Update Services Configuration
Now that WSUS is installed and the post-installation tasks completed, we need to do some simple configuration. Make sure that your WSUS server has Internet connectivity so that it can download updates from Microsoft Update before continuing.
- In Server Manager, select Windows Server Update Services from the Tools menu. The Windows Server Update Services Configuration Wizard will open in a separate window.
- Click Next on the Before You Begin Screen and again on the Microsoft Update Improvement Program screen.
- Select Synchronize from Microsoft Update on the Choose Update Server screen and click Next.
- Add your proxy server details (if you have an HTTP proxy on your network), or otherwise click Next to continue.
- Click Start Connecting to confirm the upstream server information. This might take a few minutes. Once completed, click Next.
- Select the required languages for your updates on the Choose Languages screen and click Next.
- On the Choose Products screen, select the Microsoft products for which you want WSUS to download updates. All supported Office and Windows products are selected by default. Click Next to continue.
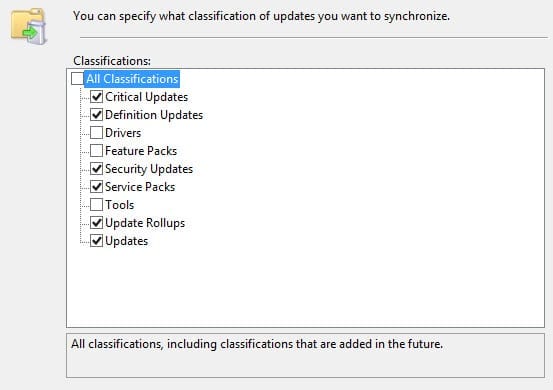
- On the Choose Classifications screen, choose the types of updates you’d like WSUS to download and click Next.
- On the Configure Sync Schedule screen, decide whether you want to initiate synchronization manually or schedule a synchronization job to download updates. Click Next to continue.
- On the Finished screen, check Begin initial synchronization and click Finish.
In the next part of this series, I’ll look at how to configure network clients to connect to the WSUS server using Group Policy and testing connectivity to WSUS.


