


View Diagnostic Data in Windows 10 April 2018 Update

In this Ask the Admin, I’ll show you the new Diagnostic Data Viewer in Windows 10.
One of the biggest controversies surrounding Windows 10 since its release has been privacy. The collection of user data has increased to apparently provide users with a better experience as part of Microsoft’s Windows-as-a-Service initiative. This has led to privacy concerns and is causing some users to put off upgrading to Microsoft’s latest and greatest. But the problems don’t end there for Microsoft as France, the European Union, and the Electronic Frontier Foundation have all voiced their concerns as well.
To help address worries about the data being sent back to Microsoft, the Windows 10 April 2018 Update includes an app that shows the data being collected in a readable format. There are also new options for configuring privacy settings during the out-of-box-experience (OOBE) when you first set up Windows 10.
Configure Privacy Settings
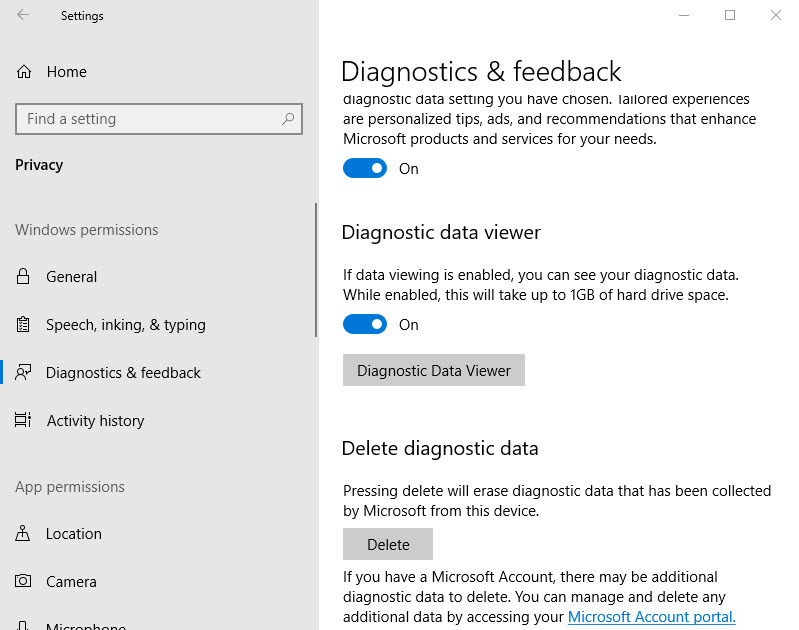
If you want to view diagnostic data collected by Windows 10, you’ll need to enable the Diagnostic Data Viewer in the Settings app. Press WIN+I to open the Settings app. Go to Privacy and then click Diagnostics and feedback under Windows permissions. Here you have the option to set the level of diagnostic data that Windows collects. The default setting is Full but you can change it to Basic. While the differences between the two settings aren’t spelled out very clearly in the Settings app, Microsoft does provide a link here that gives more information about what is collected. The two major differences are that Basic doesn’t send information about the websites you visit or the applications you launch and how long you use them.
Enterprises can use the Allow Telemetry Group Policy setting under Computer Configuration > Administrative Templates > Windows Components > Data Collection and Preview Builds to set the maximum level of data collection that users can configure in the Settings app. For more information on the available levels, see Microsoft’s website here.
Enable Diagnostic Data Collection
Scroll down the Diagnostics and feedback settings page until you get to Diagnostic data viewer. The viewer is off by default. Use the switch to toggle it to On. Microsoft warns that collecting diagnostic data locally could take up to 1GB of disk space. Once enabled, click Diagnostic Data Viewer. If the application is not already installed, the Microsoft Store will open and you’ll be prompted to download the app. If it’s already installed, it will open directly.
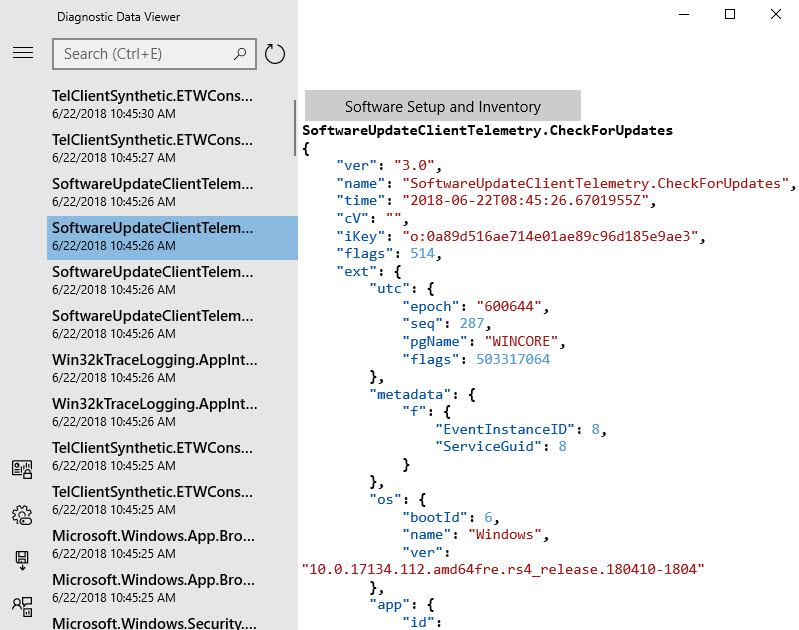
In the Diagnostic Data Viewer app, you can view each event that is sent to Microsoft in clear text or search for information. There’s also the option to export events as a comma delimited (.csv) file. You can view events by Sampling Policy. For instance, you can choose to view information about the following policies in any combination: Device Connectivity and Configuration, Inking Typing and Speech Utterance, Product and Service Performance, Product and Service Usage, and Software Setup and Inventory.
Windows Error Reporting Diagnostic Data
It’s worth noting that Windows Error Reporting data can be viewed separately in the Control Panel. The Diagnostic Data Viewer app doesn’t allow you to view these reports. To view the reports, type problem reports in the search box in the bottom left of the taskbar and click View all problem reports in the list of results.
In this Ask the Admin, I showed you how to change the level of diagnostic data collected in Windows 10, view diagnostic data using the Diagnostic Data Viewer app, and how to access Windows Error Reporting.
Follow Russell on Twitter @smithrussell.