Once you’ve gone through all the stops listed above, we’re ready to get started. I’ll step you through the process, starting with connecting to Office 365.
1. Connect to Office 365
Once your management PC is configured, open a PowerShell prompt by switching to the Start menu, type powershell and then click Windows PowerShell in the search results. In the PowerShell window, run the following command and press ENTER:
In the pop-up window, enter your Office 365 tenant credentials, and click OK. This will authorize you to access and administer your Office 365 subscription.
2. List Users
To get a list of all your Office 365 user accounts, use the get-msoluser cmdlet. Running the cmdlet without any parameters will return a list of all the users in your Office 365 subscription. Keep in mind that there's a limit of 500 results unless you specify a higher figure using the –MaxResults parameter. Office 365 uses Azure Active Directory (AAD) as its directory service, so what you're really doing here is listing all the user accounts in the AAD associated with your Office 365 subscription.
Alternatively, you can add some parameters to filter the results. For example, to return information about a specific user:
Or you can specify a search string to find users:
If you have a lot of user accounts, then the search results can be limited by specifying a maximum number of results to return, and the results filtered to display only enabled user accounts:
Like any other PowerShell cmdlet, you can get a full list of all the available parameters like this:
3. Create a New User
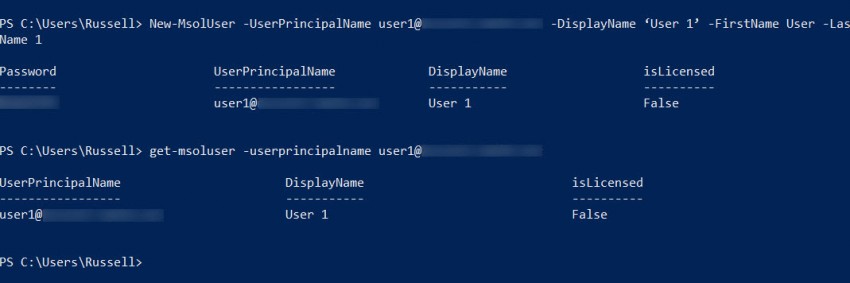
To create a new Office 365 user account, use the New-MsolUser cmdlet. The following cmdlet creates a new user account and will be assigned a random password that's shown in the console output:
Creating a new Office 365 user account using Windows PowerShell. (Image Credit: Russell Smith)
If you get details about this new user account with Get-MsolUser and the –UserPrincipalName parameter, you'll notice that a license hasn't been assigned. You will also be able to see the new user account if you run:
4. Assign a Product License
Before you can assign a license to a user account, you need to know the type of SKU that's associated with your Office 365 subscription. All you need to do is run the cmdlet below, which will return the AccountSkuID and information about assigned licenses:
Run the following cmdlet to assign a license to a user account that's already been created, replacing the value for –AddLicenses with the AccountSkuID returned using the Get-MsolAccountSku cmdlet. If you don't have enough available licenses in your subscription, PowerShell will return an error message:
5. Assign a License, Set a Password, and Force a Password Change at First Logon
Alternatively, you can assign a license when initially creating a user, by adding the -LicenseAssignment parameter to the New-MsolUser cmdlet:
Notice that I've also specified a password for the user in the –Password parameter, and used -ForceChangePassword $true to force the user to change the password when they log in for the first time.