Documenting System Center 2012 – Orchestrator Workflows
As you leverage your investment in System Center 2012 – Orchestrator, you will quickly appreciate that there are two steps you will want to consider as you work on each project. Those are, of course, documentation and backup (and version control).
Unfortunately, the product does not offer activities to assist in either of these steps, and while taking an export of your runbooks as we covered in the “System Center 2012 SP1 – Orchestrator: Exporting and Importing Runbooks” post is a good policy, the likelihood that you’ll think about this after you have made a mistake is just too high. There are easier ways to make this happen, so we’ll loop back on this topic in a later post.
In this post, we will address System Center 2012 – Orchestrator and documentation. Assisting with this process we will leverage the community with a free utility called Orchestrator Visio and Word Generator.
Related: Download Microsoft System Center 2012 R2
System Center 2012 – Orchestrator Documentation Preparation
As with all third-party utilities we have used with System Center, the first process we will need to complete is to prepare our environment to use these time-saving utilities. The utility we are going to leverage today is pain free in this respect, and it does not even require to be installed. Instead, we just need a workstation that has Visio 2013 and Word 2013 32-bit installed (the 2010 versions also work, but steer clear of the 64-bit variants for a pain-free existence).
Simply surf over to the Orchestrator and Visio Generation utilities home site and download the current build, which is supplied as a simple ZIP file. Unblock and extract the content, to expose some sample files in addition to our new tool OrchestratorVWGenerator.exe.
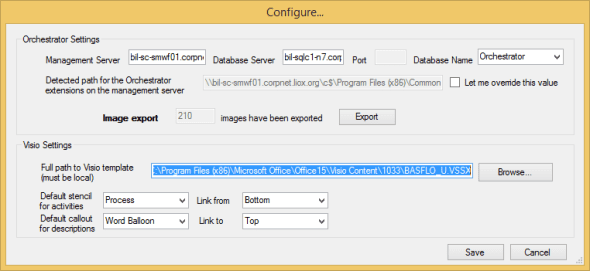
Launch the tool and you’ll get a message dialog stating that no previous configuration file was located and therefore a new one will be created for you. Click the OK button, and you will be presented with the configuration dialog.
The main area we need to address will be the upper Orchestrator settings where we will define our connection to the Orchestrator instance we wish to work with. Meanwhile, the lower Visio settings offer a selection of choices to help you customize the look and feel of your generated Visio images. Generally these can be left untouched until you are ready to tweak your results.
As you begin to configure the Orchestration Settings section, you will need to be on the same network and executing the tool as a user with permissions to both the Orchestrator Environment and its associated SQL Database.
- In the Management Server field, provide the fully qualified name of your management server.
- In the Database Server field, provide the fully qualified name of the database server, and if appropriate, the name of the instance hosting the database.
- Assuming the connection details are valid and you have the appropriate permissions, you should be able to select your database from the drop-down list.
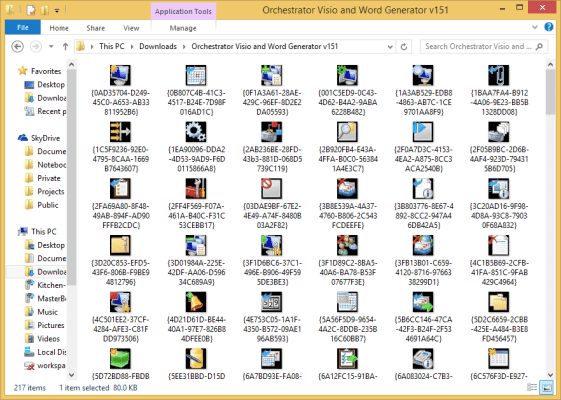
- Finally, click on the Export button to extract a copy of each activities icon. The process can take a number of minutes depending on the number of activities registered in your environment. You will only need to do rerun this export if you change the activities in your environment.

Once completed, you will be presented with a dialog confirming the export is done. You can now click on the Save button, to store the configuration and load up the main tool.
Documentation

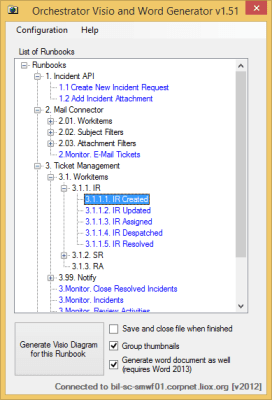
After a few moments the main tool will appear presenting a navigation tree of your runbook folder structure, which you can easily navigate. Folders will be represented in black while your actual runbooks will be in blue. In the lower portion of the dialog you will have the option to create your Word document as part of the process, along with some other basic choices.
Navigate the tree structure to locate a runbook which you wish to be documented, noting that you can only select a single runbook at a time. Finally, click Generate Visio Diagram for this Runbook.
Visio will then autolaunch and start to draw out in detail your new runbook. If selected, Word will behave in a similar manner, as the tool directs these tools to generate the documents on your behalf. Once complete, you will hear a simple ding and see a dialog confirming the generation has completed.
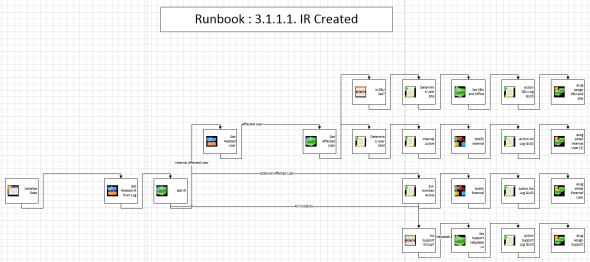
The final result of your Visio will resemble the following image, when using the default options.

You can repeat this procedure for each runbook that you wish to document, saving you time for more productive work.


