How to Setup and Configure Visio Graphics Service in SharePoint 2013
- Blog
- SharePoint
- Post
It is possible to work with Visio drawings directly from SharePoint 2013. It takes a little bit of configuration and setup, but if you follow these instructions you should have no problems getting your users the ability to easily view and even edit Visio Graphics Service documents in SharePoint 2013. Making your Visio users happy takes a little bit of configuration and a little bit of training for the end users.
Visio Graphic Service in SharePoint 2013: Create a New Application Pool and Managed Account
You might find it useful to create a new application pool to run Visio. If you’d rather use an existing application pool, you can skip this section.
- Create a new Active Directory user. This user (I call mine “SPVisio”) needs only Domain Users permissions.
- Add the new user (in my case, SPVisio) to the SharePoint 2013 Managed Service Accounts list.
$VisioAcct = New-SPManagedAccount –Credential (Get-Credential)
When prompted, provide the account username and password
- Add permissions for the Visio account to each web application that will use Visio Graphics service.
Get-SPWebApplication | Foreach-Object {
$_.GrantProcess*********TOUSER($VisioAcct.Username)
$_.Update()
}
- Create an application pool for the Visio Graphics Service Application.
$AppPoolName = “Visio Service Application Pool”
New-SPApplicationPool –Name $AppPoolName –Credential $VisioAcct
Create an Entry for the Visio Service to Make Secure Data Calls
This part is optional, but if you’re going to have Visio make connections into SQL or another data source, then now is the time to go ahead and create the connection.
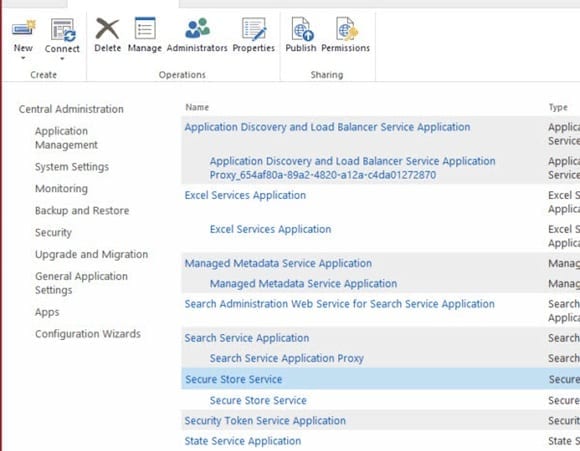
- Go to Central Administration, select Application Settings, and then choose Manage Service Applications.
- Click the Secure Store Service, and click Manage.
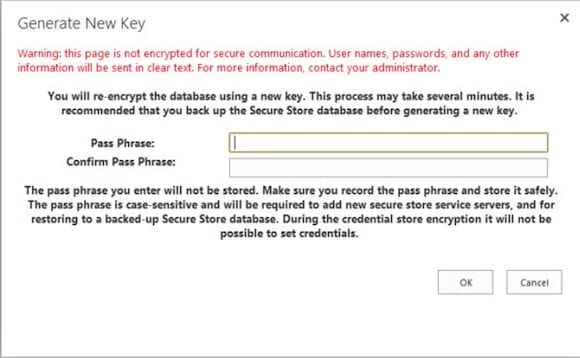
- If you haven’t created a secure store passphrase yet, now is the time. Click Generate a new key and then provide a nice long passphrase.
Note: It’s really important that you keep this password safe. Keep it written down in the same place as you keep your farm passphrase, so you don’t lose it. You’ll need it when you add a server that is running the Secure Store service, or if you have to perform a restore on the Secure Store database.
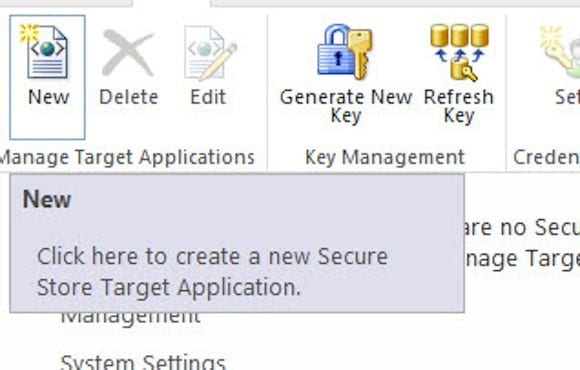
- Click New on the Secure Store management screen.
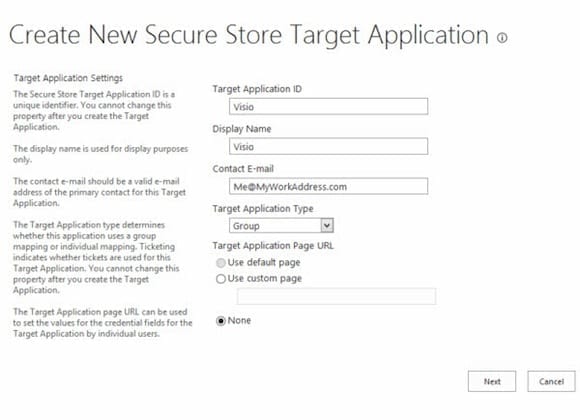
- Set the options for the Visio target. You can use “Visio” for both the name and the display name. For a contact email, you’ll probably want to use your own email or the distribution list for the system administrators. Change the target application type to Group, and then click Next.
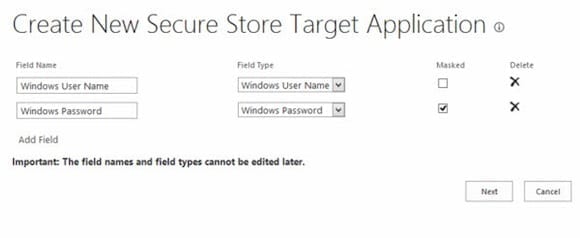
- Now you’ll define the information that this secure store target application will require. It’s already set correctly by default, so just click Next.
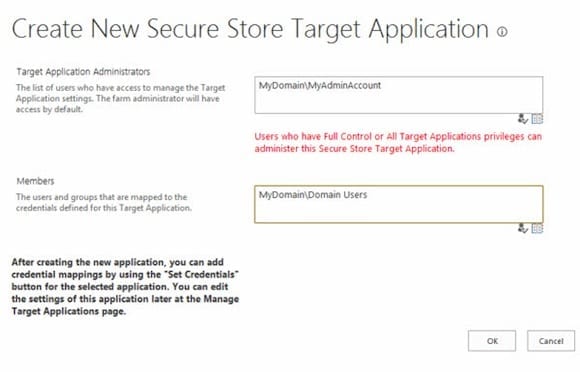
- Now add in the administrators and the users for the application. This will be you or the administrator team for the list of administrative users, and “yourdomain\Domain Users” as the people that can use this target application.
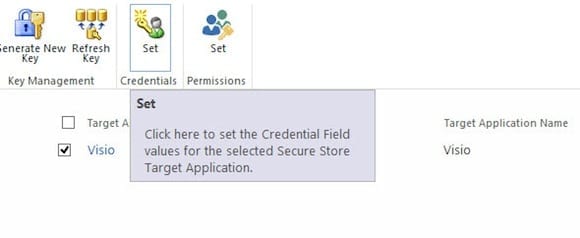
- Back on the Secure Store management, put a check in the box next to Visio and click Set (in the “Credentials” group).
- Provide the credentials to your Visio account (SPVisio). Your Secure Store target application is configured.
Run Visio Graphics Service
I’ll stay in Central Administration for now, but you could perform these steps with PowerShell pretty easily.
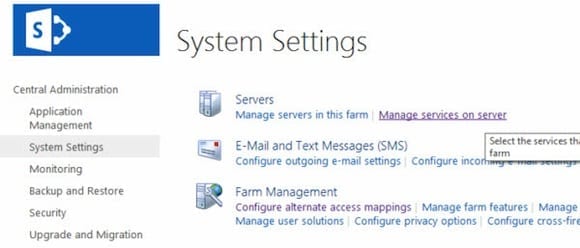
- In Central Administration, select System Settings and then choose Manage services on server.
- Find Visio Graphics Service and click Start. Your server is now ready to run the Service Application.
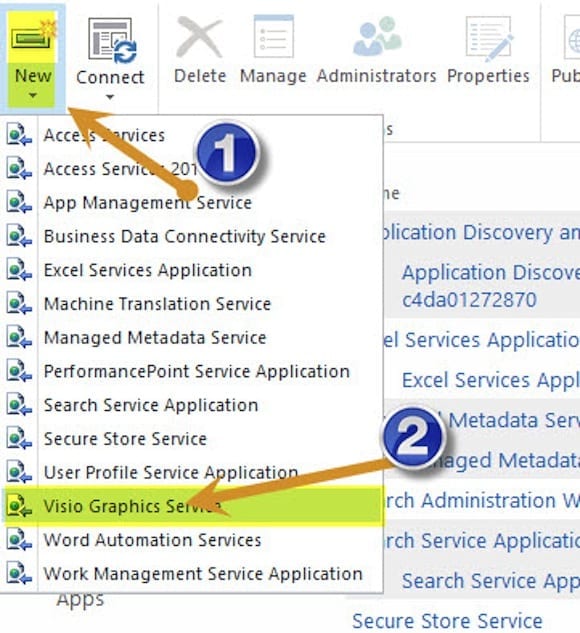
- Go back into Manage Service Applications and expand the New ribbon icon. Select Visio Graphics Service Application.
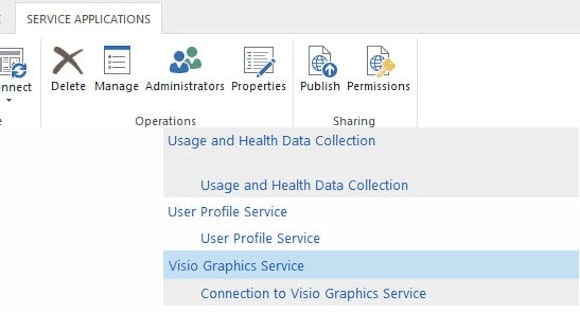
- On the New Visio Graphics Service Application dialog, provide a name for the Visio Service Application. You will choose Select an existing application pool, then choose the new Application pool you created earlier in the dropdown menu. Leave the check in the box for Create a Visio Graphics Service Application Proxy. Your Visio Graphics Service Application is created!
Visio Service Application: Final Configuration Steps
- From the Service Applications list, select your Visio Graphics Service Application and click Manage.
- On the Manage the Visio Graphics Service screen, select Global Settings.
- Configure your Visio Service application to suit your needs. If you’re not sure, you can leave the configuration items as default. The only configuration item you’ll need to add is the name of your Secure Store target application, if you opted to create one.
You’re all set! It was easy, right?
There are several options, from creating the Active Directory user and application pool to the Visio service application itself and the Secure Store target application. But all in all, it doesn’t take a long time for you to get Visio Services working in your SharePoint 2013 environment.
Once set up, you’ll still have to train your users to save their Visio documents in a format that can be used. Only the latest version (.VSDX) and the web drawing format can be viewed in the browser. Older versions will still be opened in the Visio client application, so there can at least be an easy way to get the files opened so they can be saved as the new file type.
How Did It Work for You?
If you get through all of these steps, it should be working for you. If not, you have a couple of steps to take to remedy the situation. The fastest and easiest is to stop and start the service on server. You can also verify that permissions have been set on the content databases by using SQL management studio. Finally, if all else fails, try to create a new Visio Graphics Service Application. If the new service application works and the original does not, a configuration step was missed, but you can then remove the old broken service application without worry.
Let me know in the comments below how it worked for you, or you can always follow me on Twitter or Facebook.


