


Microsoft Azure: Use Visual Studio to Deploy a Virtual Machine

In today’s Ask the Admin, I’ll show you how to create an ARM template in Visual Studio for deploying Azure virtual machines (VMs).
As a system administrator, I never thought I’d need to work with Visual Studio (VS) – that scary monolithic piece of software the developers use to conjure up their wares. Tools such as the Windows PowerShell ISE (Integrated Scripting Environment) have, until now, sufficed for my scripting needs. But since Azure has slowly moved away from the classic ‘service management’ model to JSON-based resource manager (ARM) templates, it’s clear that a professional developer tool that understands the JSON syntax, and can help debug and even deploy resources in Azure, is the best way to go.
Not only does VS understand how to parse JSON files, but integration with Azure provides access to Cloud Explorer for resource management and predefined templates so that you can quickly deploy new resources without leaving VS. Having used VS to deploy resources in Azure, this is the way I now recommend you work with Azure templates.
For more information on Azure Resource Manager, see What are Microsoft Azure Resource Groups? and Deploy VMs Using Azure Resource Manager on the Petri IT Knowledgebase.
Install Visual Studio
First you will need to install Visual Studio 15 Community, Professional or Enterprise Edition, with the Azure SDK for .NET. Community Edition is free, so that’s the version I’ll be installing. You can either download and install VS from Microsoft’s website and then add the Azure SDK later, or use Microsoft’s Web Platform Installer (Web PI) to install ‘VS Community Edition with the Azure SDK’ already configured.
VS Community Edition can be downloaded here, and the Web PI here, which can be used to get the Azure SDK for .NET as a separate download, and VS Community Edition with Azure SDK for .NET as an integrated package. When installing VS, make sure you accept the default install options.
Create a New Project in VS
Let’s create a new project in VS and use one of the templates that are provided with the Azure SDK to deploy a VM running Windows Server 2012 R2.
- Launch VS 2015.
Notice that you should already be logged in to Azure with the Microsoft account that you use to sign in to Windows. The Cloud Explorer pane in VS will show a hierarchical list of resources in your Azure subscription if you have successfully logged in to Azure. If that’s not the case, click on your name in the top right of VS and select Account settings… from the menu to change the login account.
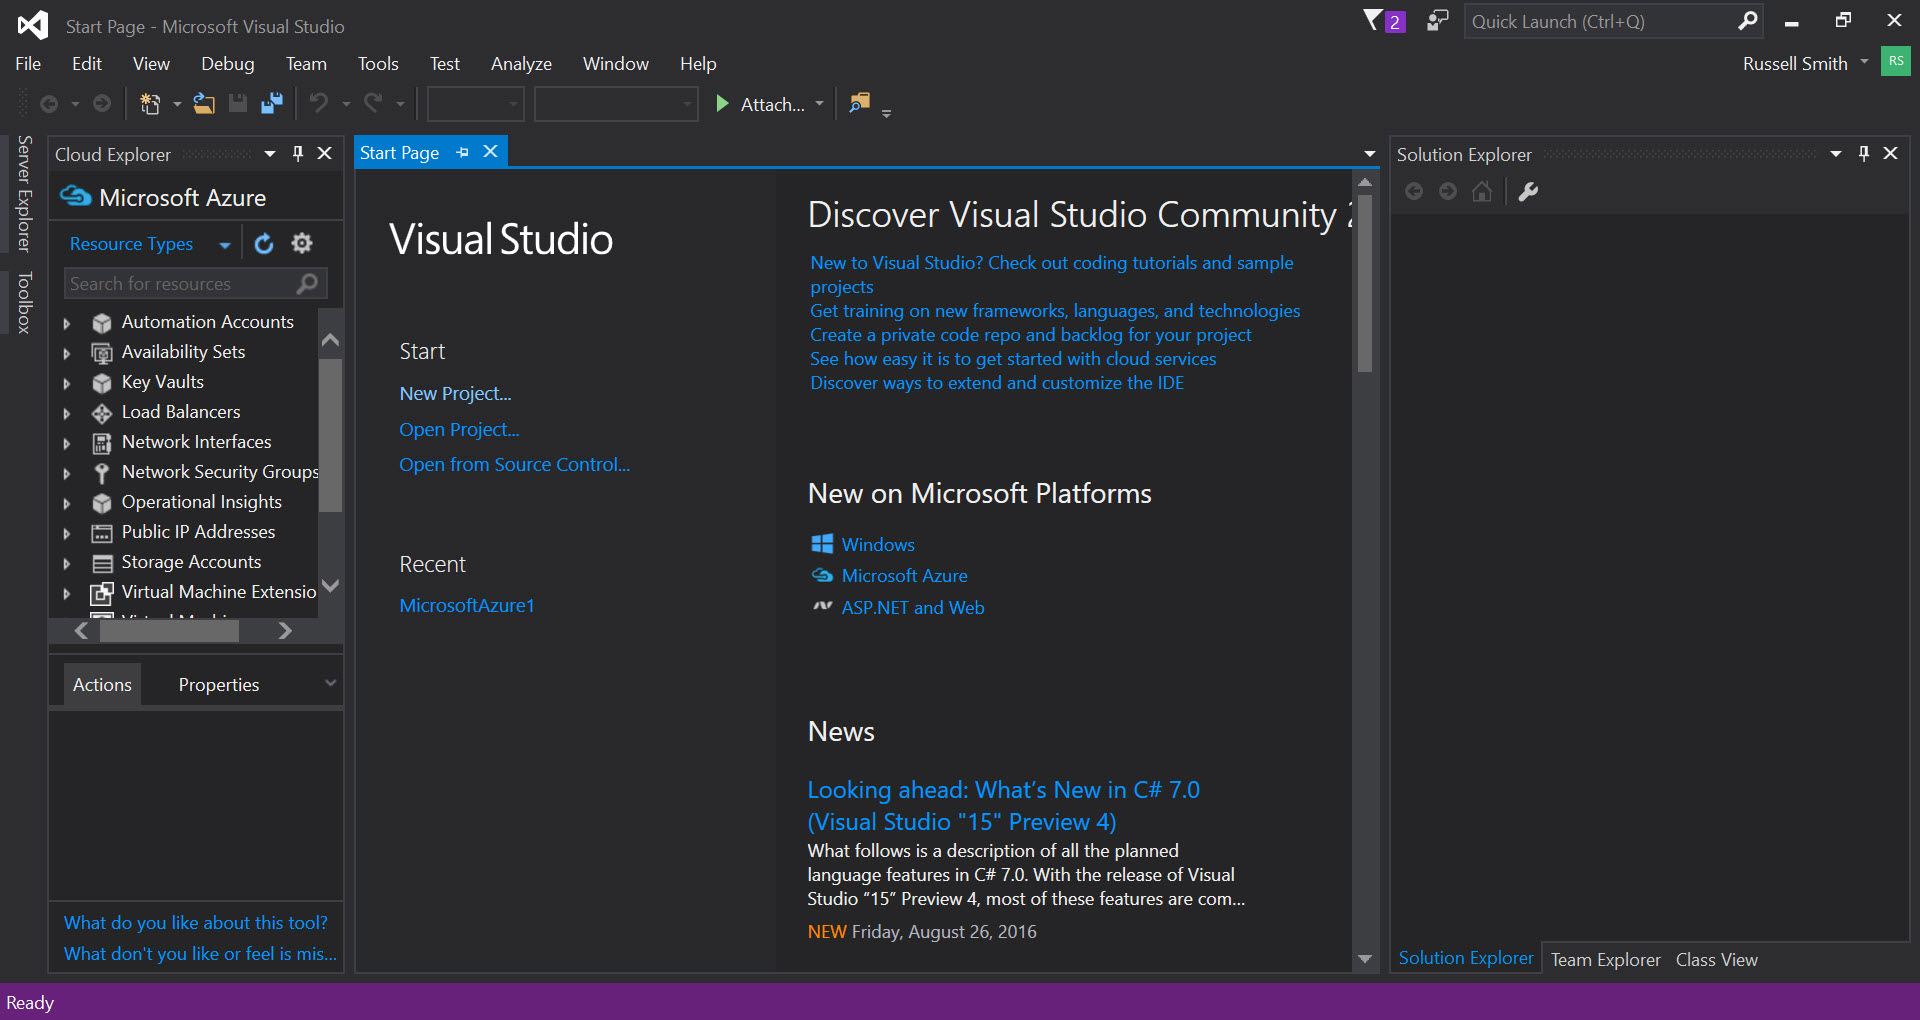
- Click New Project… under Start on the Start Page tab in VS.
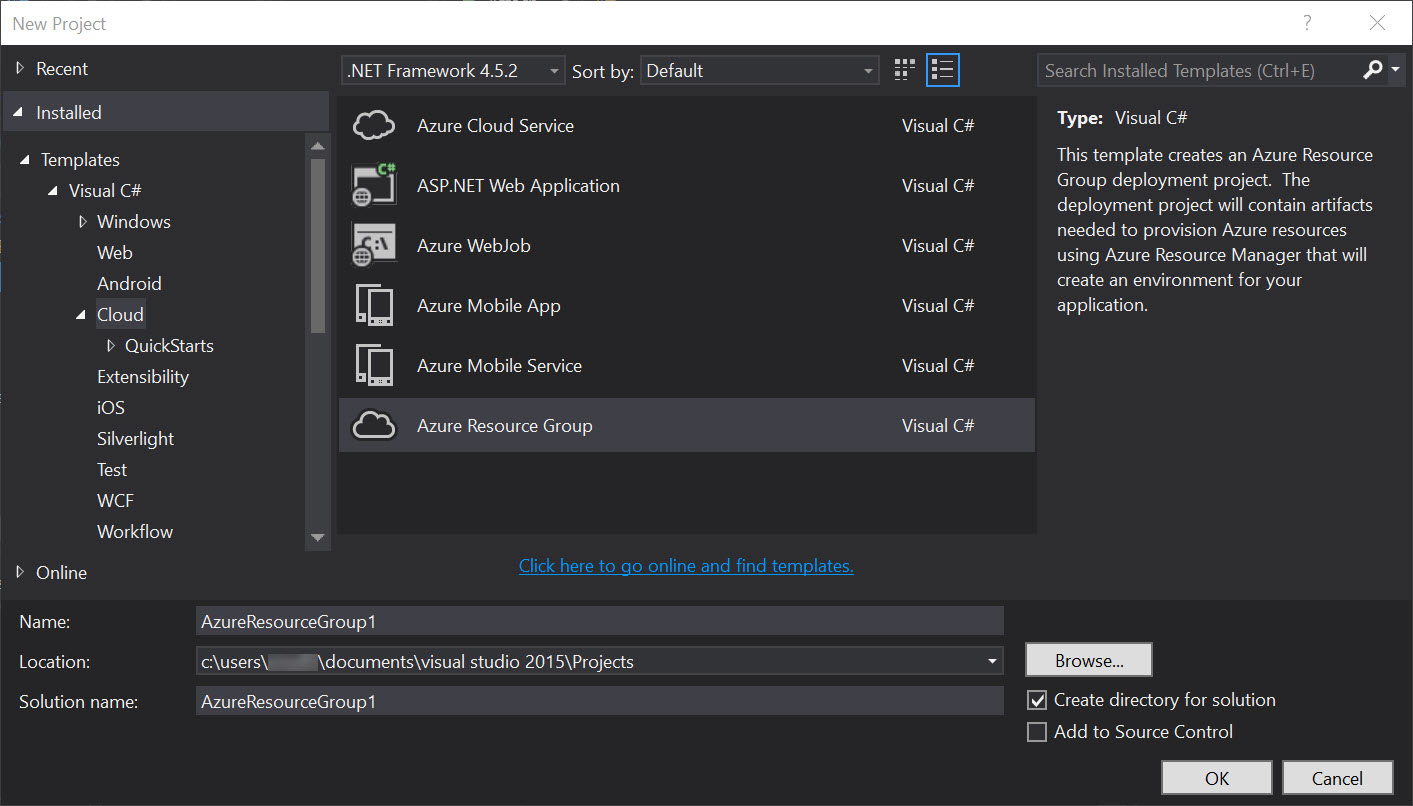
- In the New Project dialog box, expand Installed > Templates > Visual C# and select Cloud.
- In the list of templates, double-click Azure Resource Group.
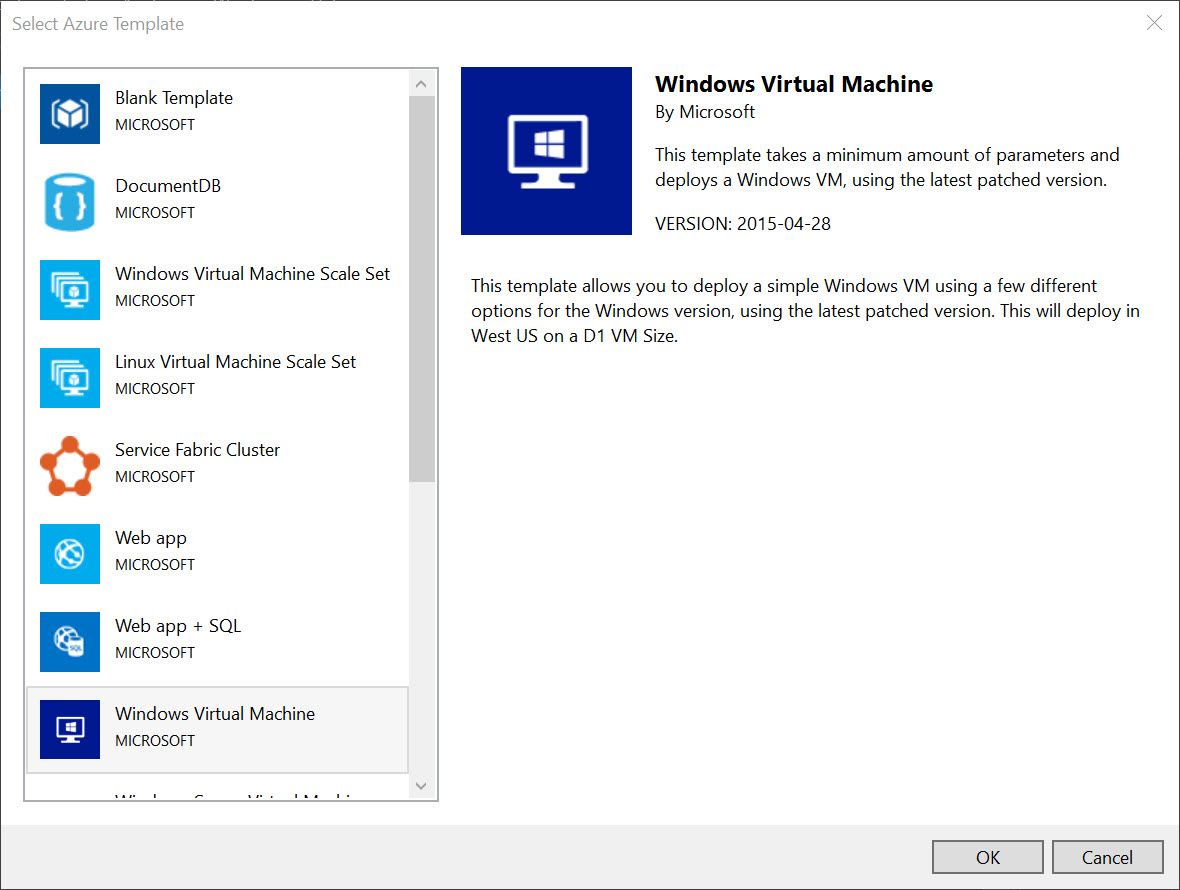
- In the Select Azure Template dialog, select Windows Virtual Machine from the list on the left and then click OK.
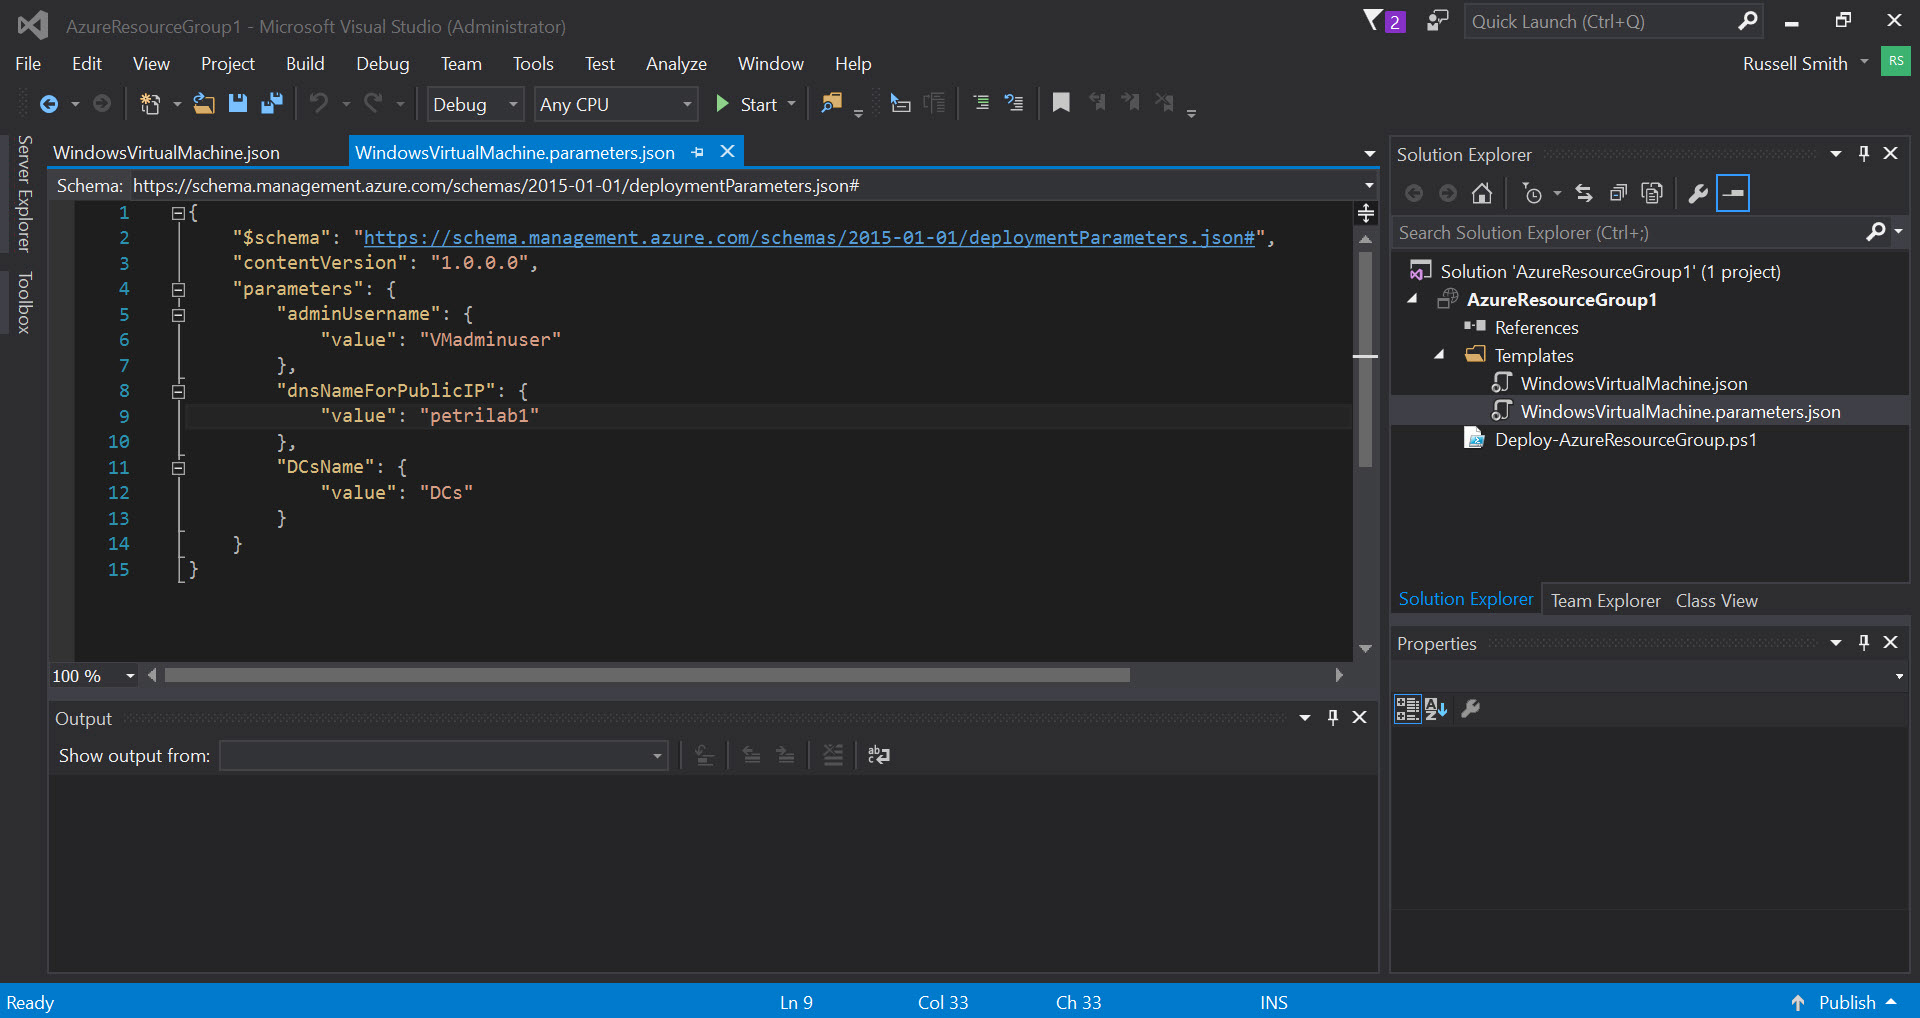
- In the Solution Explorer pane, expand the Templates folder.
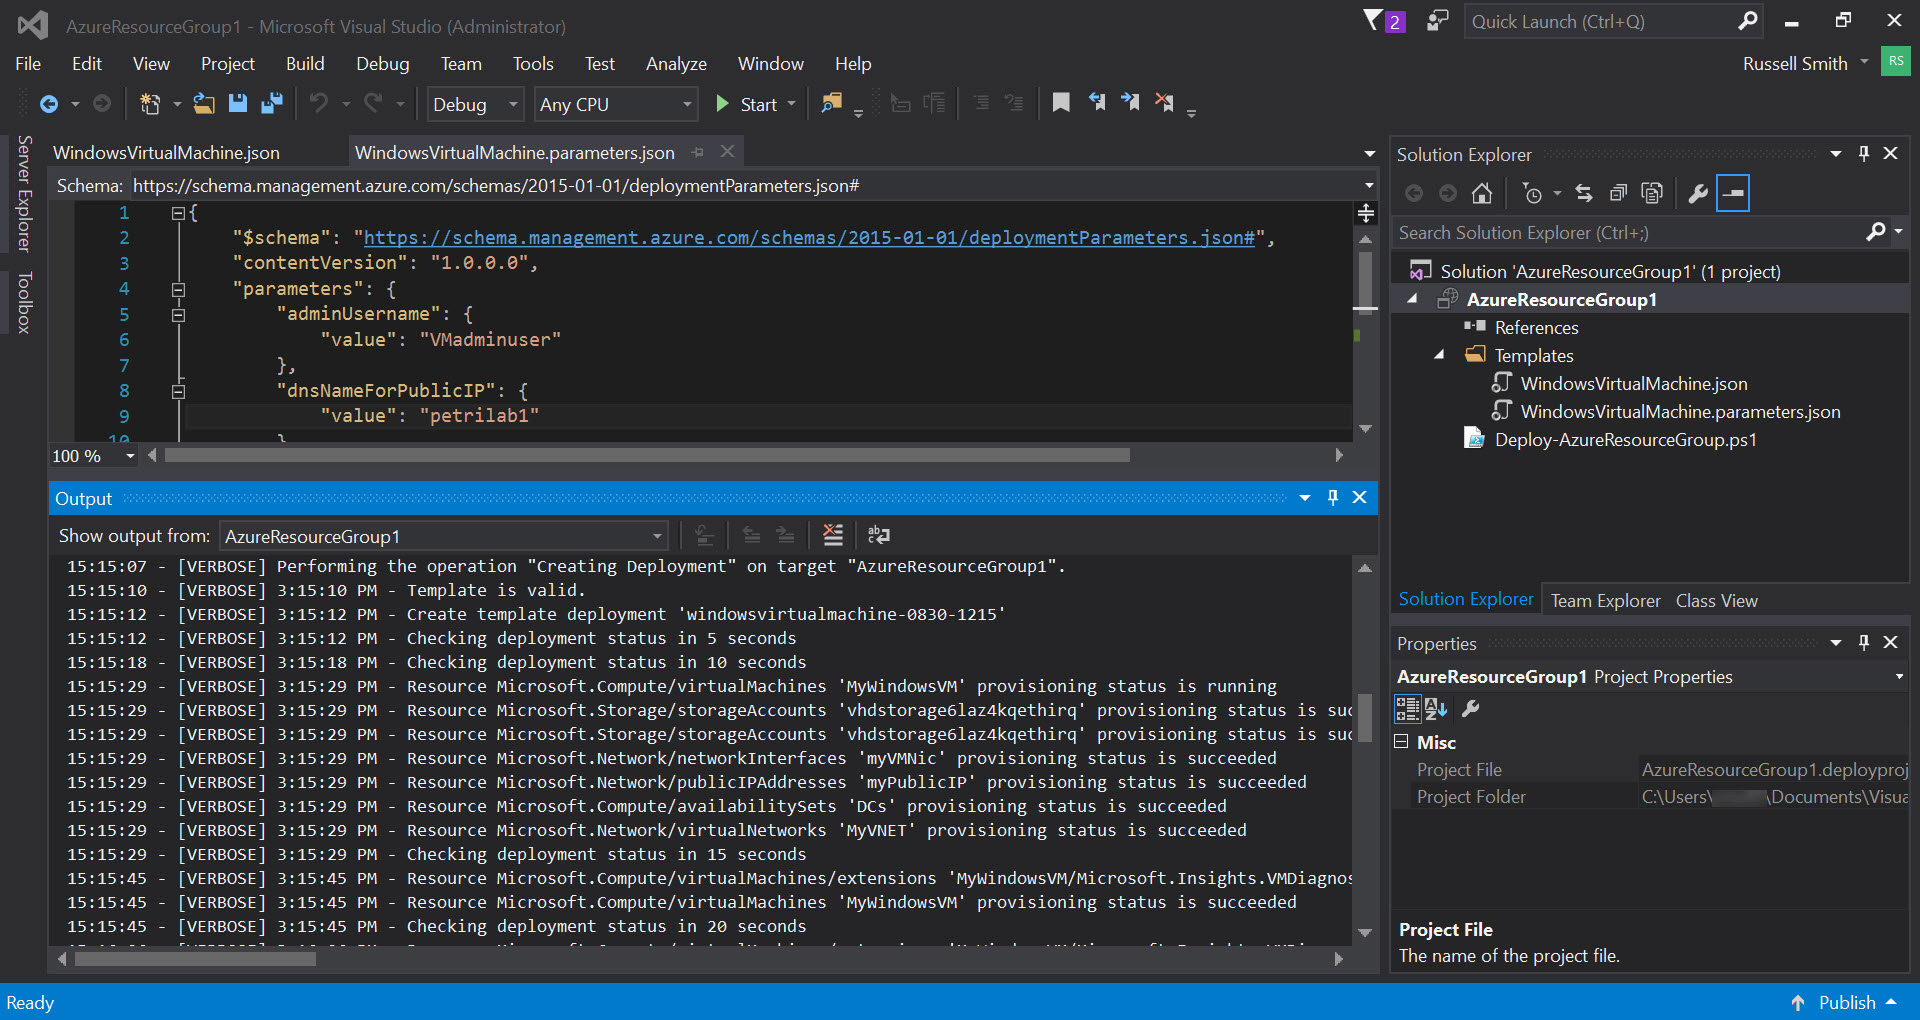
Here you’ll see two files: WindowsVirtualMachine.json and WindowsVirtualMachine.parameters.json. The first file is a template that defines the Azure resource(s) to be created or updated, and the second file contains a list of parameters for the deployment that might change each time a resource is deployed using the template, such as the VM administrator username.
- Double-click WindowsVirtualMachine.json in the Solution Explorer pane to open the code in VS.
- Notice in the JSON Outline tab that the template is divided into three sections: parameters, variables, and resources.
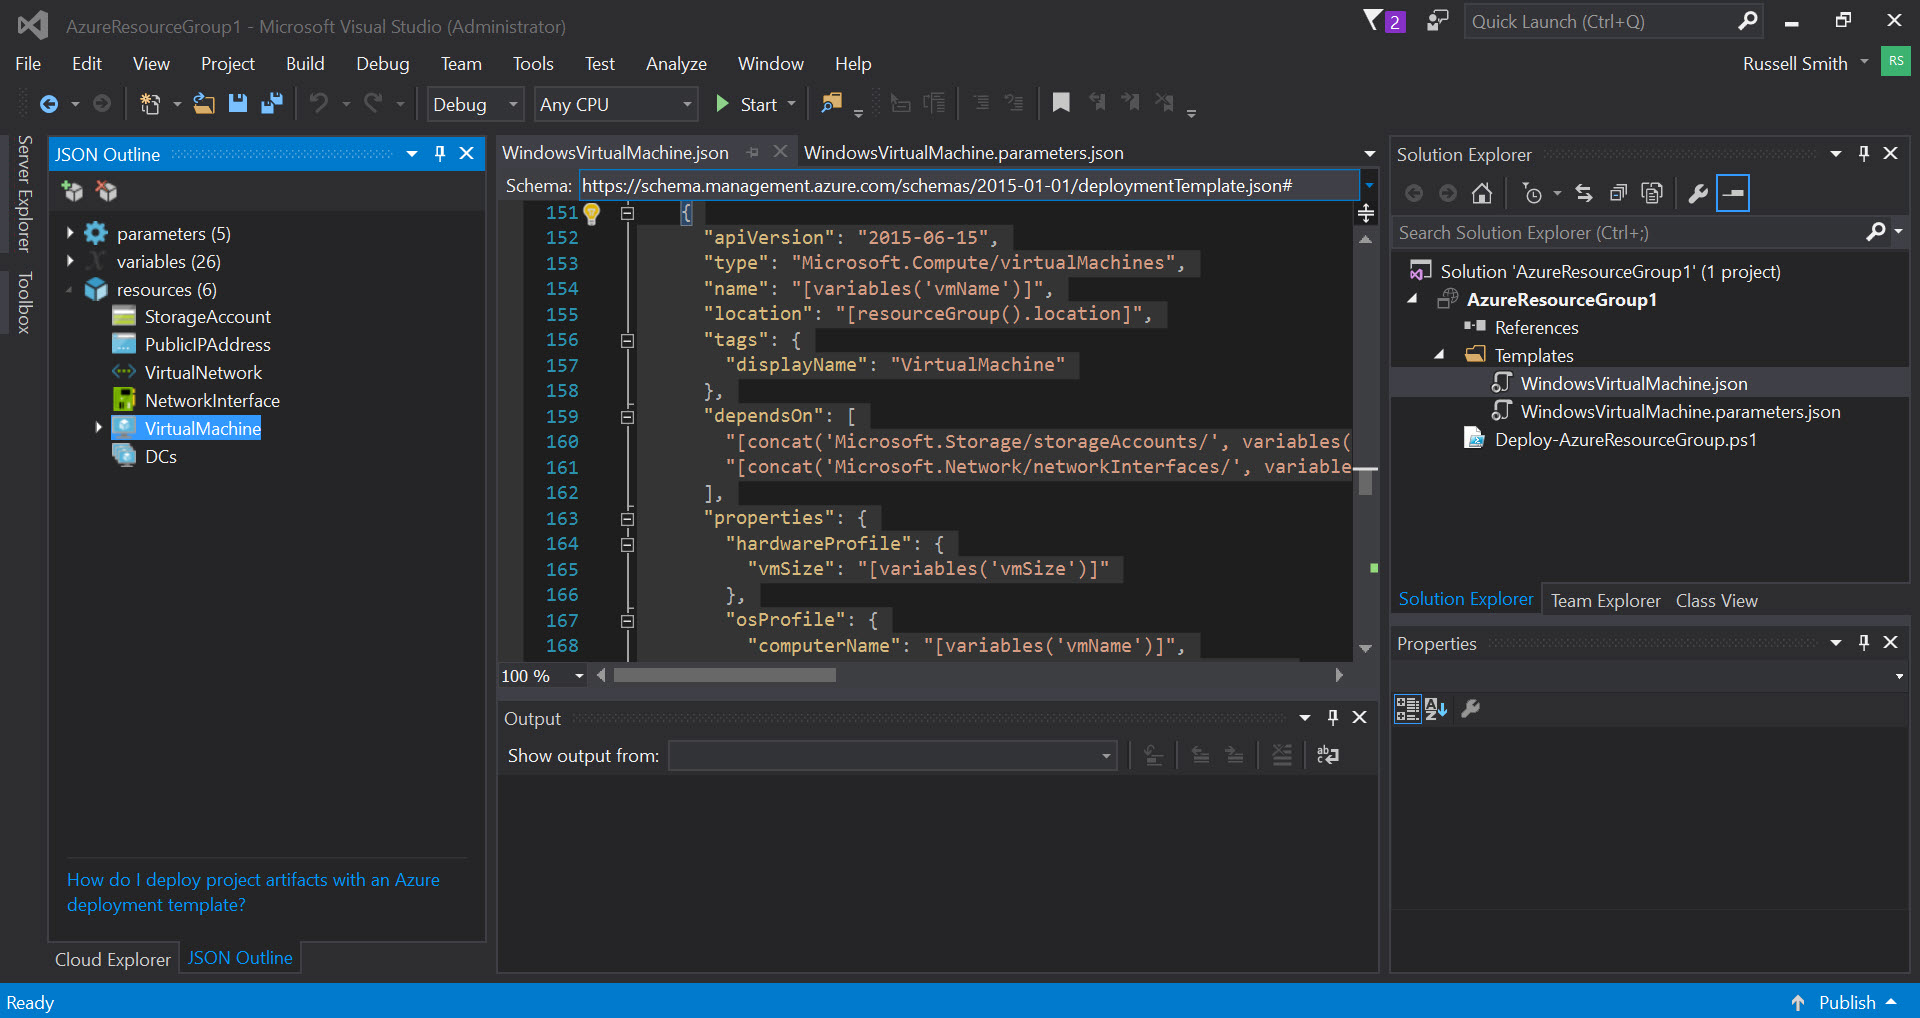
The parameters can either be provided in the WindowsVirtualMachine.parameters.json file, or using the new Azure web portal. In this case, the two parameters are set to null, so we’ll edit the file later. Alternatively, these parameter values can be provided at deployment time.
Modify the Template
Now we have a template that looks something like what we need. Let’s delete anything that we don’t want and edit what doesn’t quite fit our requirements.
- Using the JSON Outline tab, expand resources > VirtualMachine, right click AzureDiagnostics and select Delete from the menu. I might not delete this resource under normal circumstances, but just to show you how easy it is in VS. If you modify a template and VS detects any errors in the code, they will be highlighted by red marks in the margin to the right.
- Expand variables in the JSON Outline tab and click the vmSize variable. In the code tab, change “Standard_A2” to “Standard_A1”. This will give us a smaller VM size.
Add a Resource
You saw how to delete a resource from a template, and it’s just as easy to add resources.
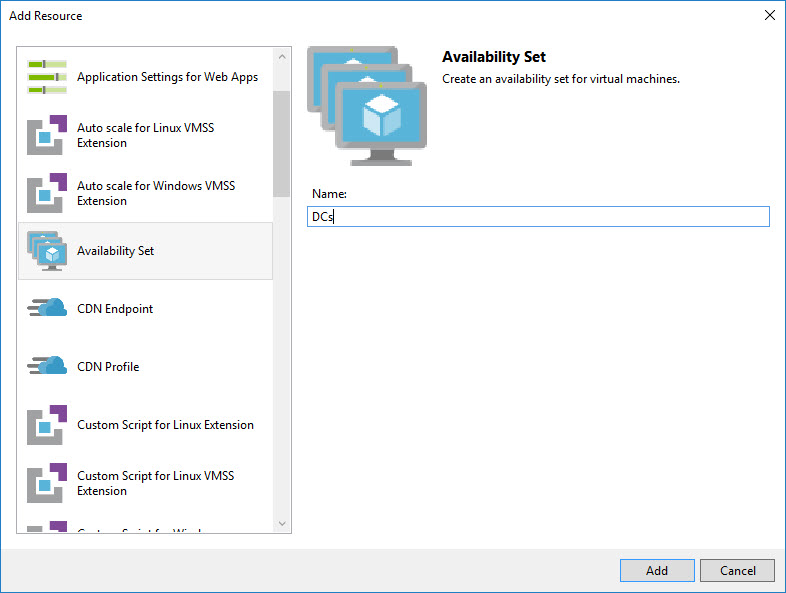
- In the JSON Outline tab, right-click resources and select Add New Resource from the menu.
- In the list of available resources in the Add Resource dialog, select Availability Set.
- In the Name field, type DCs and then click Add.
You’ll now see DCs appear as a new resource in the resources section of JSON Outline tab. For more information on Availability Sets, see Understanding Azure Availability Sets on Petri.
- Click CTRL+S to save changes you’ve made to the template.
Add Values to the Parameters File
Before we can deploy the resource, let’s provide values for the adminUsername and dnsNameForPublicIP parameters.
- Double-click WindowsVirtualMachine.parameters.json in the Solution Explorer tab.
- In the script pane below the adminUsername parameter, replace null with “VMadminuser”.
- Similarly, replace null below dnsNameForPublicIP with a DNS name for the VM’s public IP address. I’ve used “petrilabvm”, note the use of all lowercase letters, but you should choose something appropriate for your deployment.
- Click CTRL+S to save to parameters file.
Deploy the Solution
The template is now ready, so let’s try and deploy the VM and associated resources. Note that Visual Studio must be launched using an administrator account before you can deploy a solution.
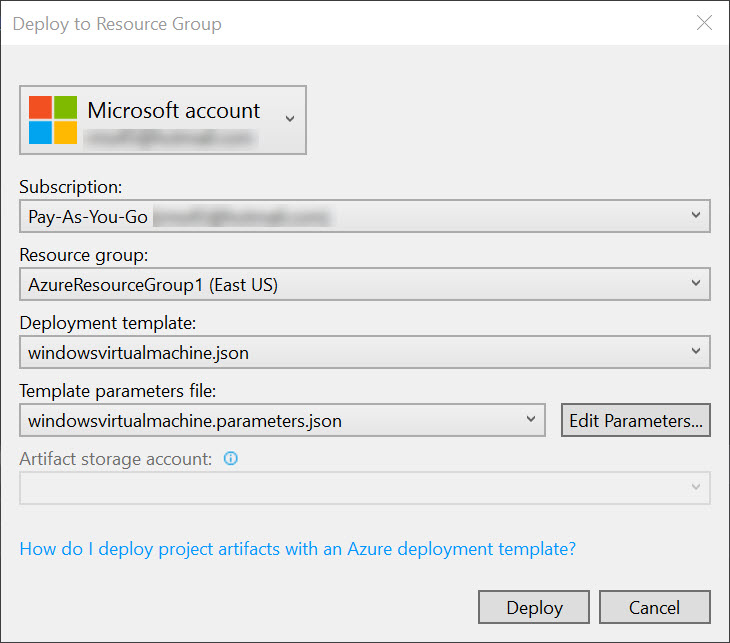
- Right-click AzureResourceGroup1 in Solution Explorer and select Deploy > New Deployment… from the menu.
- In the Deploy to Resource Group dialog, select <Create New…> in the Resource group menu.
- In the Create Resource Group dialog, type AzureResourceGroup1 in the Resource group name field and then select a region from the Resource group location menu and click Create.
- In the Deploy to Resource Group dialog, click Deploy.
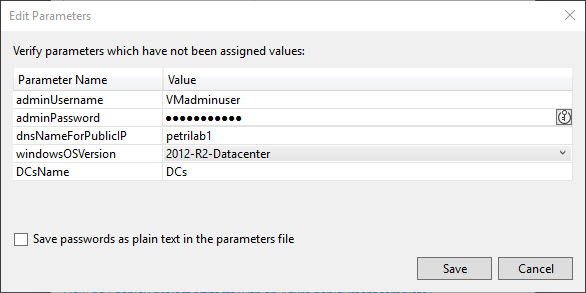
- In the Edit Parameters dialog, enter a password for the VM’s administrator account and a name for the Availability Set, and then click Save.
The deployment will begin. You may be asked to enter a value for adminPassword even if you entered one in the previous steps. The output window shows the status of the deployment and hopefully the resources will be deployed successfully.
Check VM Status
Once the solution has been deployed successfully, you can check the status of the VM using Cloud Explorer.
- Select Cloud Explorer from the View menu.
- If Cloud Explorer was already open, you might need to refresh the view by clicking the Refresh icon below Microsoft Azure.
- Expand Virtual Machines and click MyWindowsVM.
- Switch to the Properties tab at the bottom of Cloud Explorer.
- Check the State property is set to running.
In this article, I’ve shown you how to use an ARM template in Visual Studio to deploy a virtual machine in Microsoft Azure.