How To Install Windows XP Mode (XPM) on Windows 7
In my previous article (“Installing Virtual PC on Windows 7“) I walked you through the features of the new Windows Virtual PC software that is specially designed for Windows 7. Windows Virtual PC provides the capability to run multiple Windows environments such as Windows XP Mode from your Windows 7 desktop.
What Exactly is Windows XP Mode?
Windows XP Mode (or XPM for short) is a new feature of Windows 7 (available only in the Professional, Enterprise and Ultimate editions) that can help businesses to upgrade their computers to Windows 7. It does so by providing a virtual Windows XP environment capable of running many Windows XP-compatible business and productivity applications. By using Windows Virtual PC you can now run many older business and productivity applications that only work in Windows XP on your Windows 7 machine. This is made possible by installing these applications inside the Windows XP virtual machine, and integrating them with your Windows 7 desktop and start menu. This way, you can launch these applications from the Windows 7 desktop or Start menu with just a single click, and have them integrate seamlessly with the Windows 7 environment.
Here are some of new features in Windows Virtual PC that make it easier for you to run your legacy applications in a virtual software environment:
- The ability to use many of your USB devices from within a virtual Windows environment, such as Windows XP Mode.
- Seamless launching of Windows XP applications from your Windows 7 desktop, Start Menu, or Taskbar.
- Clipboard sharing, which enables you to cut, copy, and paste data between the host Windows 7 desktop and the virtual machine.
- Printer sharing between the Windows 7 desktop and the virtual Windows environment.
- Drive sharing, which provides easy access to all host data from within the virtual machine.
- Folder integration between operating environments
Unfortunately, Virtual PC only supports 32-bit virtual machines. If you want to run any 64-bit virtual machine you’ll need to either install Windows Server 2008 + Hyper-V, or use a 3rd-party virtualization program such as VMware Workstation or Sun Virtual Box (free).
How to Install Windows XPM
Important: To run Windows Virtual PC (and with it, XPM), your computer has to have the Intel VT or AMD-V features enabled in the BIOS. To find out if your PC is virtualization capable, please visit the Windows Virtual PC support page.
Another important note: XPM is a concept. Not a virtual machine. However, Microsoft has made a default Windows XP VM available to download, and has integrated it into Windows Virtual PC. Thus, when referring to XPM, in fact I am talking about what is called “Virtual Windows XP”.
Note: All screenshots and procedures are based on the RC version of Windows 7, and the beta version of Virtual PC.
First, make sure you’ve installed Virtual PC (see my Virtual PC installation instructions) and rebooted your machine.
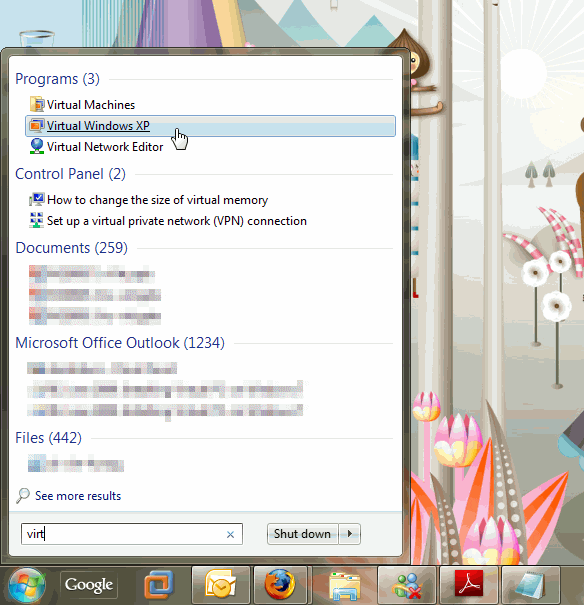
Next, type “virtual” in the Windows 7 Start menu, you’ll get a link to Virtual PC, and another one to Virtual Windows XP.
If you click on Virtual Windows XP, you’ll be prompted to download it.
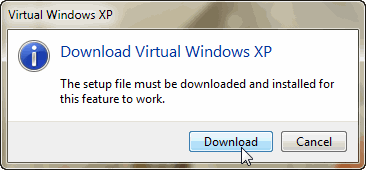
You can use the following link for the download, which is 445MB in size:
http://www.microsoft.com/windows/virtual-pc/download.aspx
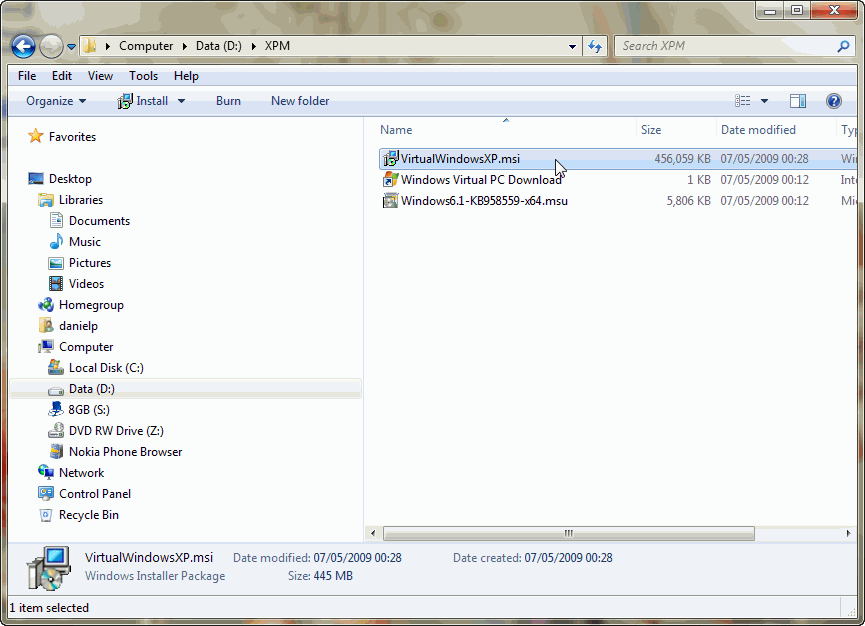
Note: You do not need to re-download it for every PC you need to install it on, just download once and manually install it multiple times.
When the download has finished, double-click on the VirtualWindowsXP.msi file to launch the installation.
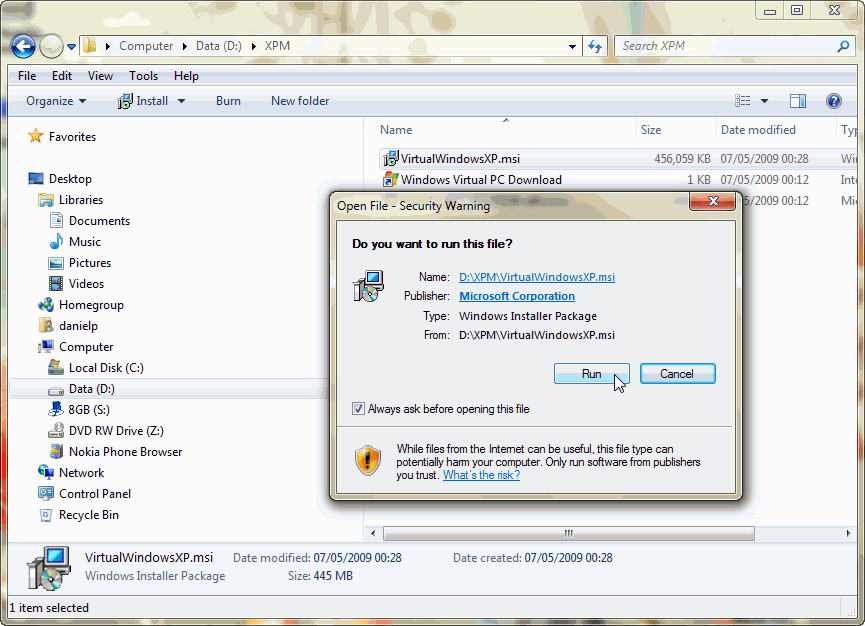
Click Run.
Click Next.
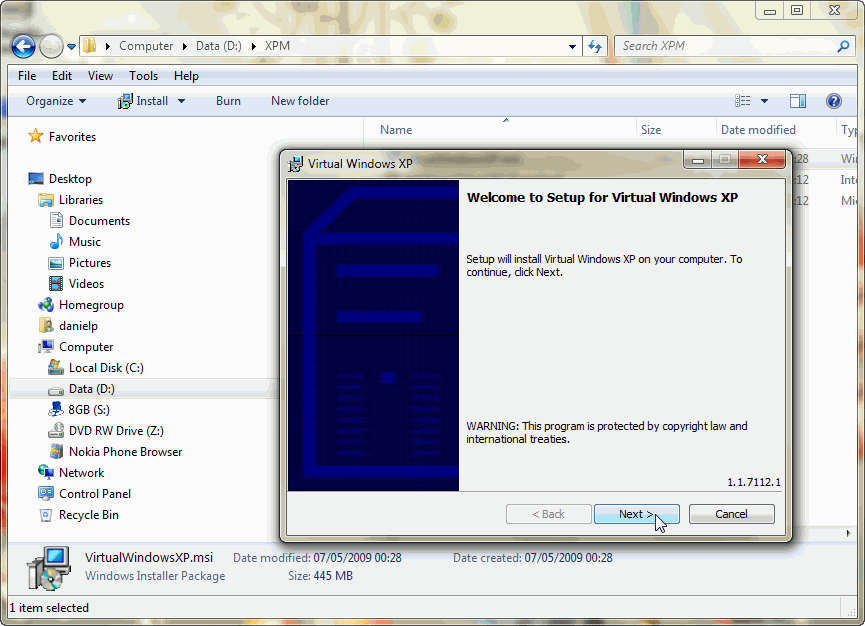
Next, accept the file location at C:Program FilesVirtual Windows XP, and click Next.
Note: You will need quite a lot of disk space on the C: partition,not just because the Virtual Windows XP installation is big, but also depending on the amount, type and size of all the applications that you plan to use in the virtual XP machine. So, if you plan to use Virtual Windows XP extensively, consider changing this path. More about that in a later article on working with virtual Windows XP Disks in Windows Virtual PC and Windows 7.
You might be prompted by the Windows 7 User Account Control (UAC) prompt. Click Yes to continue the installation.
When the installation process is over click Finish.

Note: Since the current version of Virtual PC for Windows 7 is beta, you might want to remove the default Virtual Windows XP machine when the RTM version is available.
Launching the Virtual Windows XP
When you finished installing it, you were prompted to launch Virtual Windows XP.
If you did not do so then, you can always launch it from the Start menu.
You can also go to the Virtual Machines folder, you will now see a shortcut to Virtual Windows XP.

Either as the final phase of the installation process, or as a separate click, when you first launch Virtual Windows XP, you will be prompted to accept the license agreement. Select the “I accept” check-box, and then click Next.

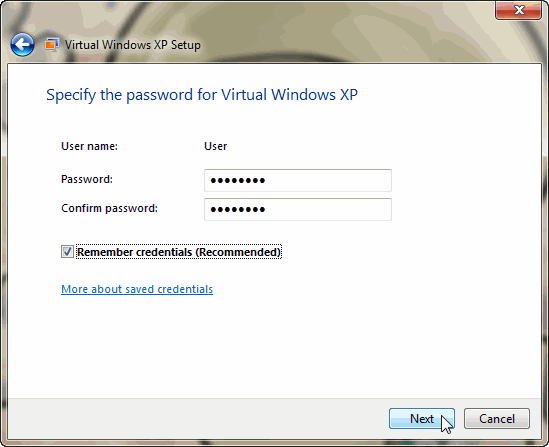
Next, you’ll be prompted to provide a password for the default user account (called “user”) that the Virtual Windows XP machine will use. You can also configure Virtual PC to remember these credentials (which will make using the VM much more easier, not having to enter this information each time you’re going to use it). Click Next.
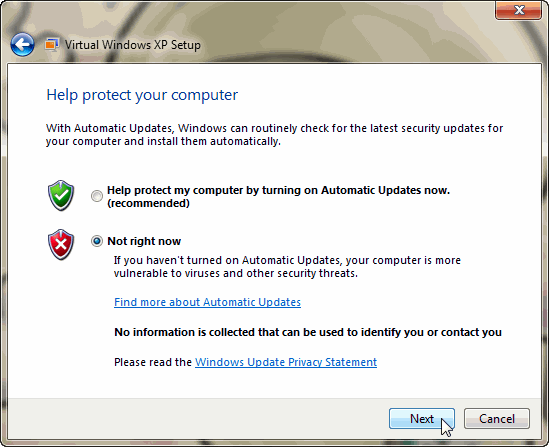
Next, you’ll be asked if you want to enable auto-updates for the Virtual Windows XP machine. Because this is a beta system I chose not to enable auto-updates. Click Next.
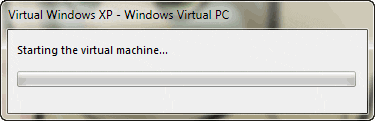
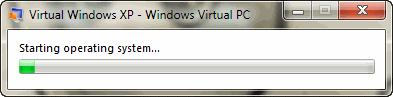
As this is the first time Virtual Windows XP is launched, it will take a few moments till it prepares the VM for first use. You will see a progress bar windows that will change for a few moments.


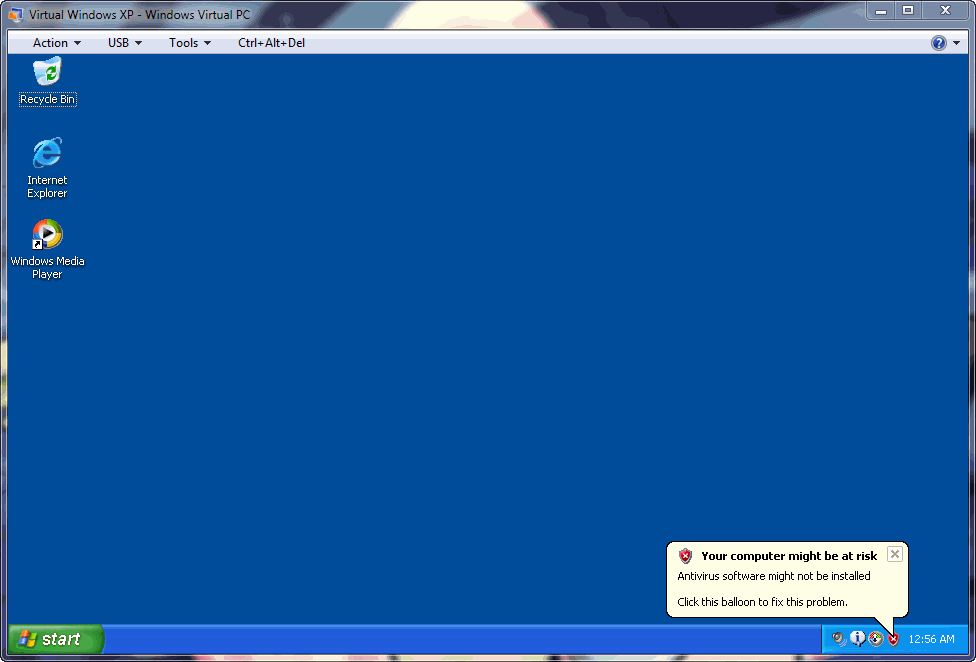
Finally, if you’ve got a sound card and speakers on your system, you’ll hear the good old Windows XP starting sound, and you’ll see the XP desktop ready for your usage.

Renowned as the creator of the acclaimed Petri IT Knowledgebase back in 1999 Daniel Petri has become a distinguished figure in the IT realm, recognized for delivering reliable, expertise-driven content. This website - www.petri.com - not only embodie...