


How to Set Up Windows Sandbox

If you want to spin up an isolated Windows 10 desktop quickly, without the knowledge required to work with virtual machines (VM) or the cloud, then Windows Sandbox is the answer.
How does Windows Sandbox work?
Windows Sandbox is a feature in Windows 10 Pro, Enterprise, and Education SKUs, which provides users an easy way to quickly test apps in isolation. It uses a clean operating system image that is generated from your system’s current state, so there’s no need to download and install Windows.
When you start Windows Sandbox, there’s a short delay while the image is provisioned in a VM. Because the VM is generated from your current Windows system, it is always up to date with the same version of Windows and patches as the host device.
When the VM is ready, you can install apps and change the OS configuration inside the VM. When Windows Sandbox is restarted, the image is regenerated, wiping any changes you made in the previous session.
Check Windows Sandbox prerequisites
Before you can install Windows Sandbox, you should make sure that your device meets the following prerequisites:
- Windows 10 Pro, Enterprise, or Education (build 18305 or later)
- AMD64 CPU
- Virtualization enabled in BIOS
- 4 GB of RAM (8 GB recommended)
- 1 GB of free disk space (SSD recommended)
- Two CPU cores (four cores with hyperthreading recommended)
You can check whether virtualization is enabled for your CPU using Task Manager.
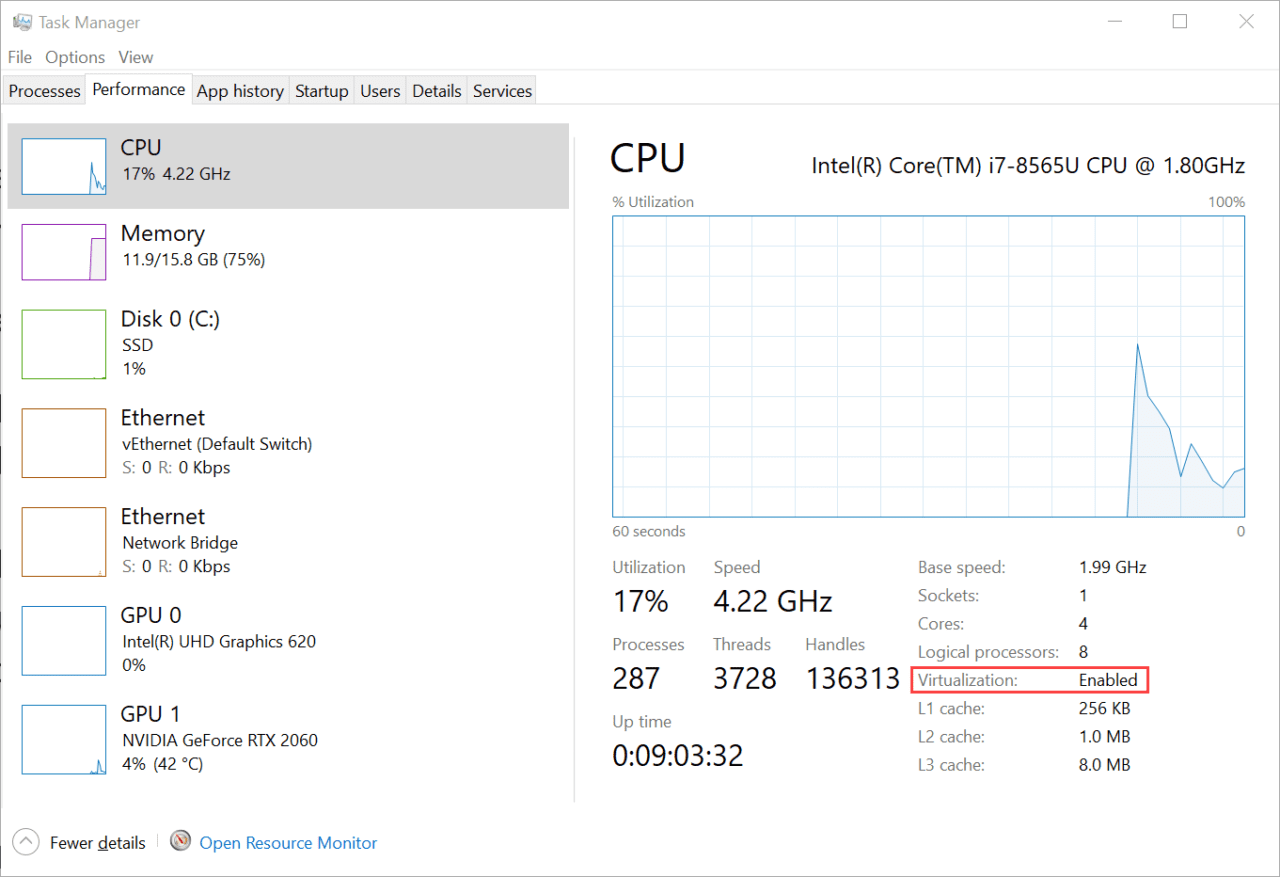
- Press CTRL + SHIFT + ESC to open Task Manager.
- Switch to the Performance tab in Task Manager.
- Make sure that CPU is selected in the list of resources on the left.
- Below the utilization graph on the right, check the Virtualization is set to Enabled.
- If Virtualization is set to Disabled, you’ll need to enable CPU virtualization features in the device BIOS/UEFI. Refer to the manufacturer’s instructions for more details about how to enable virtualization. Most modern CPUs support it.
Windows Sandbox in a Hyper-V virtual machine
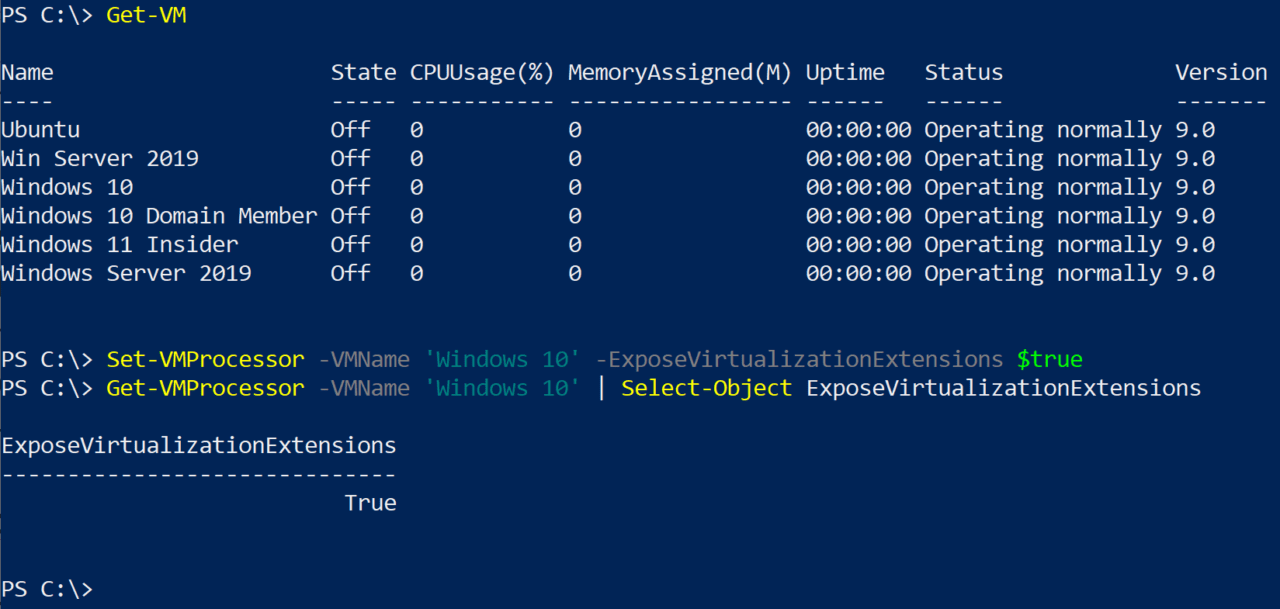
If you want to try out Windows Sandbox in a Hyper-V VM, make sure that nested virtualization is enabled for the VM.
- Type powershell into the search box in the bottom left of the taskbar.
- Click Windows PowerShell in the search results.
- In the PowerShell window, run Get-VM to see a list of the VMs on the device.
- Now run the command below to enable nested virtualization for your chosen VM. Replacing ‘Windows 10’ with the name of your VM.
Set-VMProcessor -VMName 'Windows 10' -ExposeVirtualizationExtensions $true
- To check the configuration of your VM, use the Get-VMProcessor cmdlet as shown below.
Get-VMProcessor -VMName 'Windows 10' | Select-Object ExposeVirtualizationExtensions
- Close the PowerShell window.
Install Windows Sandbox
Once you are sure that you can run Windows Sandbox, the easiest way to get it installed is using PowerShell.
- Type powershell into the search box in the bottom left of the taskbar.
- In the search results, make sure that Windows PowerShell is selected on the left. And in the pane on the right, click Run as Administrator.
- Give consent, or provide an administrator password, as prompted in the User Account Control dialog.
- In the PowerShell window, run the command below to install the Windows Sandbox feature.
Enable-WindowsOptionalFeature -FeatureName "Containers-DisposableClientVM" -All -Online
- You’ll be prompted to restart the device to complete the installation. Type y in the PowerShell window at the prompt and then press ENTER to reboot.

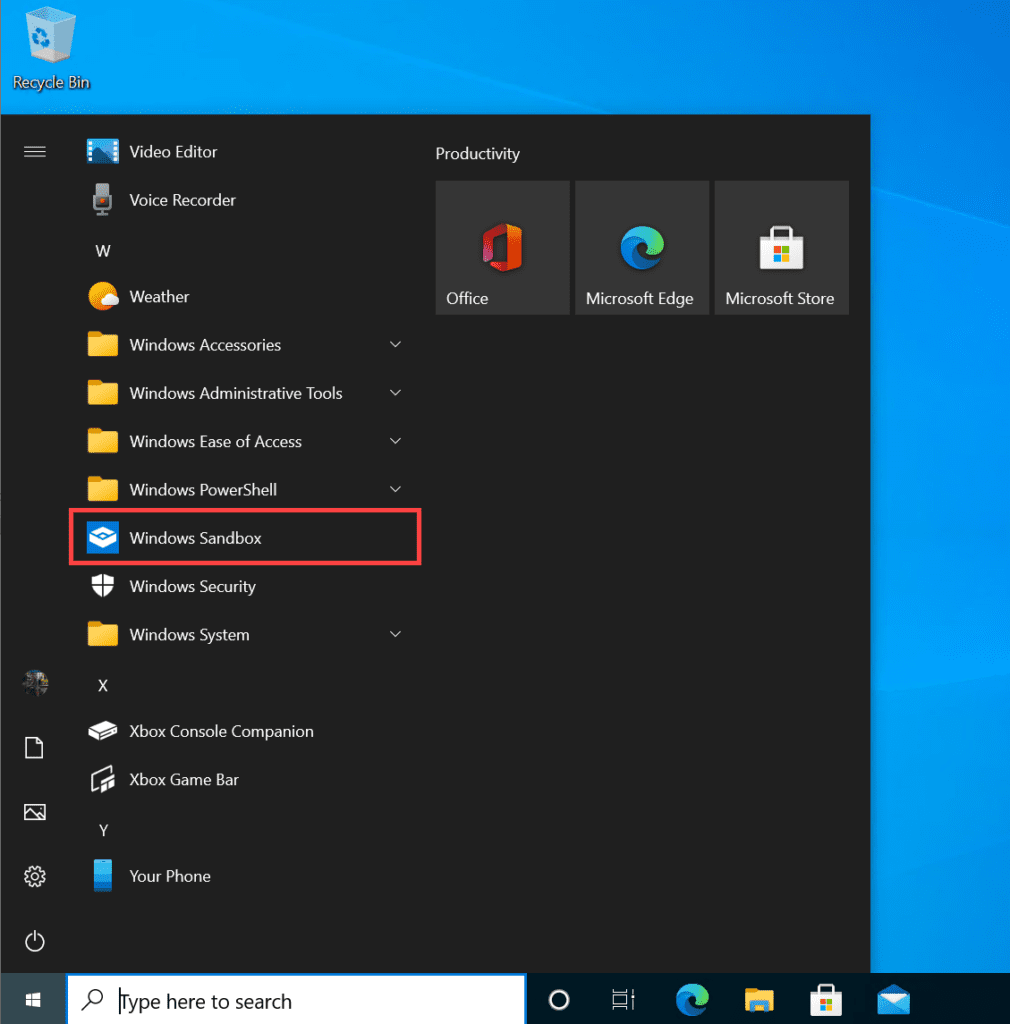
- When the device has restarted, log in to Windows.
- You’ll now find Windows Sandbox listed on the Start menu as an application.
Using Windows Sandbox
Once the Windows Sandbox VM has started, you can use it like you would use the host device. There are a couple of caveats, however.
- You can use copy and paste between the host device and the Windows Sandbox VM. But drag and drop doesn’t work. Much like a Hyper-V VM.
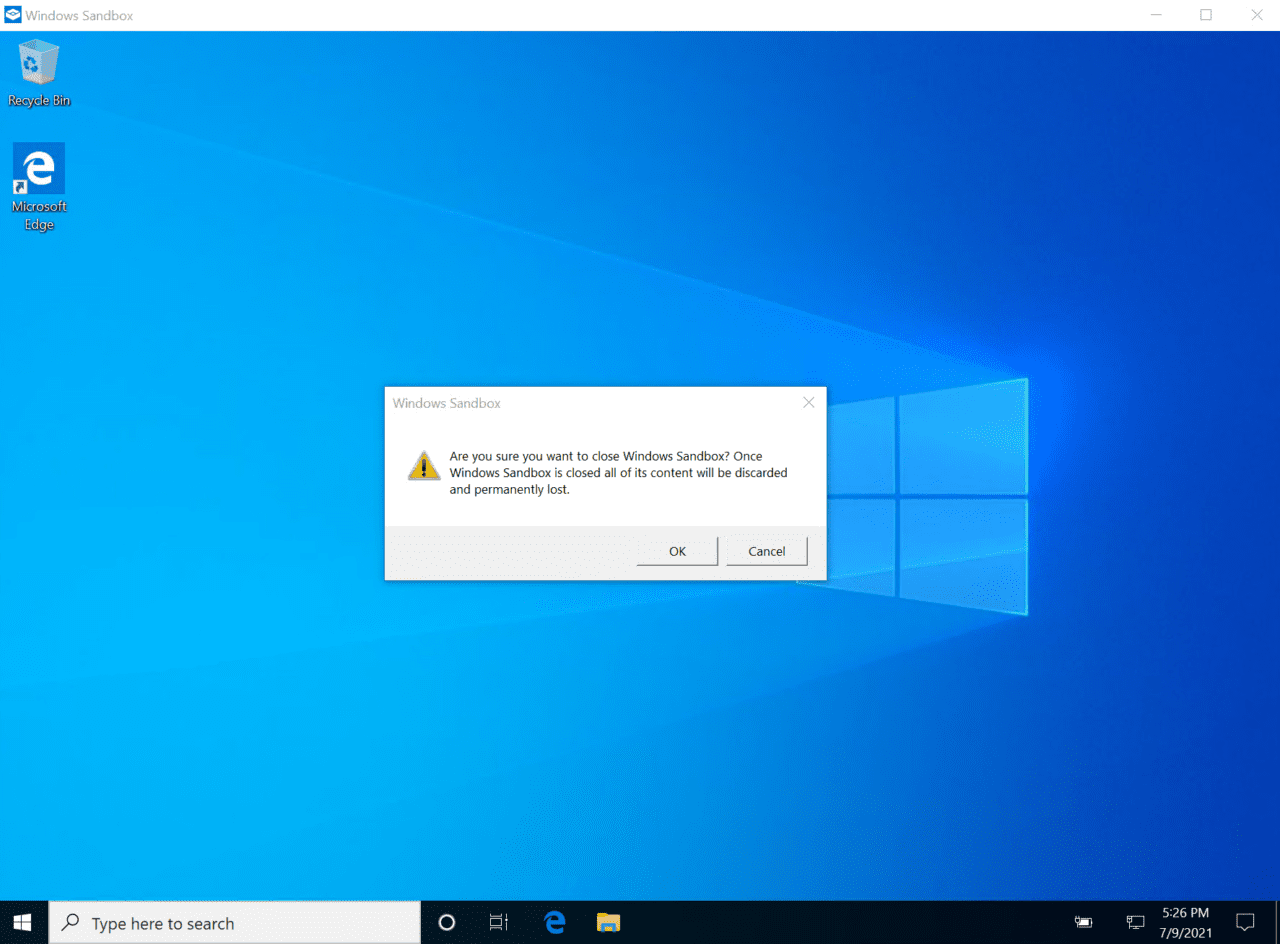
- When you close the Windows Sandbox app, which is what you should do instead of using shut down and restart in the VM, any changes you made in the VM will be permanently lost.
Configuring Windows Sandbox
You can use configuration files to customize a limited set of Windows Sandbox options. Here is a list of the options that can be configured:
- vGPU (virtualized GPU): Enable or disable the virtualized GPU. If vGPU is disabled, the sandbox will use Windows Advanced Rasterization Platform (WARP).
- Networking: Enable or disable network access within the sandbox.
- Mapped folders: Share folders from the host with read or write permissions. Note that exposing host directories may allow malicious software to affect the system or steal data.
- Logon command: A command that’s executed when Windows Sandbox starts.
- Audio input: Shares the host’s microphone input into the sandbox.
- Video input: Shares the host’s webcam input into the sandbox.
- Protected client: Places increased security settings on the RDP session to the sandbox.
- Printer redirection: Shares printers from the host into the sandbox.
- Clipboard redirection: Shares the host clipboard with the sandbox so that text and files can be pasted back and forth.
- Memory in MB: The amount of memory, in megabytes, to assign to the sandbox.
Windows Sandbox configuration files are associated with the .wsb file extension. Any time you double click a file with the .wsb extension, Windows Sandbox will be started using the settings in the file.
Windows Sandbox configuration files follow a simple XML format. You can find full documentation on Microsoft’s website here. The following example maps a folder in the VM to a location on the host device. It then runs a script (VSCodeInstall.cmd) from the host, which installs Visual Studio Code in the Windows Sandbox VM.
<Configuration>
  <MappedFolders>
    <MappedFolder>
      <HostFolder>C:\SandboxScripts</HostFolder>
      <ReadOnly>true</ReadOnly>
    </MappedFolder>
    <MappedFolder>
      <HostFolder>C:\CodingProjects</HostFolder>
      <ReadOnly>false</ReadOnly>
    </MappedFolder>
  </MappedFolders>
  <LogonCommand>
    <Command>C:\Users\WDAGUtilityAccount\Desktop\SandboxScripts\VSCodeInstall.cmd</Command>
  </LogonCommand>
</Configuration>
Windows Sandbox is useful and simple to work with, but it has one major drawback
Windows Sandbox is a useful feature that lets users test software or experiment with configuration changes, without touching the host OS or configuring a VM manually. The only real disadvantage is that the Windows Sandbox VM never survives a reboot, which limits its application because some software cannot be installed without restarting Windows.