


How to Provision a Windows Virtual Desktop Host Pool

Windows Virtual Desktop is cloud Desktop-as-a-Service (DaaS) offered by Microsoft as part of Azure and Microsoft 365. Other companies offer Windows virtualized desktop services in the cloud but one of the key differentiators of Microsoft’s service is that you can use a multi-session version of Windows 10 instead of Windows Server. The Desktop Experience in Windows Server provides something similar to the Windows 10 desktop, but some features are missing, like Edge and the Microsoft Store. WVD includes optimizations for Office 365 ProPlus to improve performance for users in virtual machines (VMs). WVD can also be used with Windows 7, including free Extended Security Updates, while Windows 10 migrations are being planned or in progress.
For more information on WVD, see Getting Started with Windows Virtual Desktop: Understanding Windows Virtual Desktop on Petri.
WVD host pools are collections of one or more identical virtual machines in a tenant. Each pool contains an app group that users can work with like on a physical PC. A desktop is published by default. Before creating a host pool, you must set up a WVD tenant in Azure. For more information on setting up a tenant, see How to Create a Windows Virtual Desktop Tenant with Windows Virtual Desktop on Petri. Note that because WVD is currently in preview, details outlined in this and previous articles might change during the preview and once WVD reaches general availability.
Create a Windows Virtual Desktop Host Pool
Let’s create a host pool in the Azure management portal.
- Log in to the Azure management portal here.
- Click + Create a resource in the top left of the Azure portal window.
- In the search box, type windows virtual and then select Windows Virtual Desktop – Provision a host pool from the options given.
- On the Windows Virtual Desktop – Provision a host pool panel, click Create.
- In the Basics panel, give the new host pool a name.
- You can decide to provision each user that logs in with their own dedicated VM (Personal) or to share a multi-session VM (Pooled). In this example, I’ll use the default option which is Pooled.
- In my environment, I have only one user, vmjoiner, which I will use to join VMs to AD and to log in and test WVD. If you have a list of users that you want to give access to WVD VMs, you can add them in a comma-delimited list in the Default desktop users
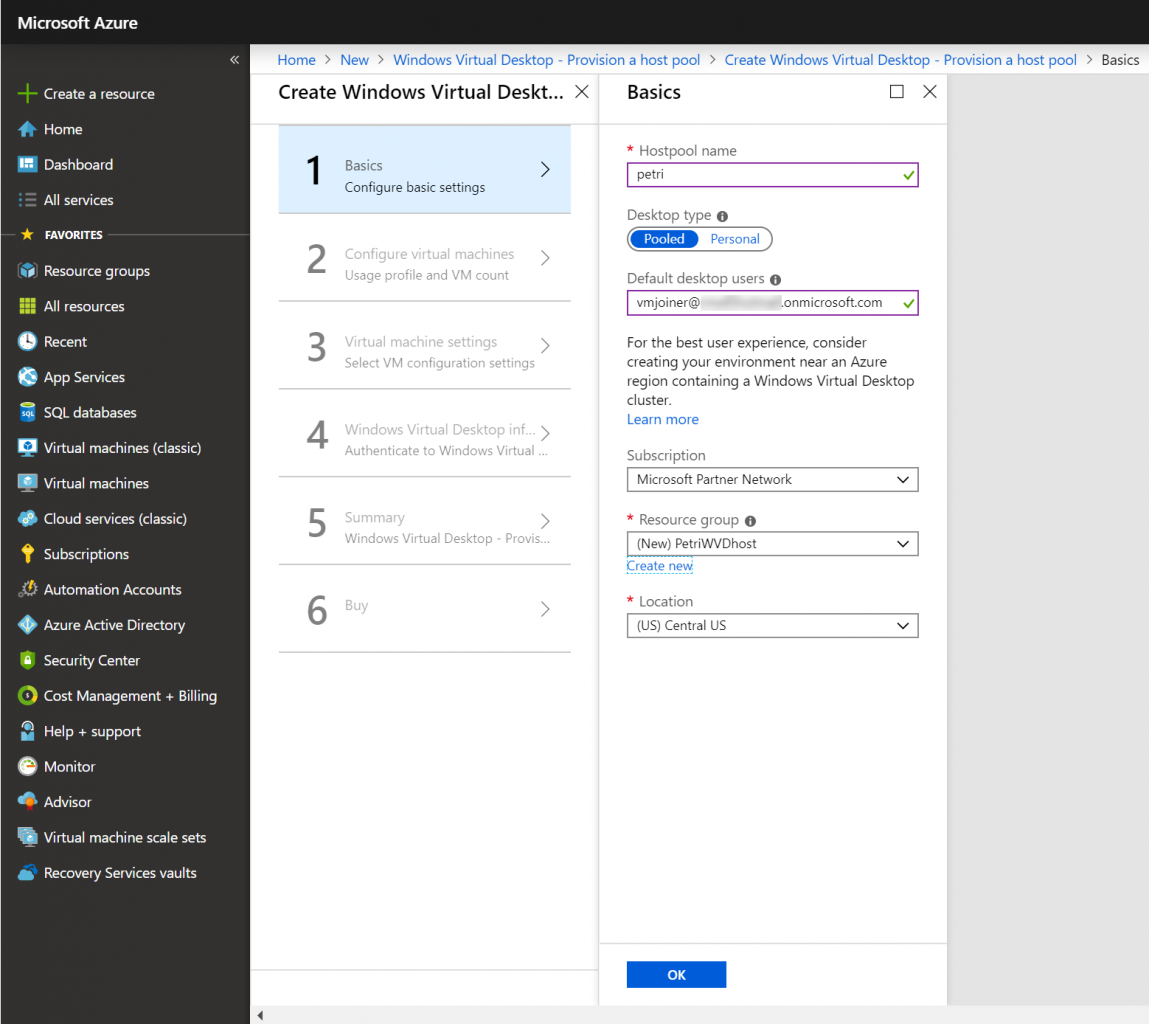
- Select the Azure subscription and location. The subscription should be the same subscription where you created your WVD tenant. You’ll need to specify or create an empty resource group in which to create the new host pool.
- Click OK to continue.
- On the second configuration panel you can set the number of VMs to use in the pool. I’ve changed the default settings, Medium and 100, to a Usage Profile of Light and Total users to 10 to keep costs down.
- In the Virtual machine name prefix box, type a prefix to be appended to the beginning of every VM name.
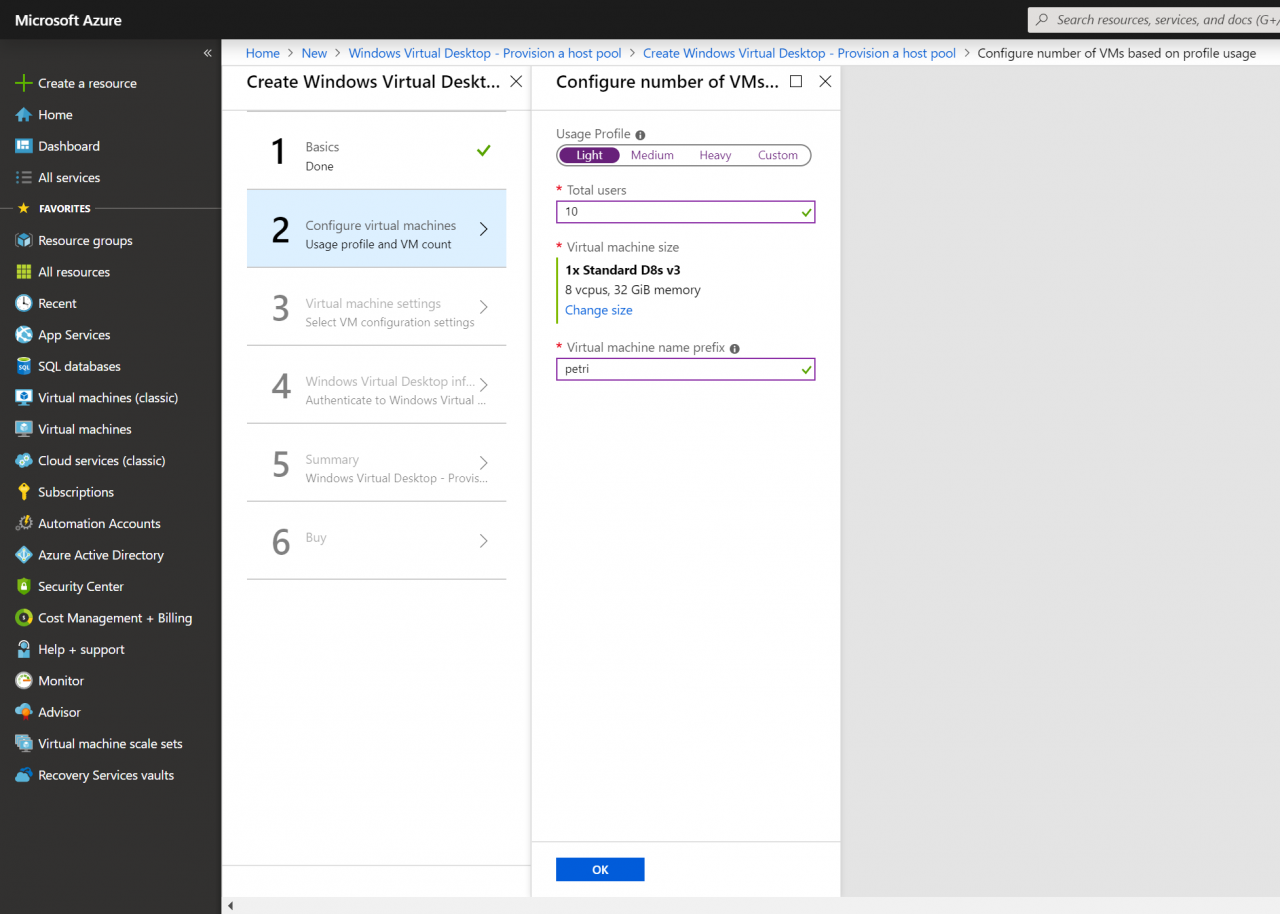
- Click OK to continue.
- On the third panel, Virtual machine settings, let’s choose an image from the Azure gallery.
- Select Windows 10 Enterprise multi-session with… from the Image OS Version dropdown menu and set Disk Type to Standard SSD to keep costs down.
- In the AD domain join UPN field, type the name of an account that has permission to join devices to your domain. Don’t forget, WVD requires Active Directory. Type and confirm the user’s password.
- Leave Specify domain or OU to No unless you want to customize the domain and Organizational Unit (OU) to which WVD VMs are added.
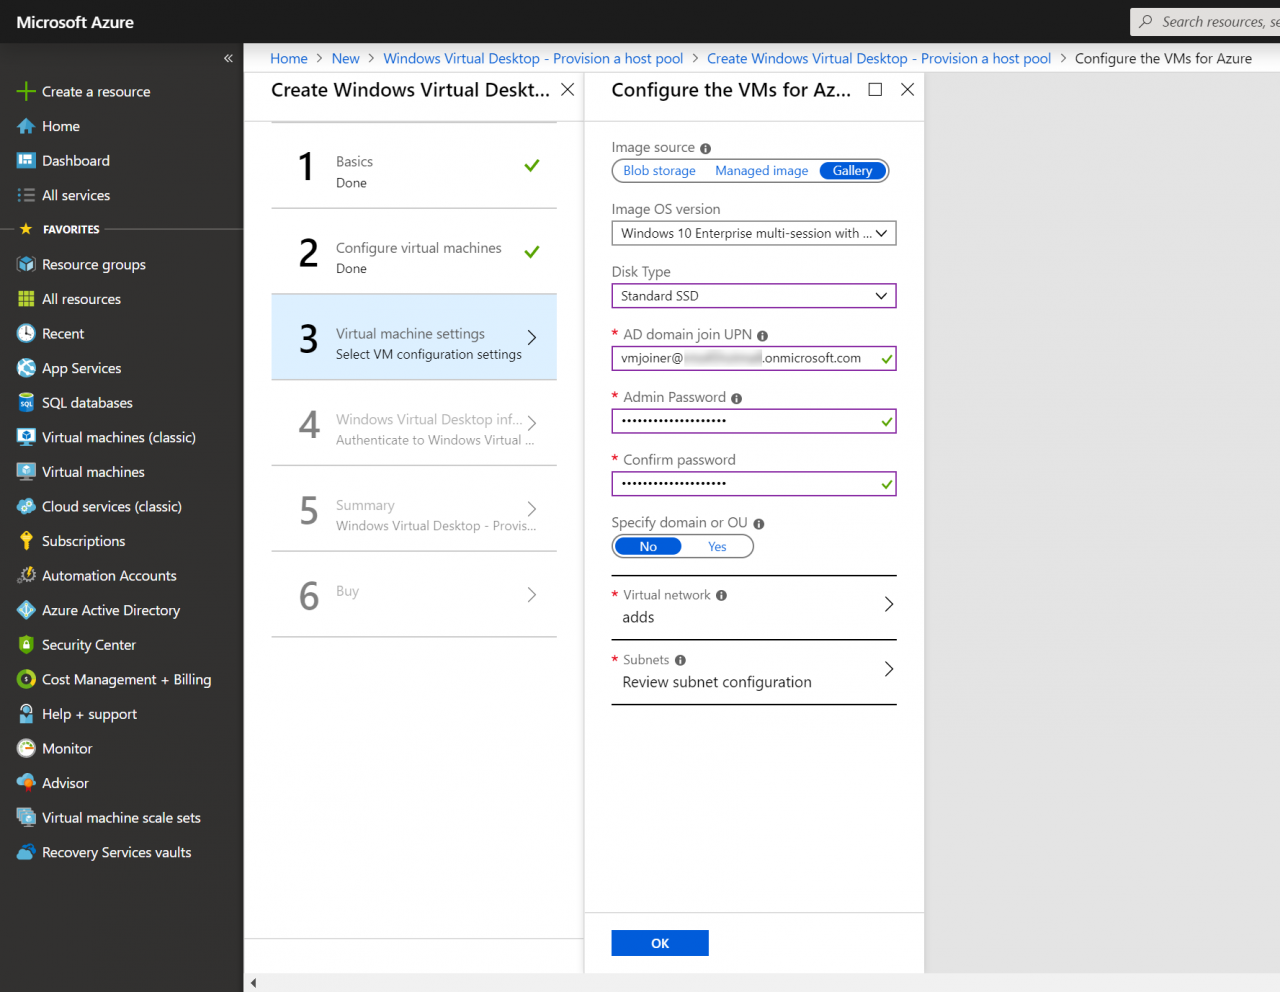
- In the networking section, select a virtual network that has access to Active Directory. In my case, the same VNET where I configured Azure Active Directory Domain Services.
- In the subnet menu, choose a subnet for your WVD VMs. You might want to create a dedicated subnet.
- Click OK to continue.
- On the fourth configuration panel, first type the name of the WVD tenant you want to add the new host pool to in the Windows Virtual Desktop tenant name In my case, this was PetriWVD. I left the tenant name group set to Default Tenant Group.
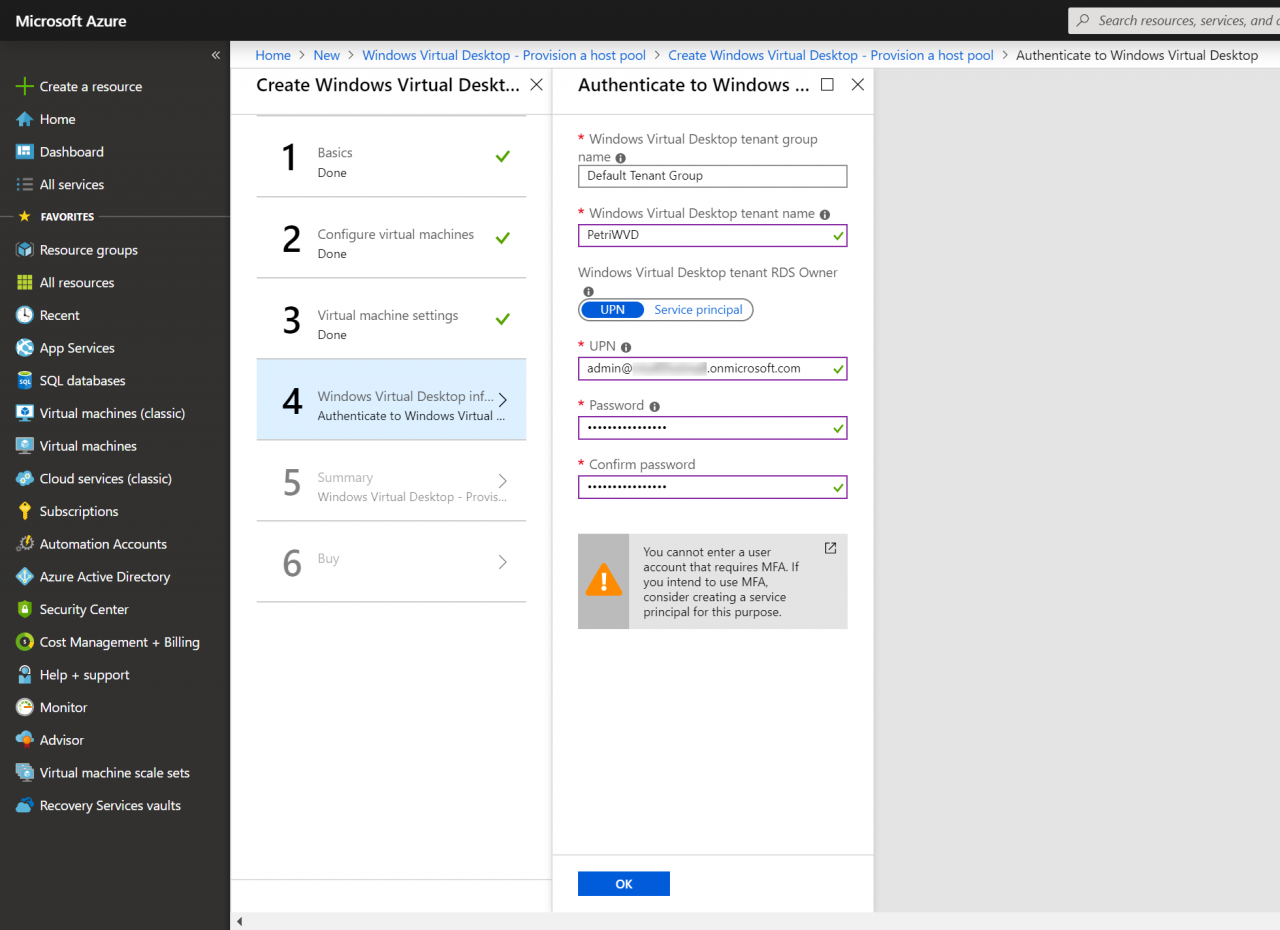
- If you are using an account for the RDS Owner, where multifactor authentication (MFA) is not configured, select UPN. Type the username in the UPN field and then type and confirm the password for the account. I used an account in the AAD DC Administrators group and the same account that I’d assigned as TenantCreator.
- Click OK to continue.
- Finally, on the Summary panel, Azure will run a final validation. If everything is OK, click OK to continue.
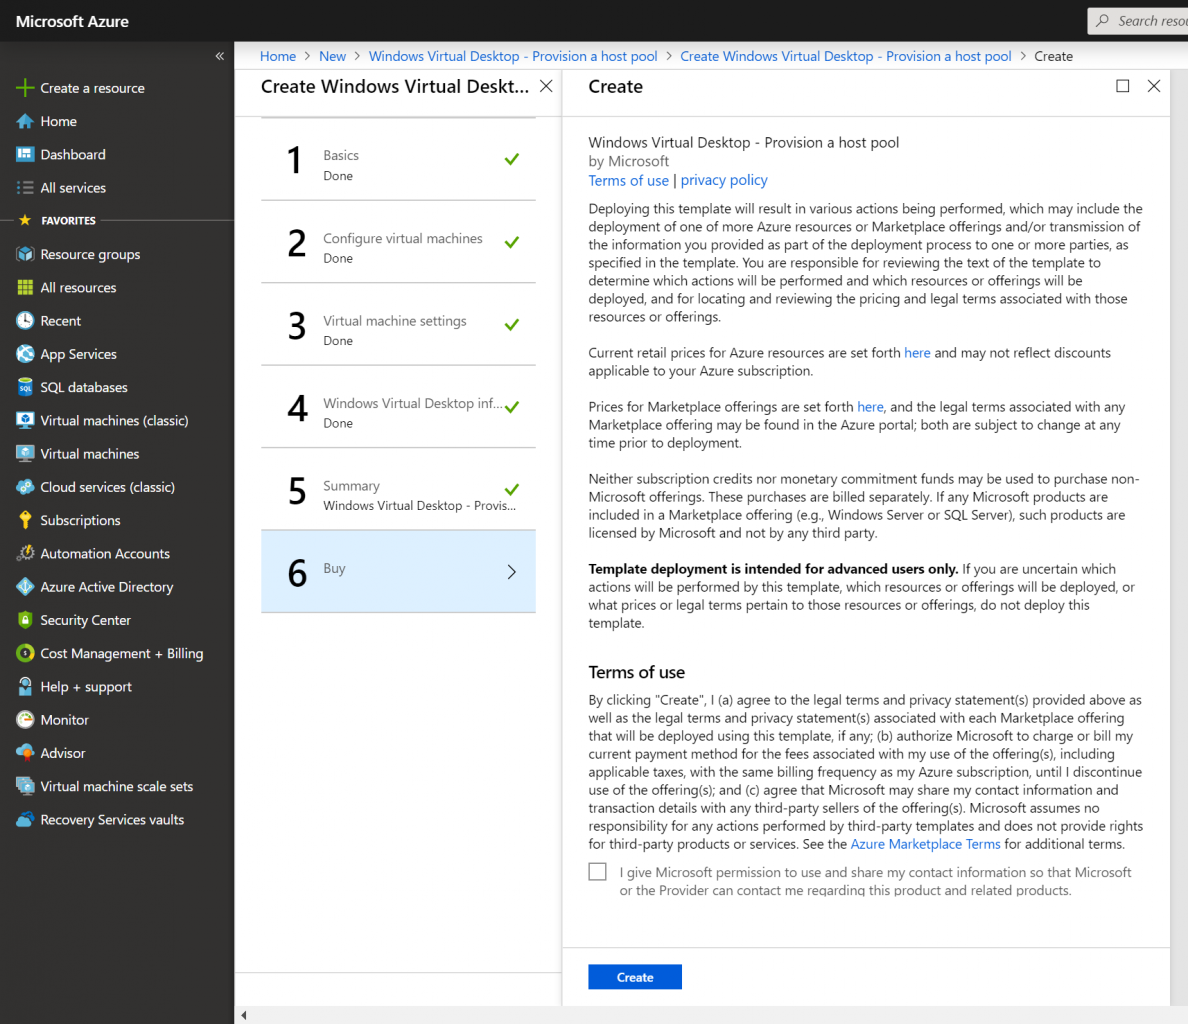
- On the Buy panel, click Create.
You’ll have to wait some time for the WVD host pool to be deployed. You should receive a notification when it’s done. In the final part in this series, I’ll show you how to connect to a virtual machine in your new host pool.