How to Package and Deploy Windows Applications with Intune

Intune Administrators can deploy, make optionally available, or uninstall Win32 apps with the help of Windows 10’s Intune Management Extension (IME). The IME is a service installed on Windows 10 that acts as the engine to execute these actions and, additionally, PowerShell scripts (which were originally its only purpose). Win32 apps in the context of Intune really refer to the usual app extensions such as EXE, MSI, and even script-based installations like BAT and PS1.
Getting your Win32 app ready for Intune upload
Prior to the IME supporting Win32 apps, only MSI and APPX type installations could be uploaded. Apps using this older approach are called line-of-business (LOB) apps. LOB uses built-in MDM functionality (specifically, the EnterpriseDesktopAppManagement CSP) rather than an agent. This allowed for basic deployments, but the IME introduces additional benefits like dependencies, requirements, custom install commands, and supersedence. Additionally, Win32 apps can reduce your office’s internet bandwidth consumption by using peer-to-peer distribution with a feature called Delivery Optimization.
As both methods allow the deployment of MSI, but Win32 supports far more options, you may be wonder: why deploy using LOB, which is still an option in Endpoint Manager? The answer: you shouldn’t. I can’t see why LOB exists for any reason other than legacy support at this point.
This article will guide you through the process of getting your Win32 app ready for Intune upload (“packaging”), configuring it for client installation (“deploying”), then monitoring the deployment after you push it out.
Packaging the app
You cannot just upload your app’s installation file directly to Intune – it must be packaged using a small command-line tool: the Microsoft Win32 Content Prep Tool, which you can download from GitHub here. This archives and compresses the installation to a .intunewim file, and that’s what you upload. In the example for this article, I’ll be working with VLC media player. This only has one file, but if your app installer has multiple files (e.g. subfolders), that is supported too.
1. Place your installation file(s) in a dedicated folder. For example, VLC\vlc-3.0.10-win64.exe. The entire contents of this folder will be archived, so make sure it includes everything you need, but nothing more.
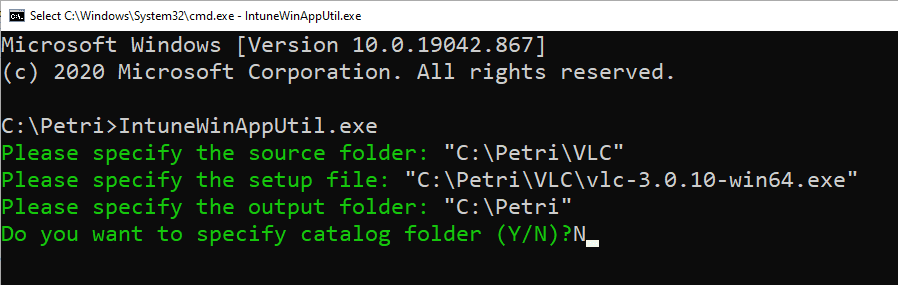
2. From the command prompt, run IntuneWinAppUtil.exe, which is the Win32 Content Prep Tool. In the command prompt window, you are prompted for four pieces of info:
- The source folder (created above)
- The setup file (the file that begins app installation when executed)
- An output folder (where the .intunewim file is saved)
- Whether or not you need to specify a catalogue folder (only needed if deploying to Windows 10 S mode)
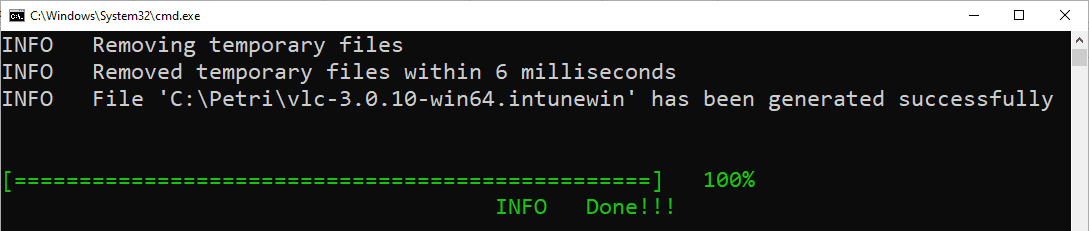
After you complete the last prompt, a stream of output will fill the screen; the last line reporting the app has been packaged.
Deploying the app
Apps are uploaded and configured in the Microsoft Endpoint Manager admin center (MEM).
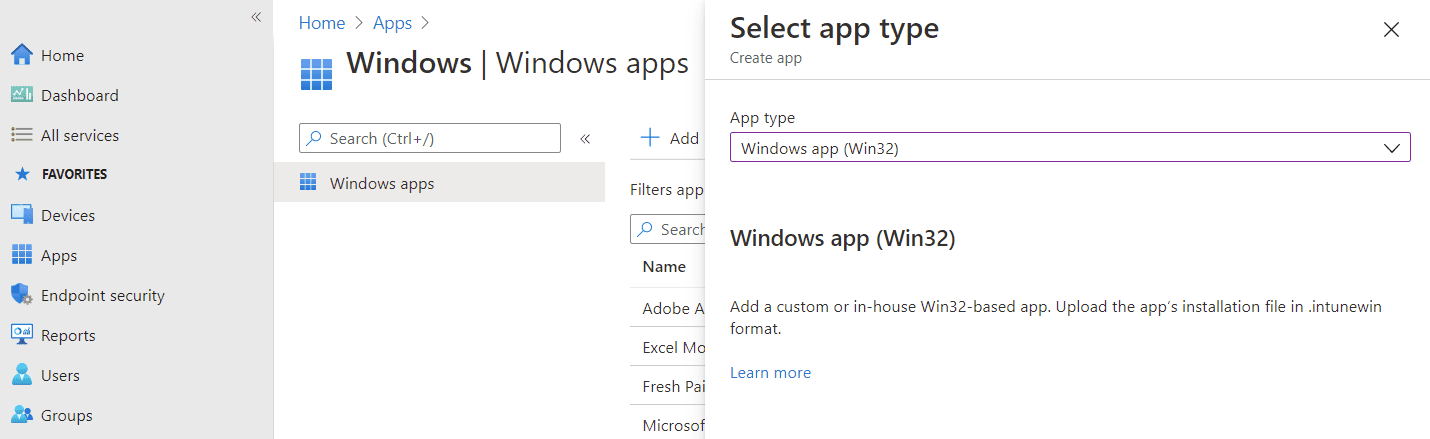
1. In MEM, navigate to Apps > Windows > + Add and choose the app type Windows app (Win32).
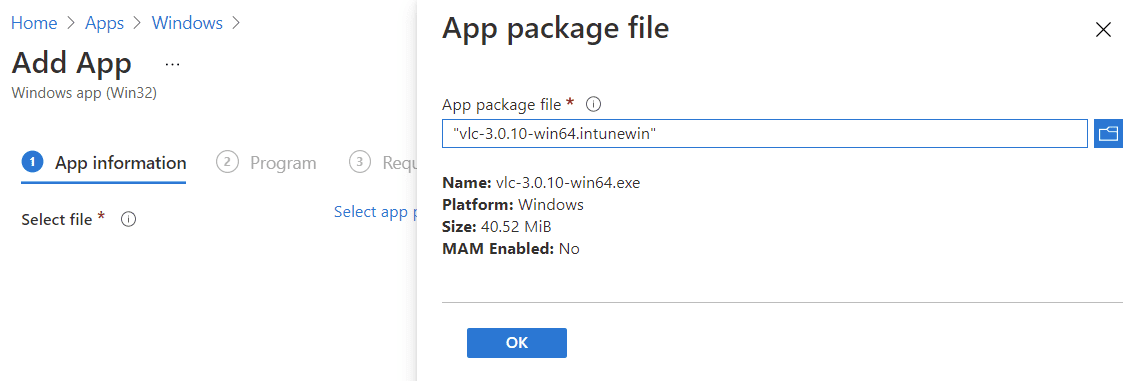
2. You configure the Win32 application using the add app wizard. The first page of the wizard, app information, requires you to browse to the .intunewim file.
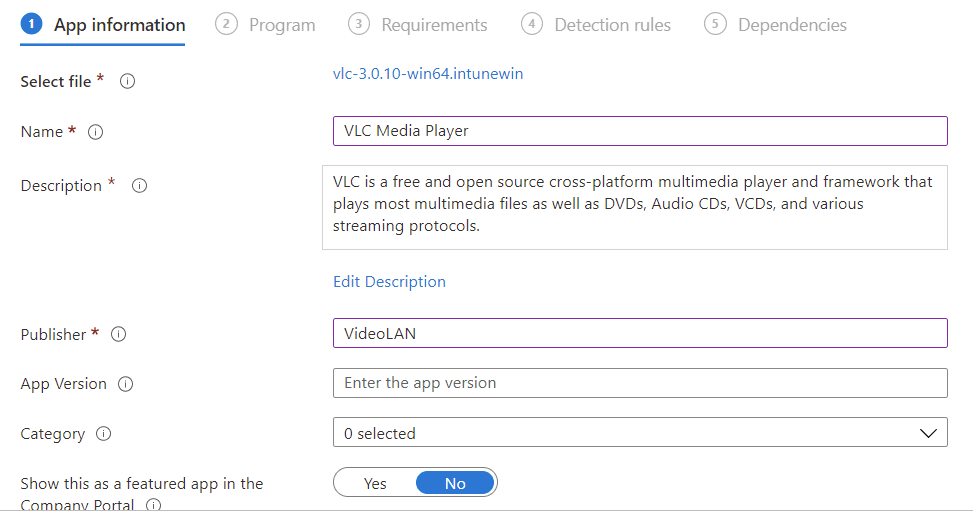
3. After selecting the file, you populate the files of app metadata. For example, the name, description, publisher, category, and even icon. Most of this information is shown in the Company Portal, another app that can be installed to let users install software on-demand. You are only required to fill out the mandatory fields.
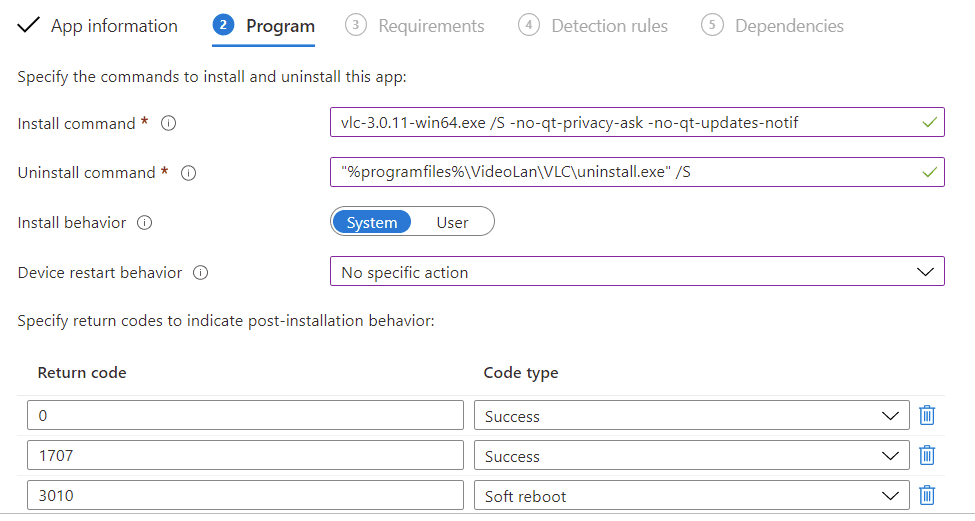
4. On the program page, you need to enter install and uninstall commands for your app. If you uploaded an MSI file, these are usually prepopulated for you by Intune using the msiexec parameters to do both actions silently. In my example, I’m using an EXE, so need to specify these manually. When you enter the commands, they run relatively. This means if you have to reference a subfolder, you only need to enter the relative path; as if installing from a command prompt where the active folder is an extract of your package. Similarly, you can reference system variables.
The install behavior is a key option to get right. Generally, you want to choose System (NT AUTHORITY\SYSTEM), as this executes the installation with administrative rights. However, there may be circumstances you need to execute in the user context. Device restart behaviour does what it says on the tin, and as a general rule, I choose no specific action unless I really need to reboot, which you can choose too.
Lastly, in the program options, the return codes are used to inform Intune if the installation was successful, and also potentially trigger reboots. These can require looking to the documentation of the app, as can they vary from developer to developer.
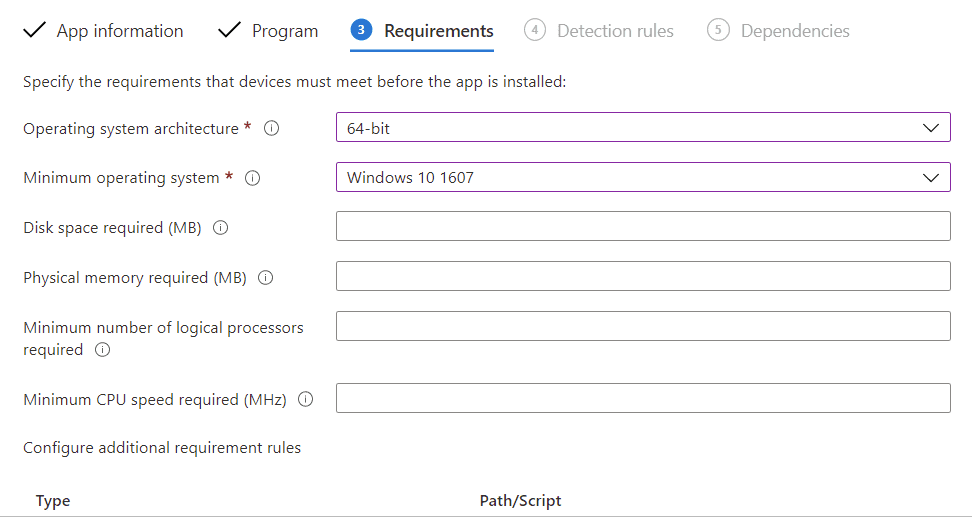
5. Next up, requirements are prerequisites for app installation on clients in scope. If the devices you target the app to do not meet what you specify here, the app isn’t installed. The only mandatory options are OS architecture (x86, x64, or both) and minimum operating system, which at its lowest can be Windows 10 1607. Of potential interest is the configure additional requirement rules option, which allows you to query files, directories, registry entries, or use scripts. You can, for example, not allow the app to install if a certain file is or isn’t present – or even query the version attribute of that file. Scripts can run, then based on the output, you can determine whether or not the app installs.
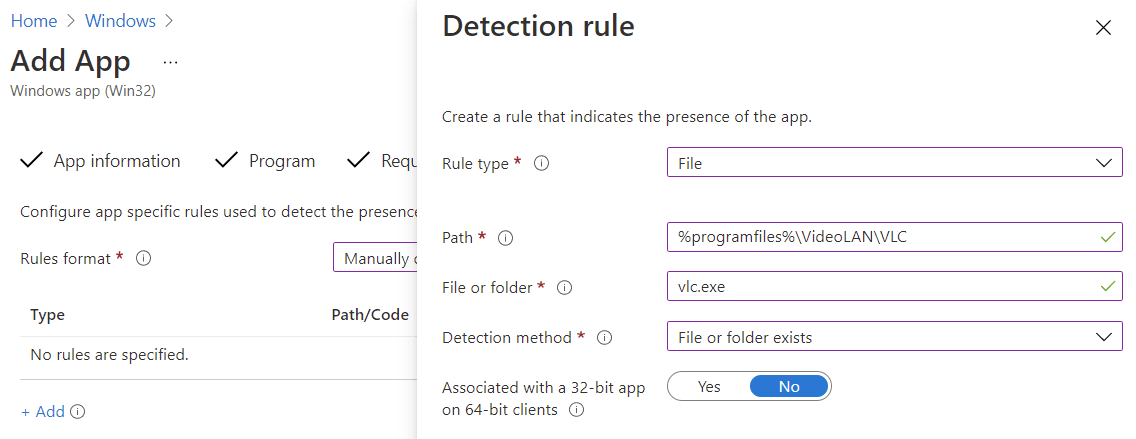
6. For Intune to know whether or not the app is installed, you need to include detection rules. These are mandatory because, without them, Intune wouldn’t know when to stop trying to install the app, or how to report success/failure. Again, you can use a script to determine success or use the manually configure detection rules option for similar options to the earlier requirements like the presence of a file or registry entry. Additionally, for detection rules, you can use the MSI rule type. This queries the MSI product code, which for MSIs is a unique identifier for the app. For MSI uploads, it’s populated automatically, or you can retrieve it from a reference device using PowerShell:
Get-WMIObject Win32_Product | Sort-Object -Property Name | Format-Table IdentifyingNumber, Name, Version, LocalPackage -AutoSize
7. Optionally, dependencies are checks (in addition to the earlier requirements) for other Intune-managed apps being installed before this one is. For example, you may be deploying a plugin for VLC. A dependency will make sure it is only installed if VLC is, and you can even choose to automatically install the dependency too.
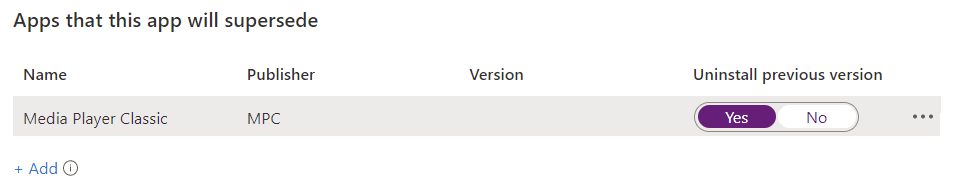
8. Supersedence is a new option (still in preview at time of writing) that allows you to update or replace applications. The former will uninstall the app you specify under apps that this app will supersede, then install the app you are configuring. If are you using supersedence to update, under the earlier detection rule you should specify a version number rather than just the existence of a file.
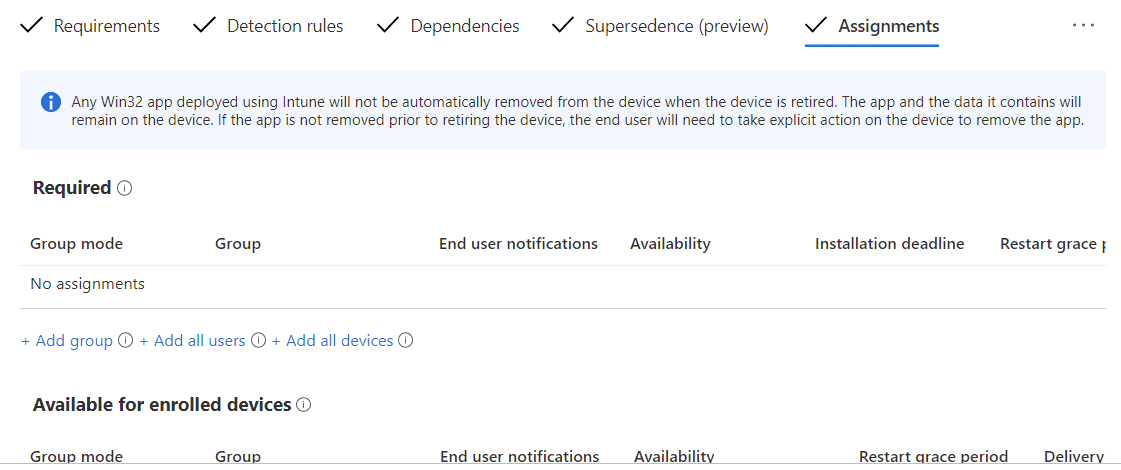
9. Lastly, you manage which Azure AD groups the app is targetted towards within assignments. There are three assignment types:
- Required groups will have the application force installed. This can be a user group, device group, all users, or all devices.
- Uninstall groups will have the application force uninstalled. This can be a user group, device group, all users, or all devices.
- Available groups will be able to retrieve the app from the Company Portal. This must be a user group or all users.
If you assign an app to a user, it will “follow” that user as they move from Intune device to Intune device, with the IME attempting to install it on each device they use. For all assignment types, you can choose what kind of notifications are presented to the user: for example, show all toast notificaitons or only if a restart is required.
10. On the final page for review + create, you can confirm the settings you’ve entered. Hitting create will then upload the application. And you’re done!

Monitoring the app
Depending on your assignments (required or uninstall, specifically), Intune may also attempt to check in with devices or users in scope to install the app. Alternatively, if it cannot check-in from the service, the client will check-in with Intune next time the Intune Management Engine service is started.
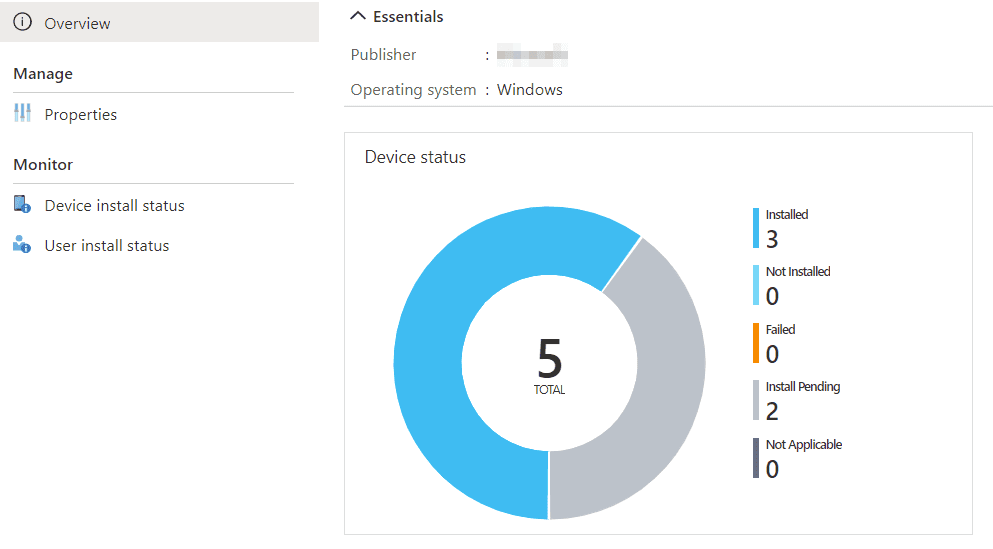
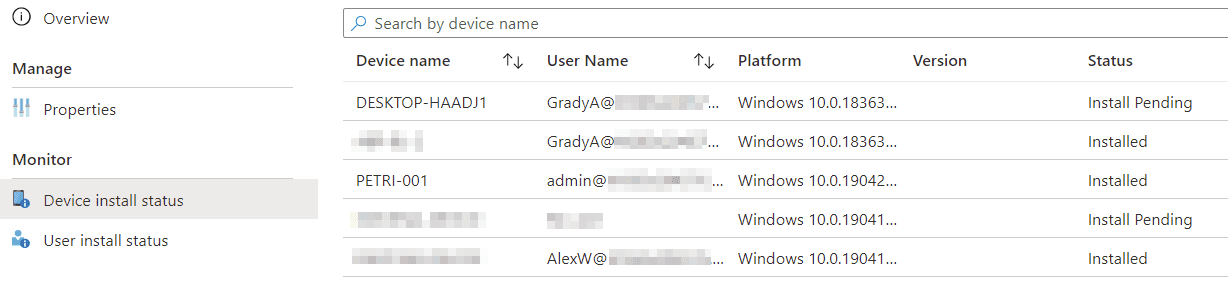
As an administrator, you can monitor the deployment of the application from Endpoint Manager too. The device install and user install status pages will report to you the status of installations across your environment. You can also get a quick visual overview from the overview page of the app in Endpoint Manager.