


Guide: How to Implement SharePoint Syntex Document Understanding Models
- Blog
- SharePoint
- Post
In Getting Started with SharePoint Syntex – Problem, Solution, and Methodology, we explain that SharePoint Syntex is a service that teaches Microsoft 365 to read, understand, and extract content from files stored in SharePoint Online Document Libraries.
In this article, we create one of the available models that SharePoint Syntex provides, specifically a Document Understanding Model. We use the example of an Engineering company that stores Scopes of Work in a Document library. In the steps which follow, we setup a model, train it to understand the content and classify matching documents, extract additional relevant information from matching documents, and apply the model to a document library.
Setup a Document Understanding Model
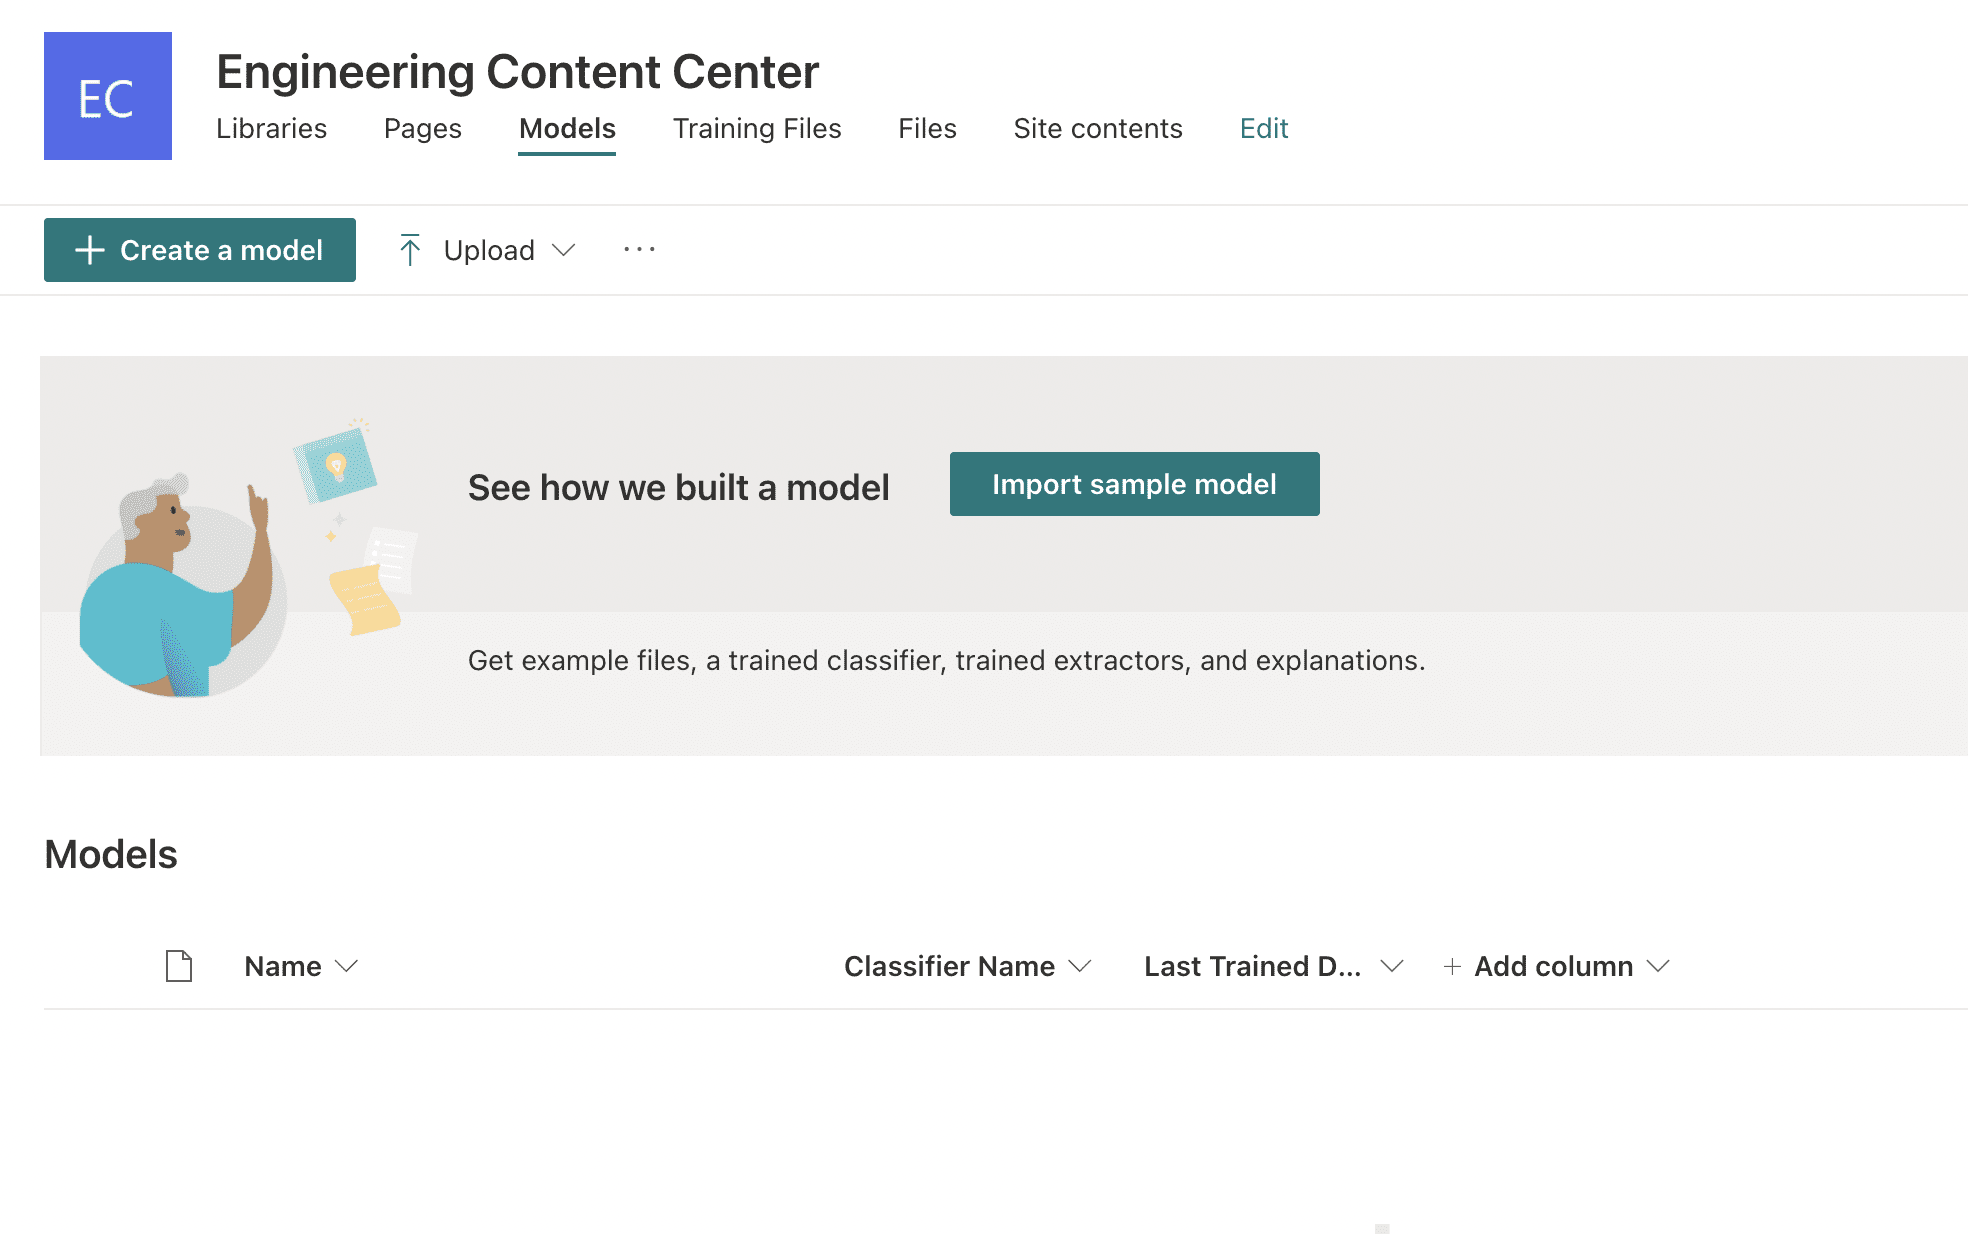
To setup our Document Understanding Model, we start from the SharePoint Syntex Content Center and select + Create a model (Figure 1).
Note: It is assumed that SharePoint Syntex licenses are available in the Microsoft 365 tenant and assigned to users, and that SharePoint Syntex is setup with a Content Center created.
The New document understanding model wizard opens (Figure 2). In this example we name the model SOW, to reflect that the model’s purpose is to read through document libraries and identify and classify documents that match the content type we are creating. It is also possible to use existing content types if preferred.
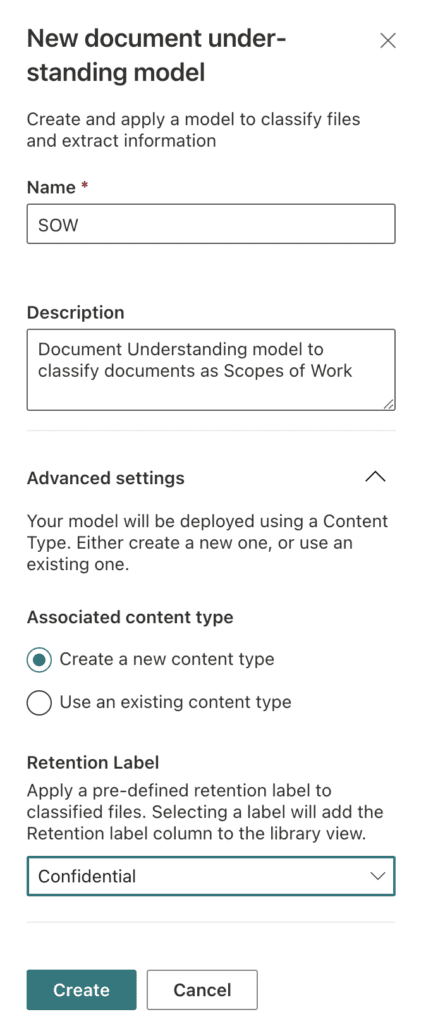
The final option in the wizard sets a retention label to any documents matching the model. This is not a mandatory step but is a powerful way to apply compliance to documents identified as a particular content type within a document library. In this example, we set the chosen retention label to Confidential.
Note: Sensitivity labels with document understanding models are targeted for release in June 2021
Once the required settings are selected, click to Create the model.
Add example files to the model
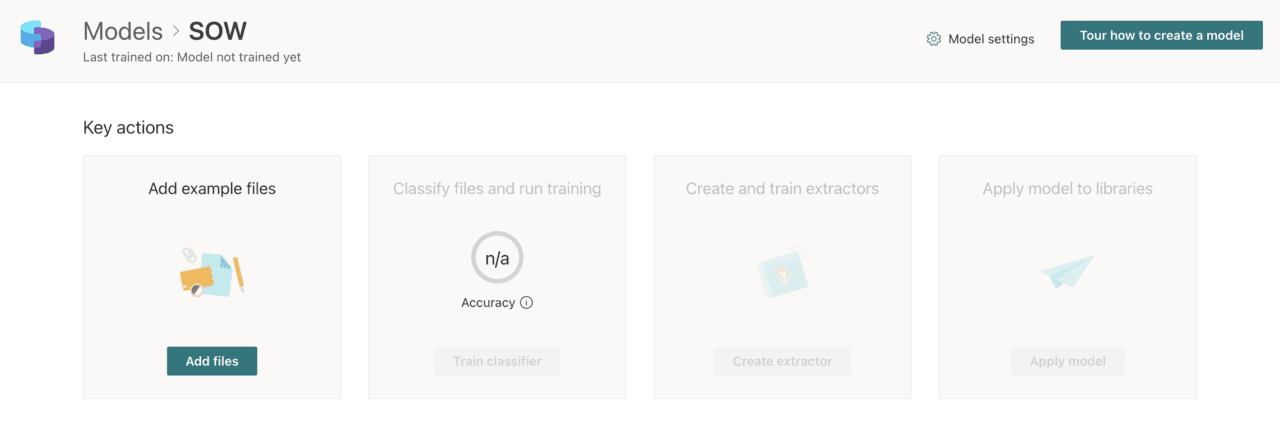
The new model opens immediately after it is created, and there are four key actions to complete (Figure3). The first of these is to Add files.
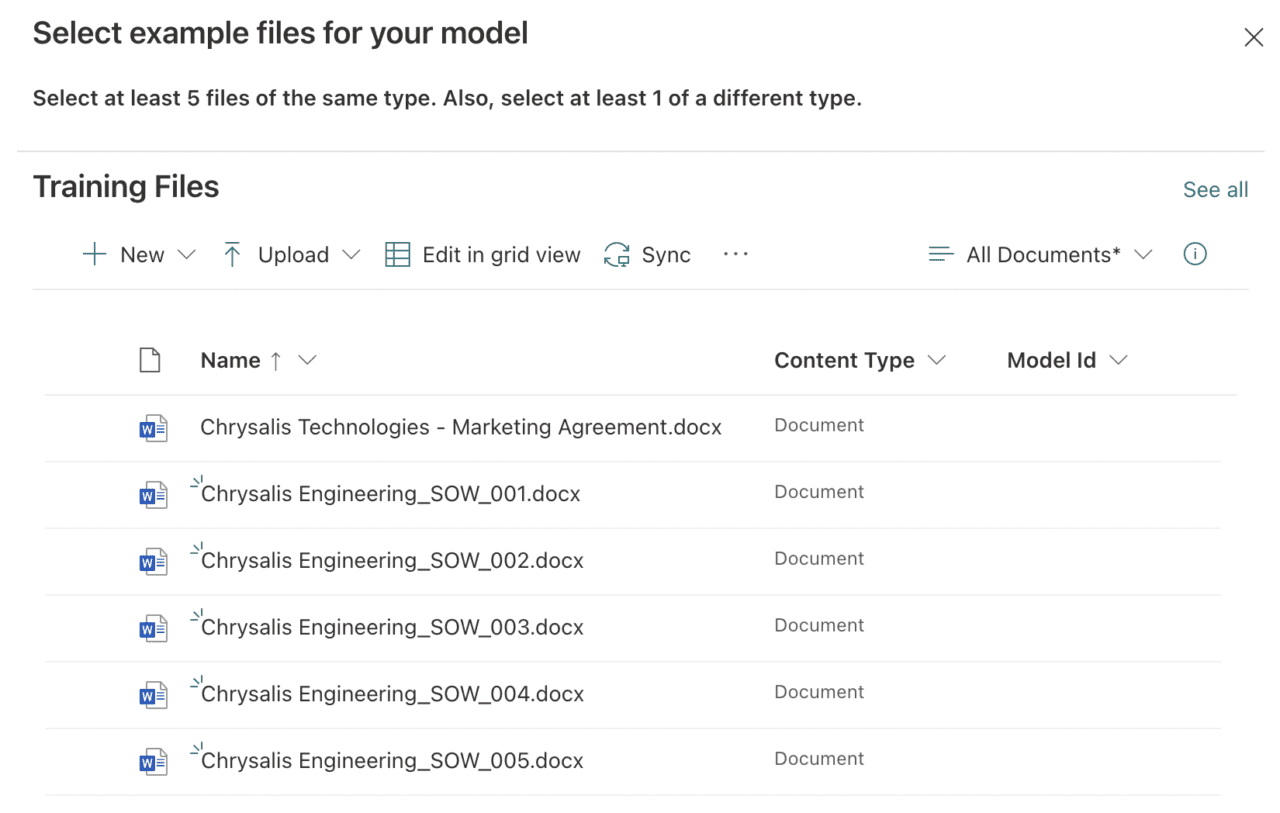
Add at least 5 files of the same type, these represent positive examples of documents the model should match. Also, add at least 1 file of a different type to represent a negative example. Figure 4 shows 5 Scopes of Work added as positive examples, and 1 Marketing Agreement added as a negative example.
With the example files added, the second key action for the model is unlocked, which allows the model to be trained.
Classify files and run training of the model
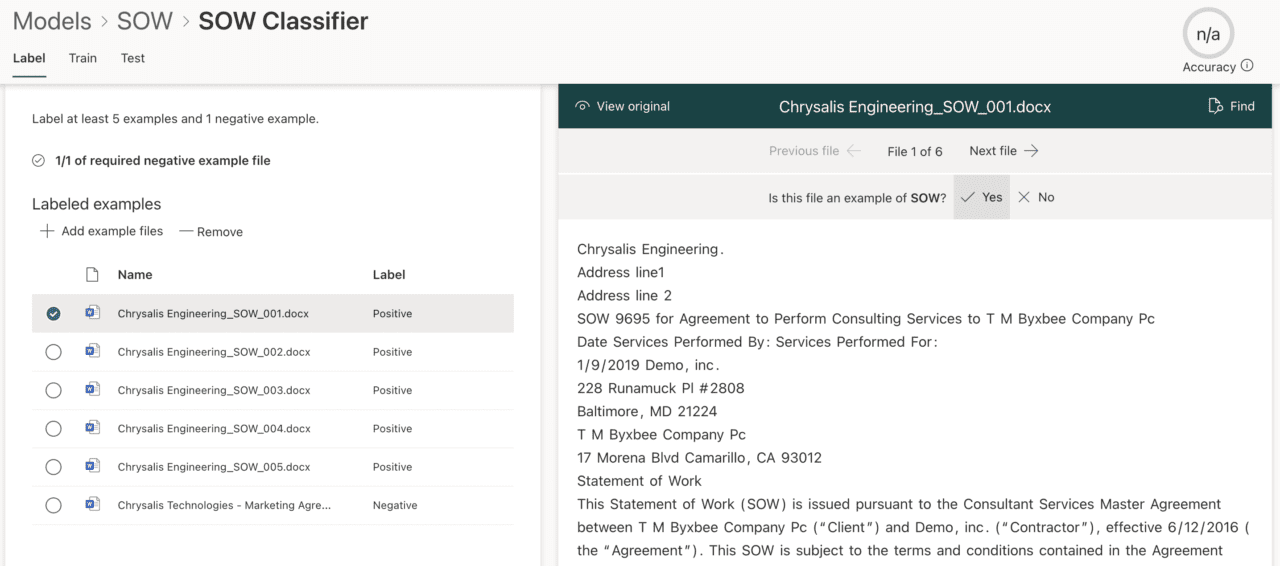
Now we select Train classifier. The uploaded files show in the left pane, while a preview pane to the right allows the content of the files to be viewed. We scroll through each file and label as either a positive or negative example of a Scope of Works (Figure 5).
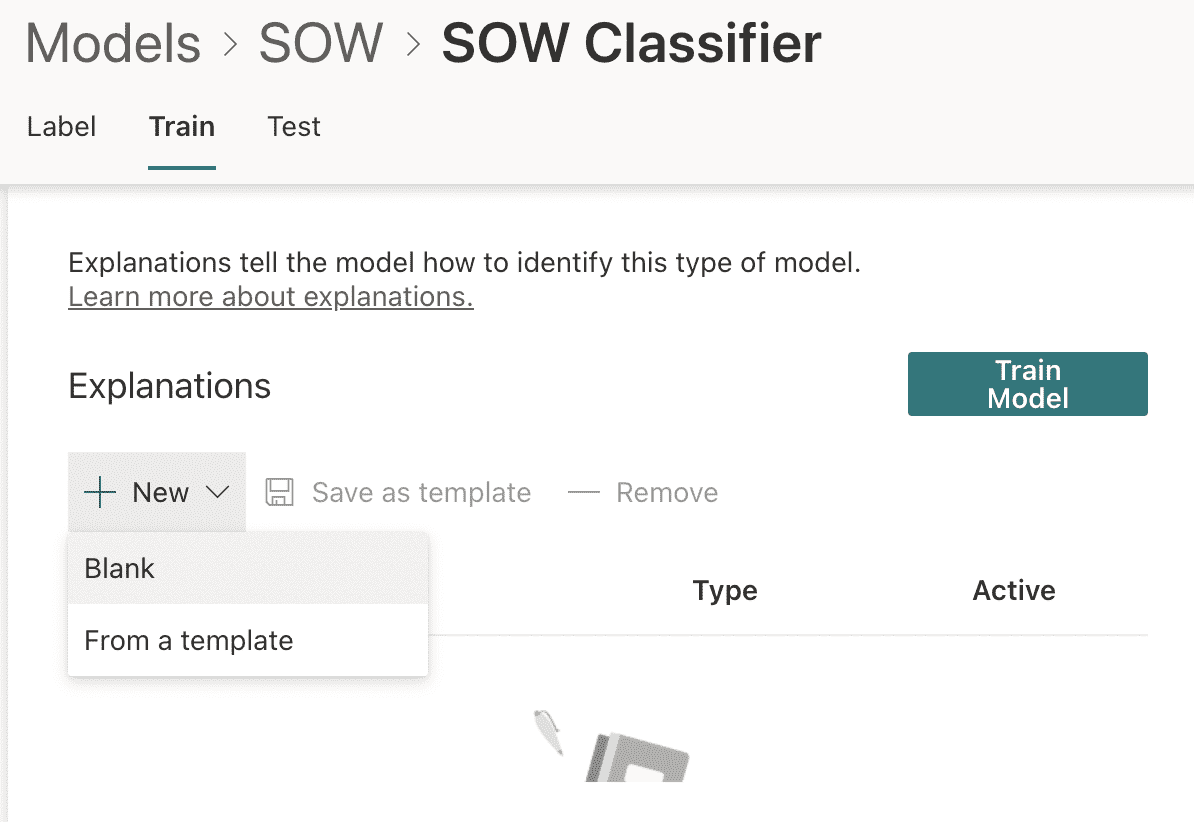
Next, we select the Train tab. Here we add more information for the model to read and understand the documents by adding an explanation. We add a new blank explanation in this example (Figure 6). Templates are also available when creating explanations for your classifier.
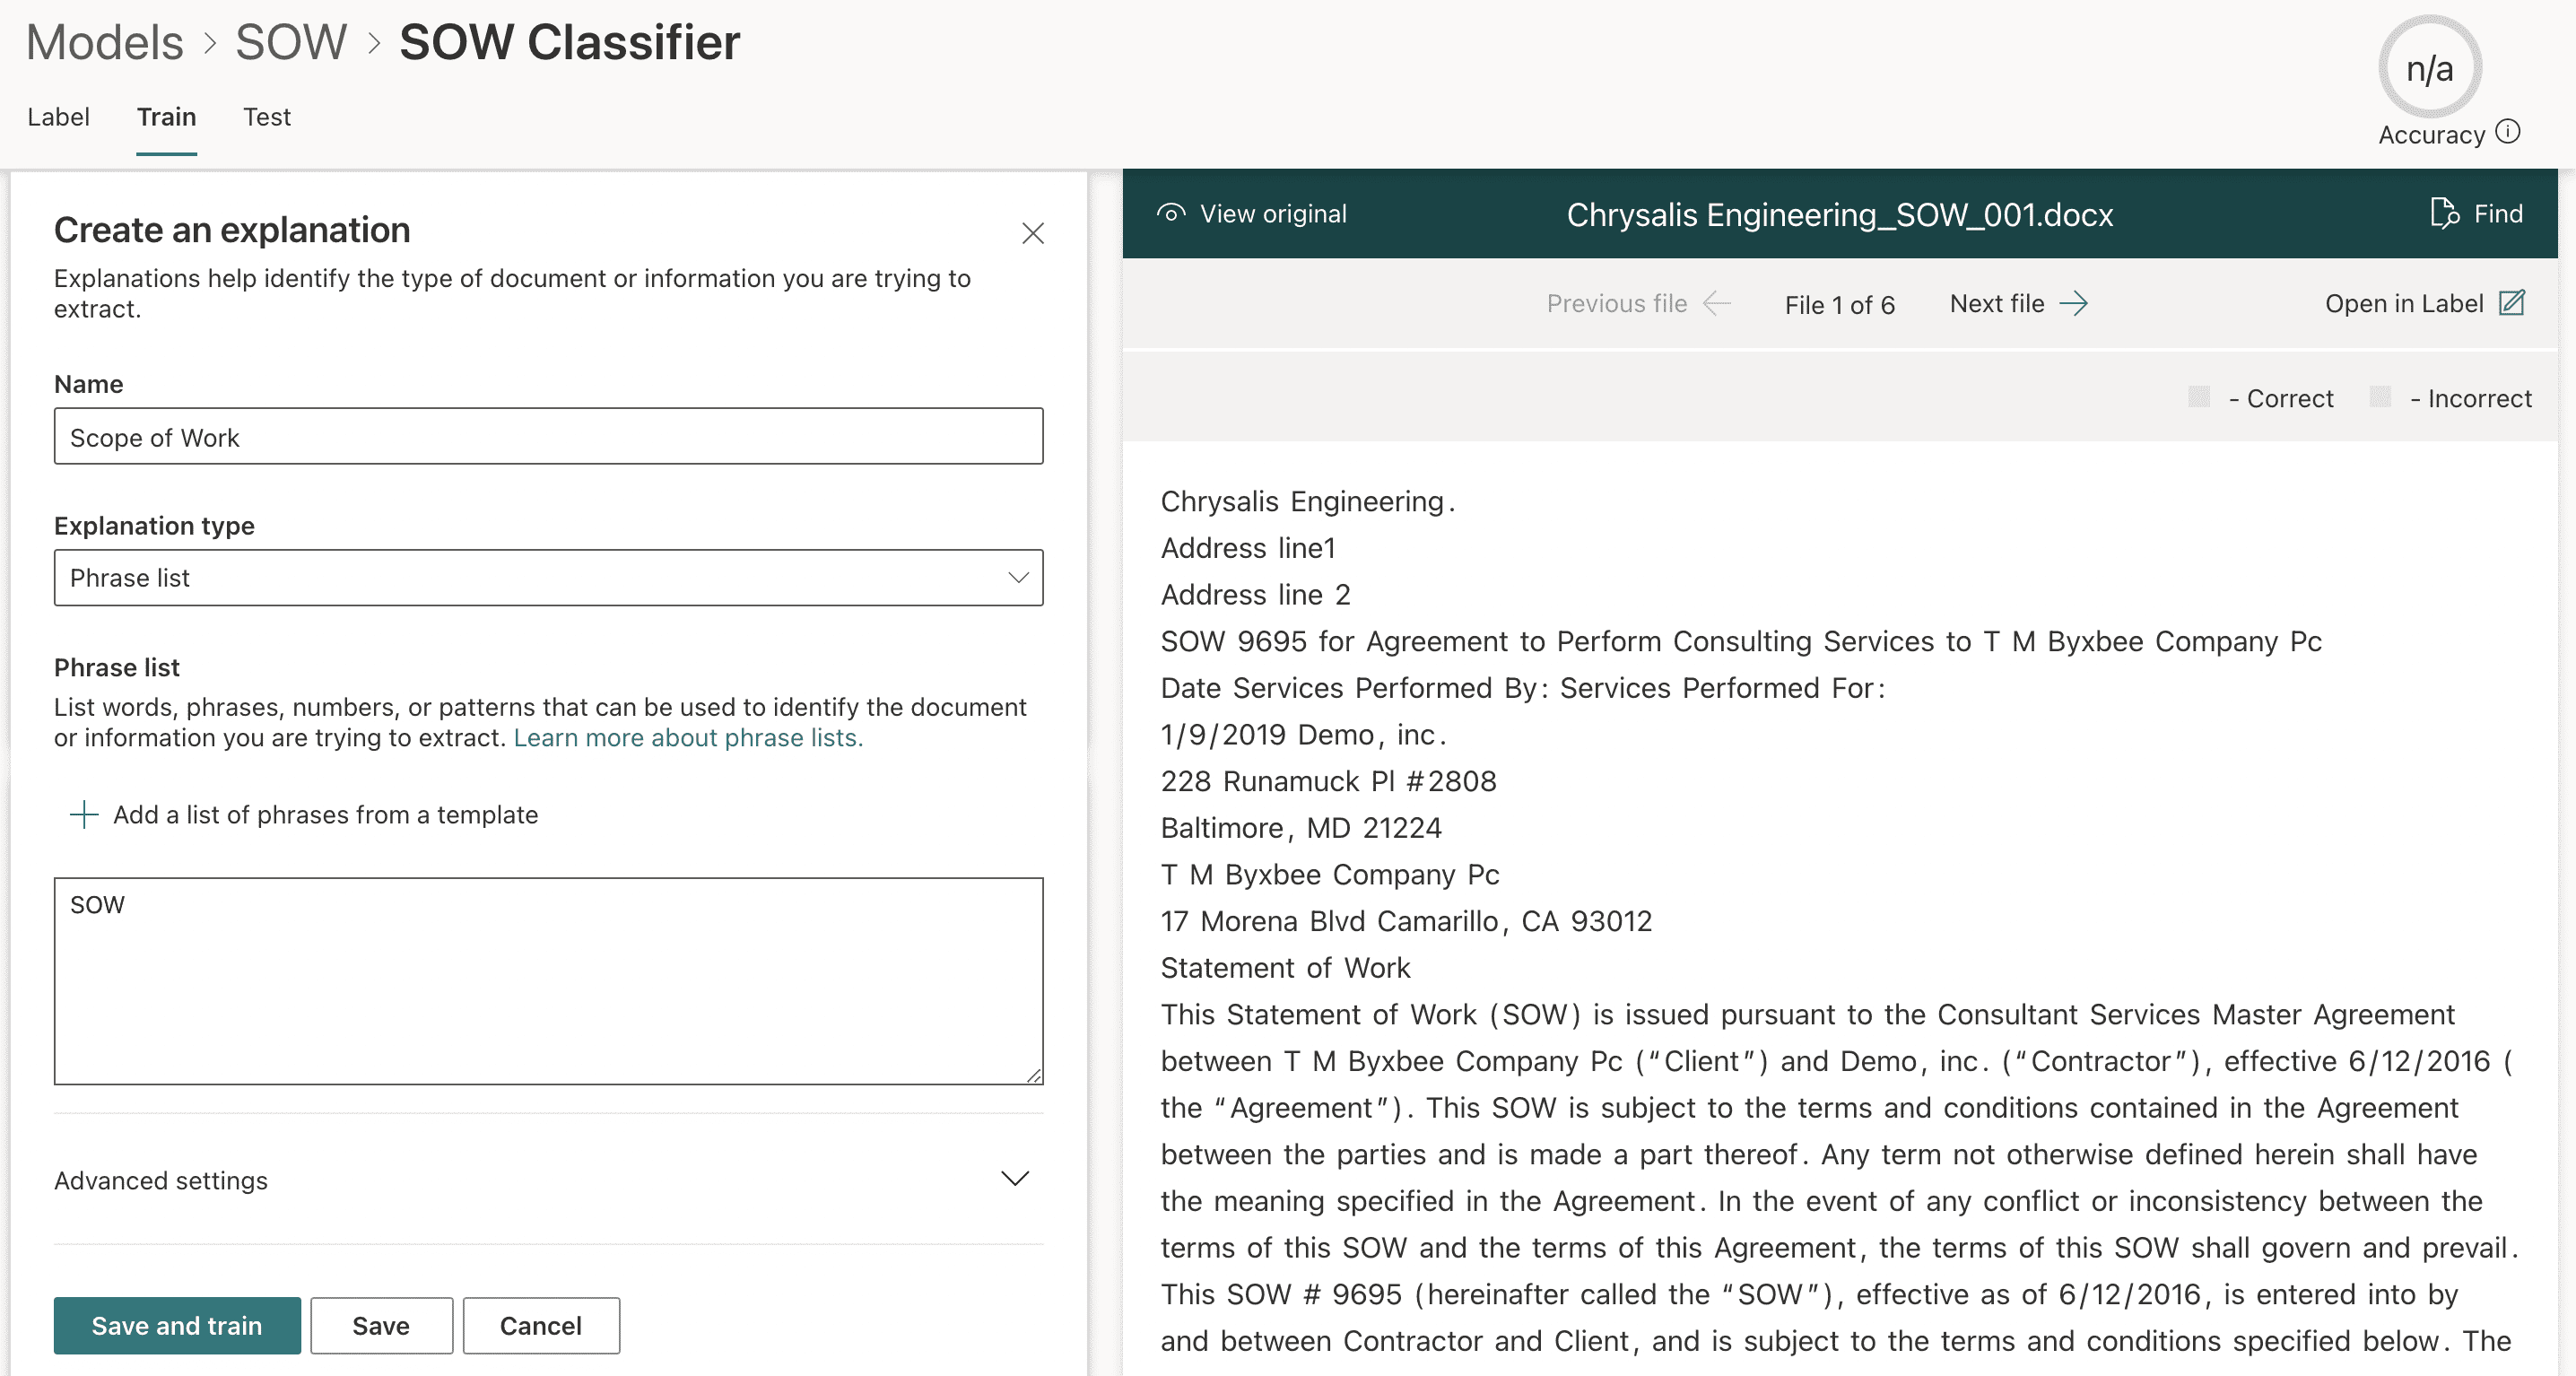
We name the explanation Scope of Work (Figure 7), and choose the explanation type of Phrase list. Next, we add a phrase (or phrases) that will be present in our positive document examples. This phrase is used to identify and set the content type of documents that are a match for the model. The phrase “SOW” is present within all matching documents – therefore this is the phrase we use for this example.
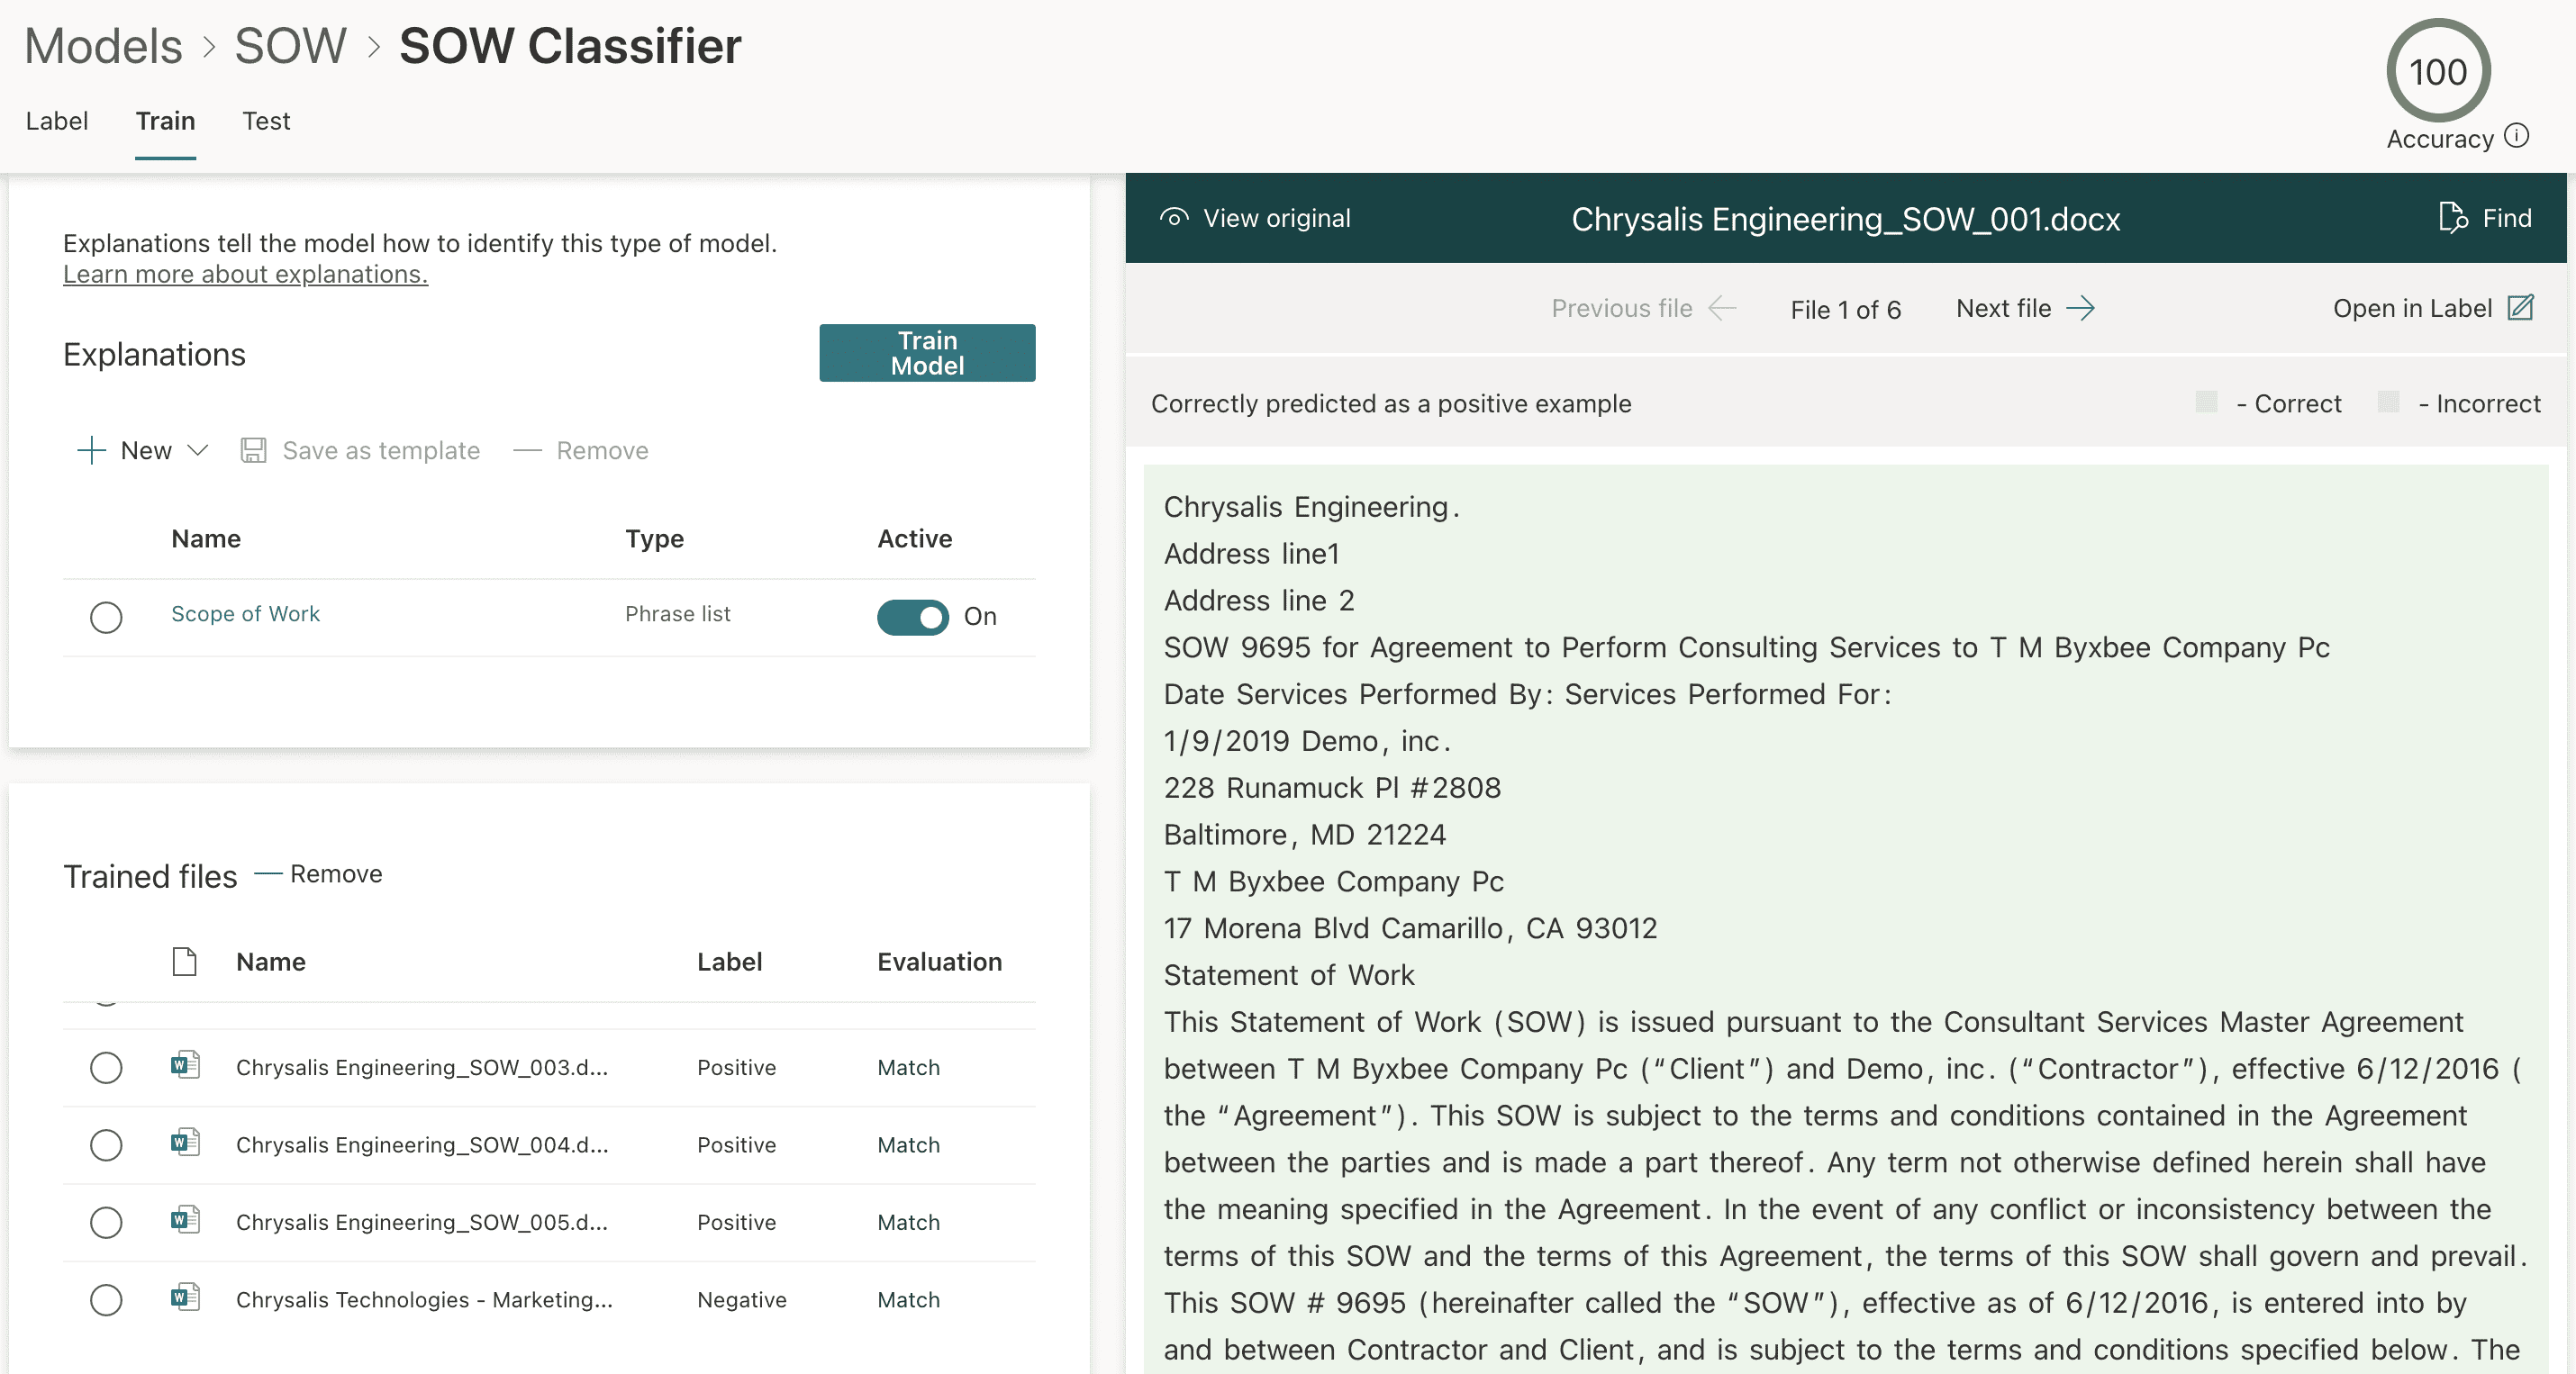
Select Save and train to begin training your example files. If your explanation is configured sufficiently, you will see a match in the evaluation column (Figure 8). If you see any mismatches in the evaluation column, this means the explanation is not sufficiently configured, and if this happens, you need to go back to your explanation and edit it, or include additional explanations to help the classifier to read the documents.
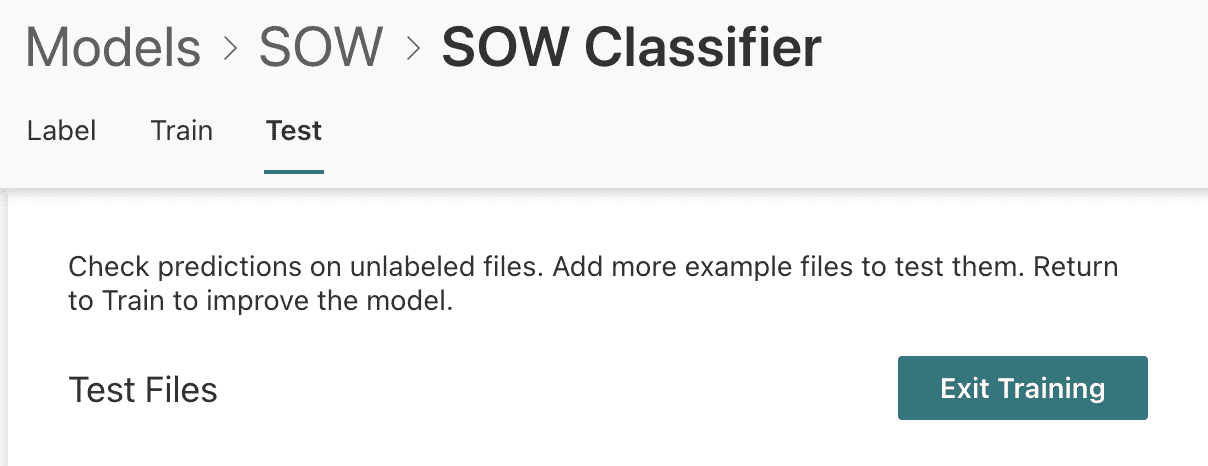
With the training now completed, we can optionally test more files against the model from the Test tab, and then exit the training (Figure 9).
The model is now trained and may be applied to document libraries at this point to apply the content type of SOW to matching content in the library. However, we may optionally extract content from the model to be displayed in additional columns in document libraries where the model is applied.
Extracting content from the model
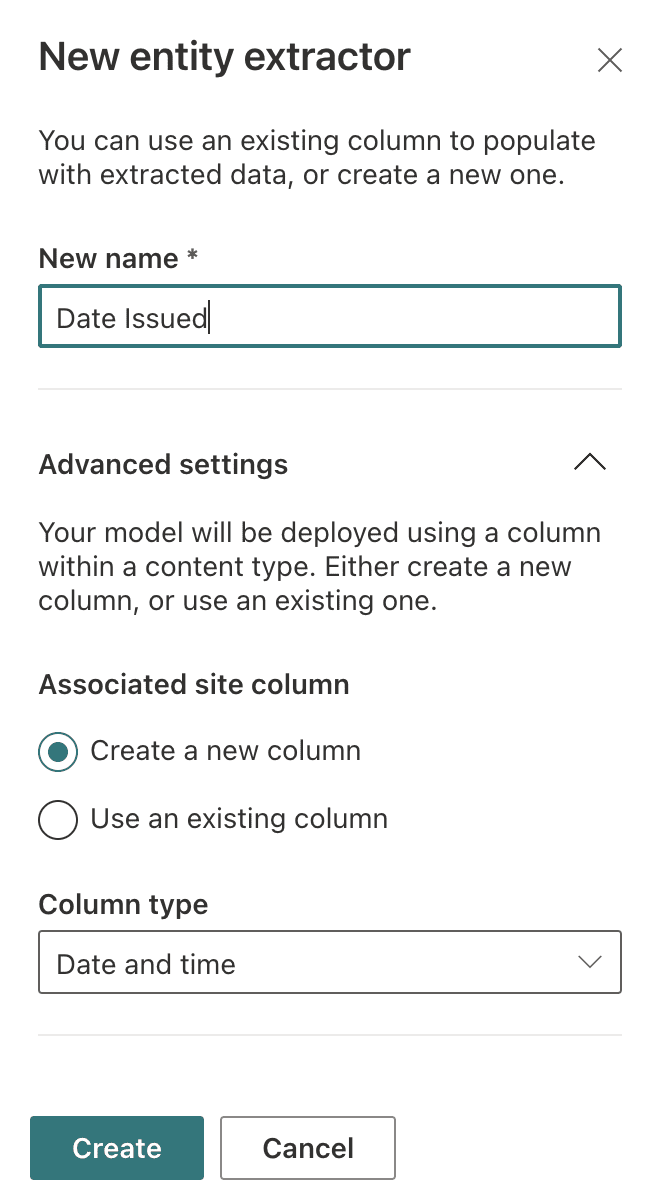
From the model, we select Create extractor which starts the New entity extractor (Figure 10). There are many things that can be extracted from documents using document understanding models. In this example, we extract the issue date of each Scope of Work.
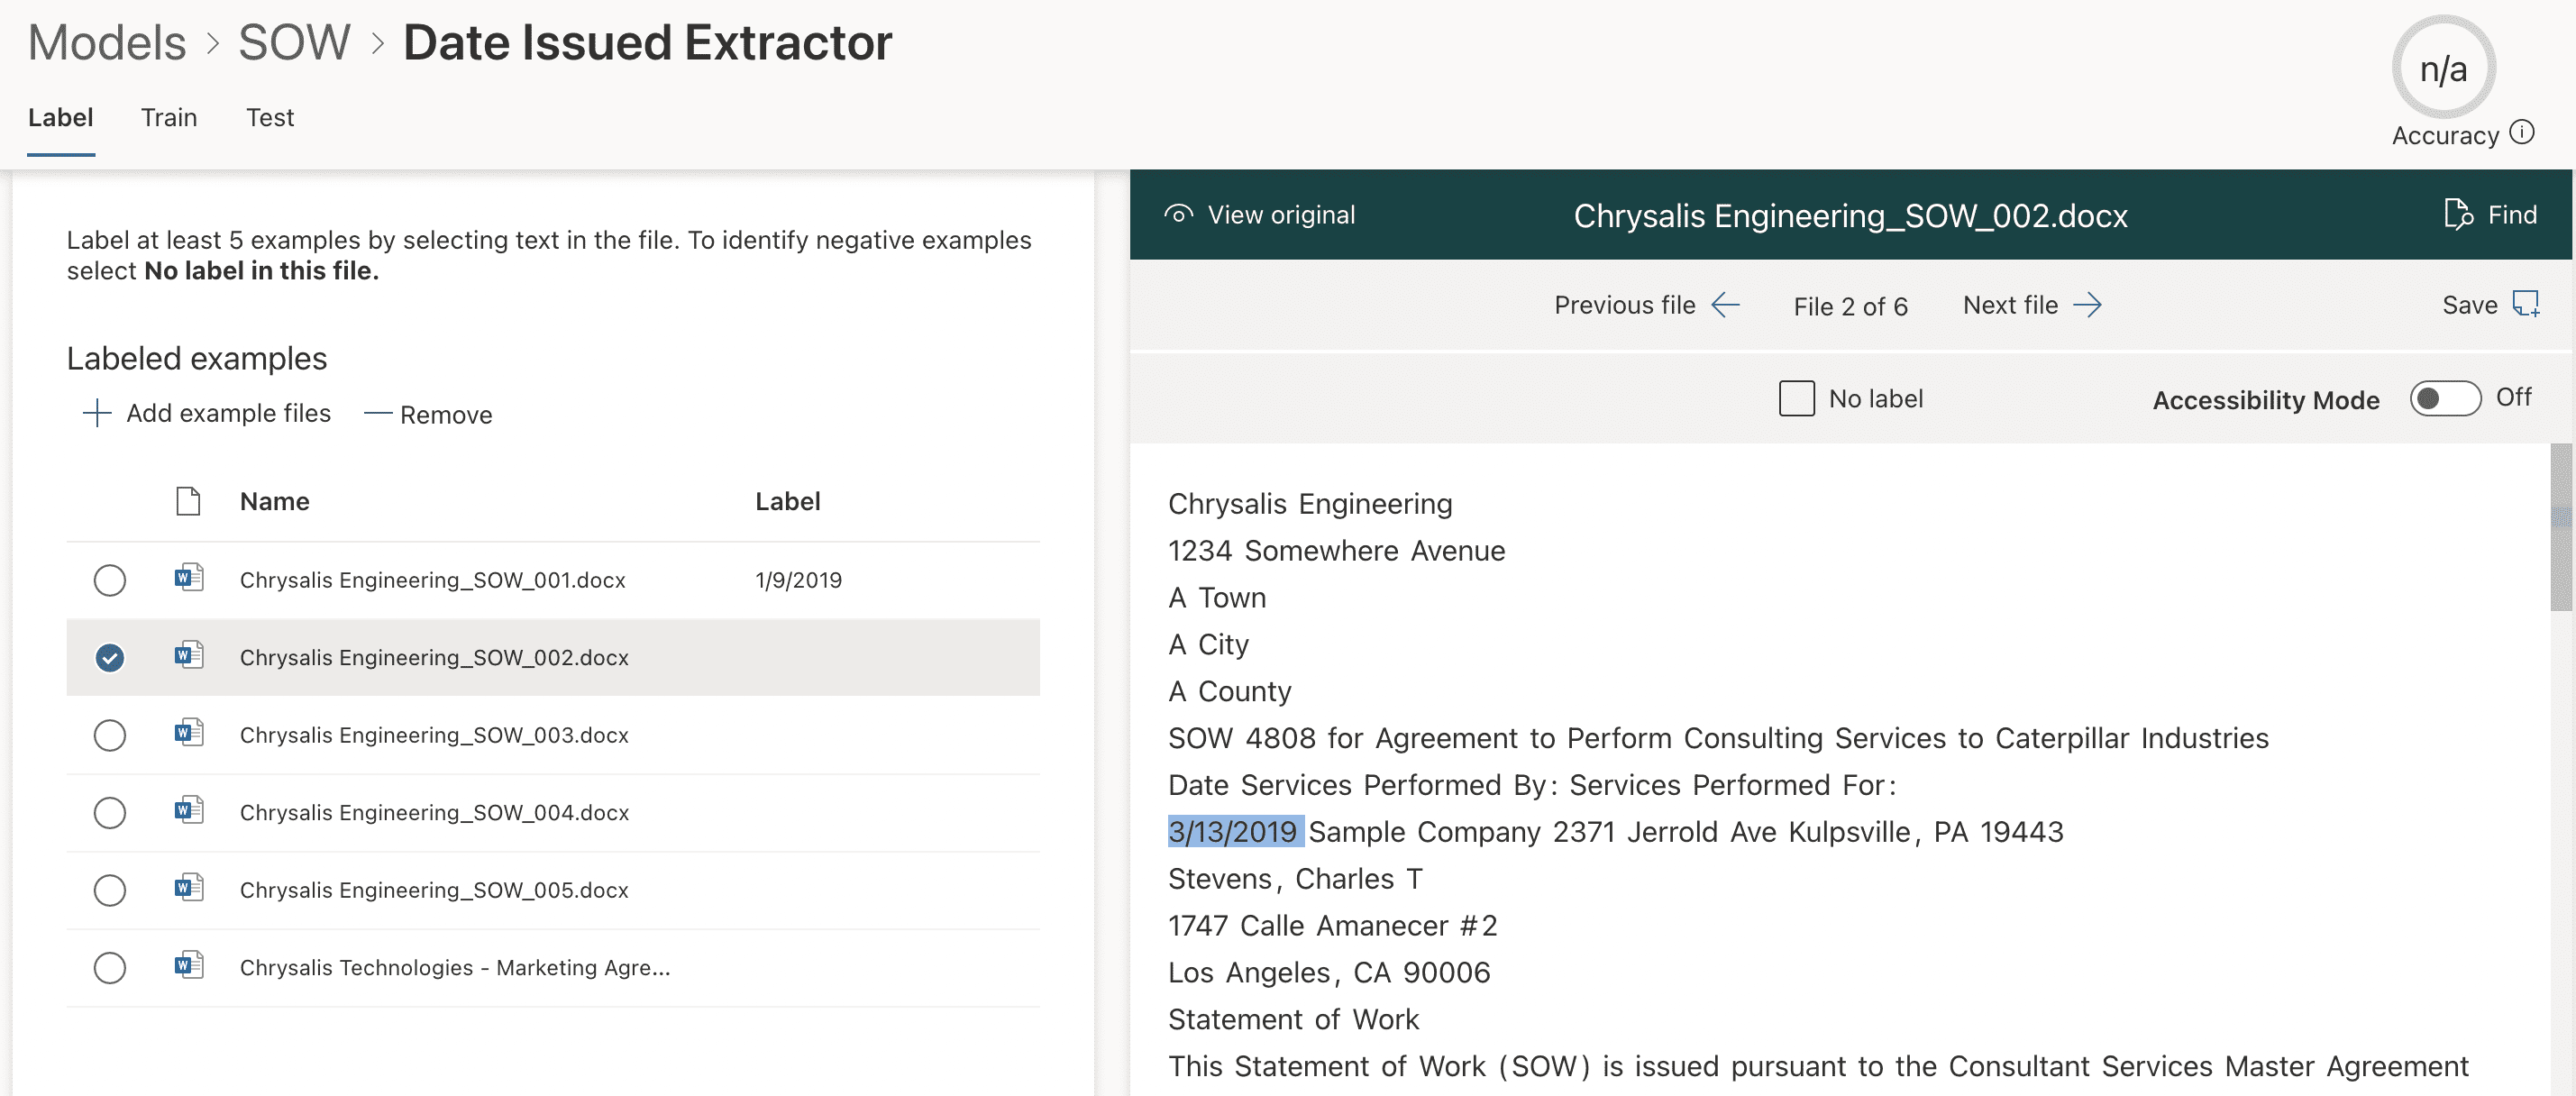
We use the preview pane (Figure 11) to scroll through each document. On each Scope of work, we highlight the Date, then move to the next document. As we progress through the documents selecting the dates, the labels are applied.
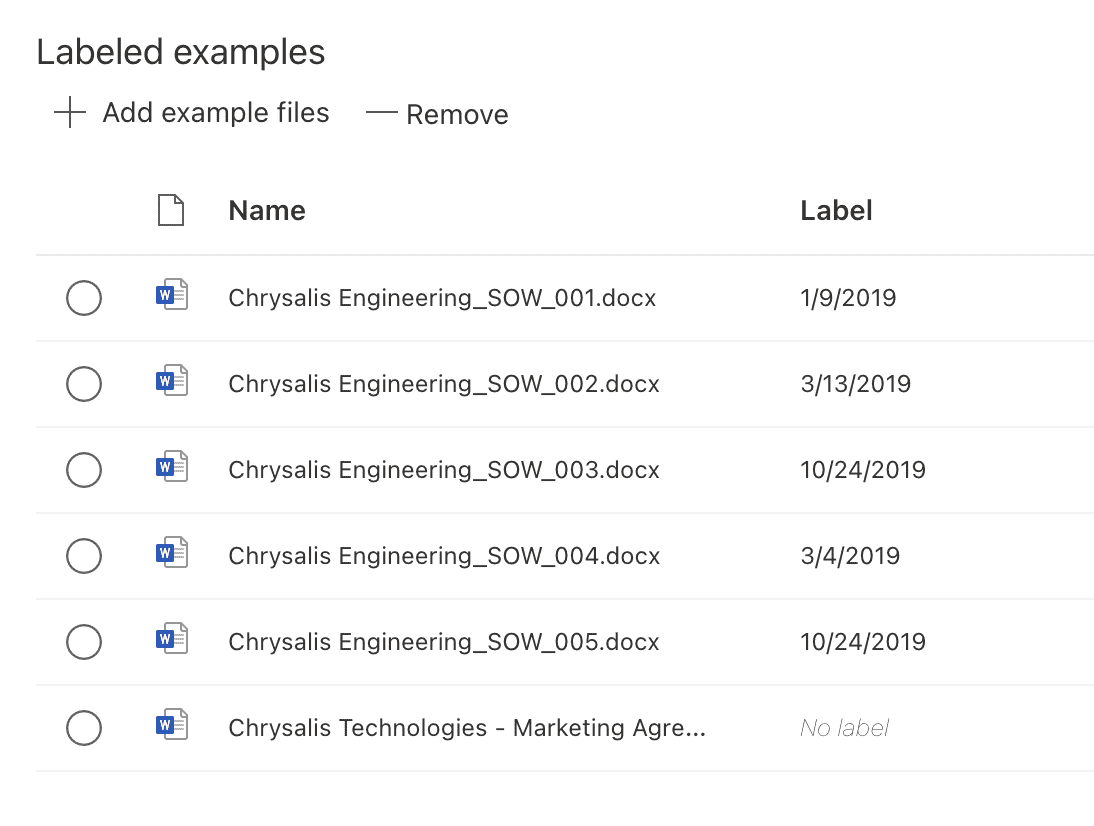
The final document in the list is a negative example. Therefore, we choose No label for this document. The labeled examples are shown in Figure 12.
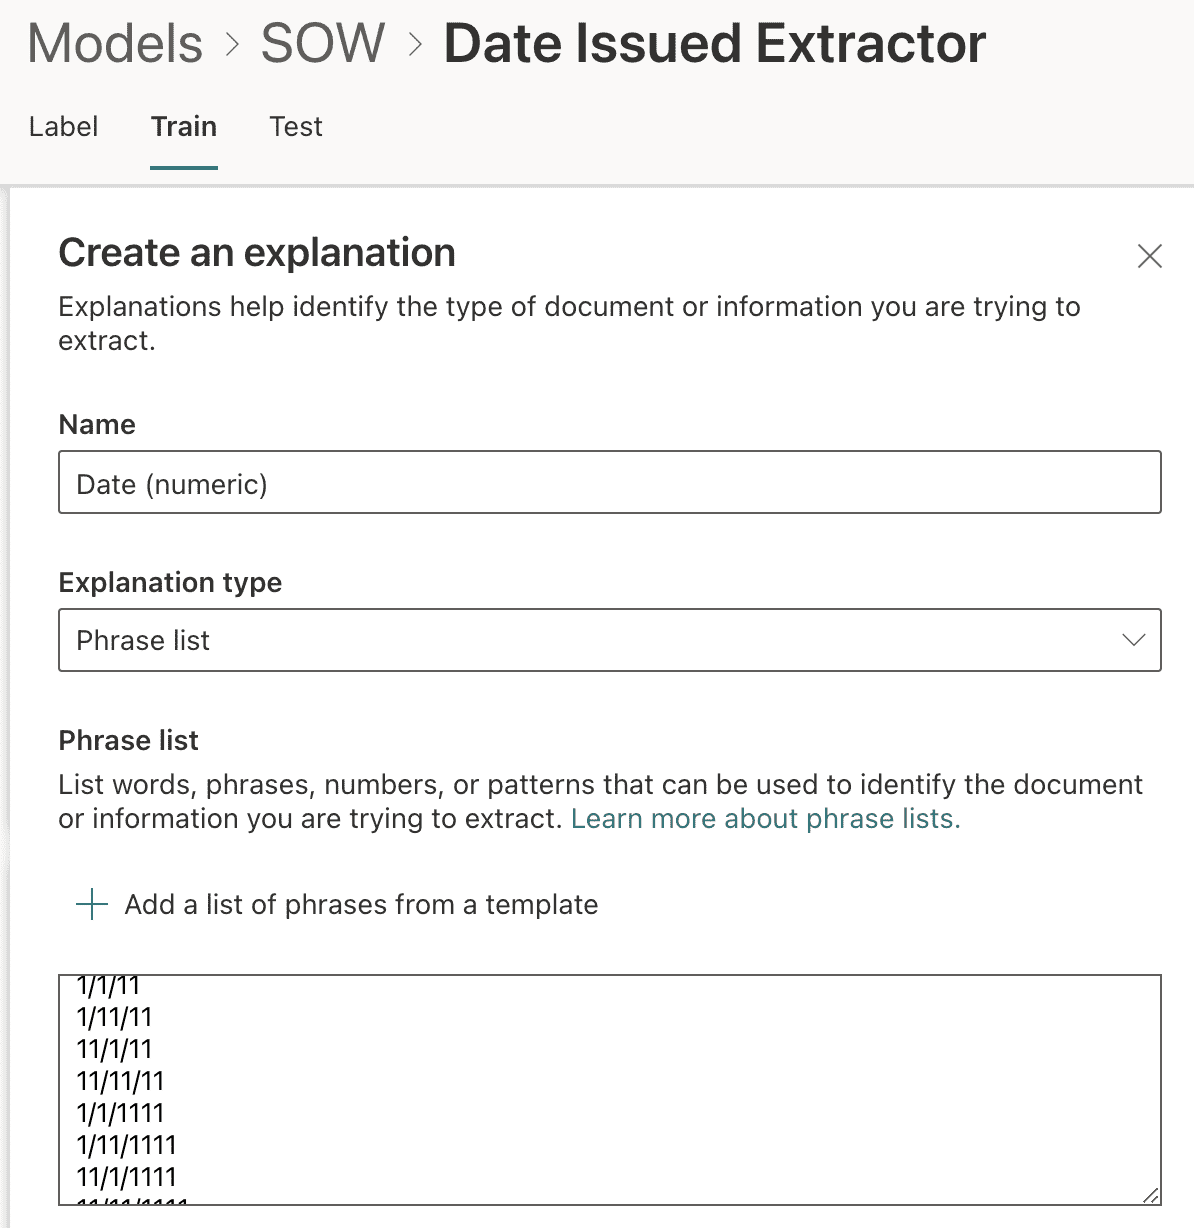
From the Train tab in the extractor, we add an explanation to help identify the information we wish to extract from matching documents. In this example, we choose the option of + Add a list of phrases from a template and select the Date (numeric) option (Figure 13).
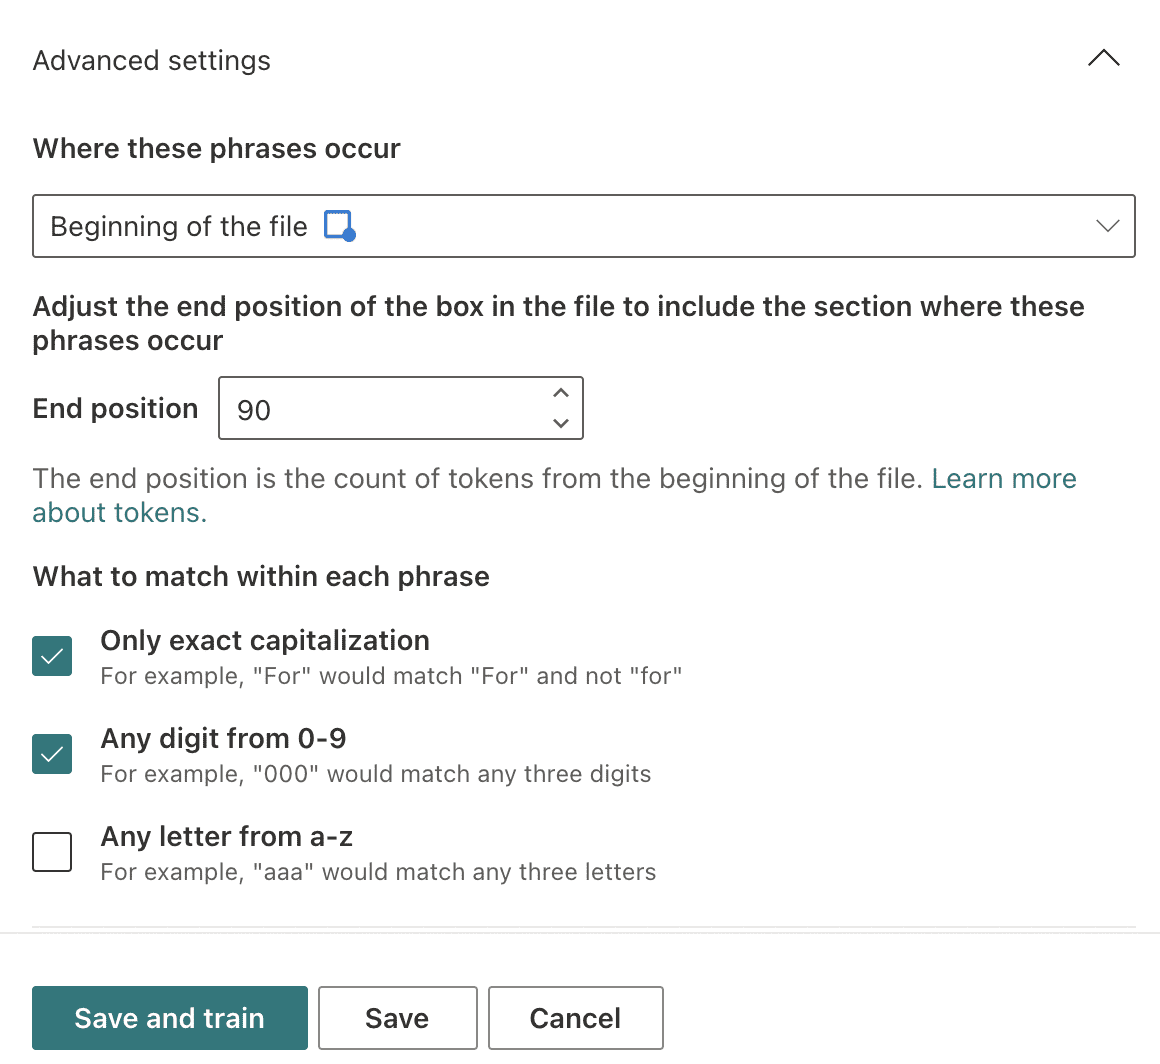
To narrow the search parameters for the explanation, we scroll down to the Advanced settings and choose to search at the beginning of the file where the Scope of Work date is included.
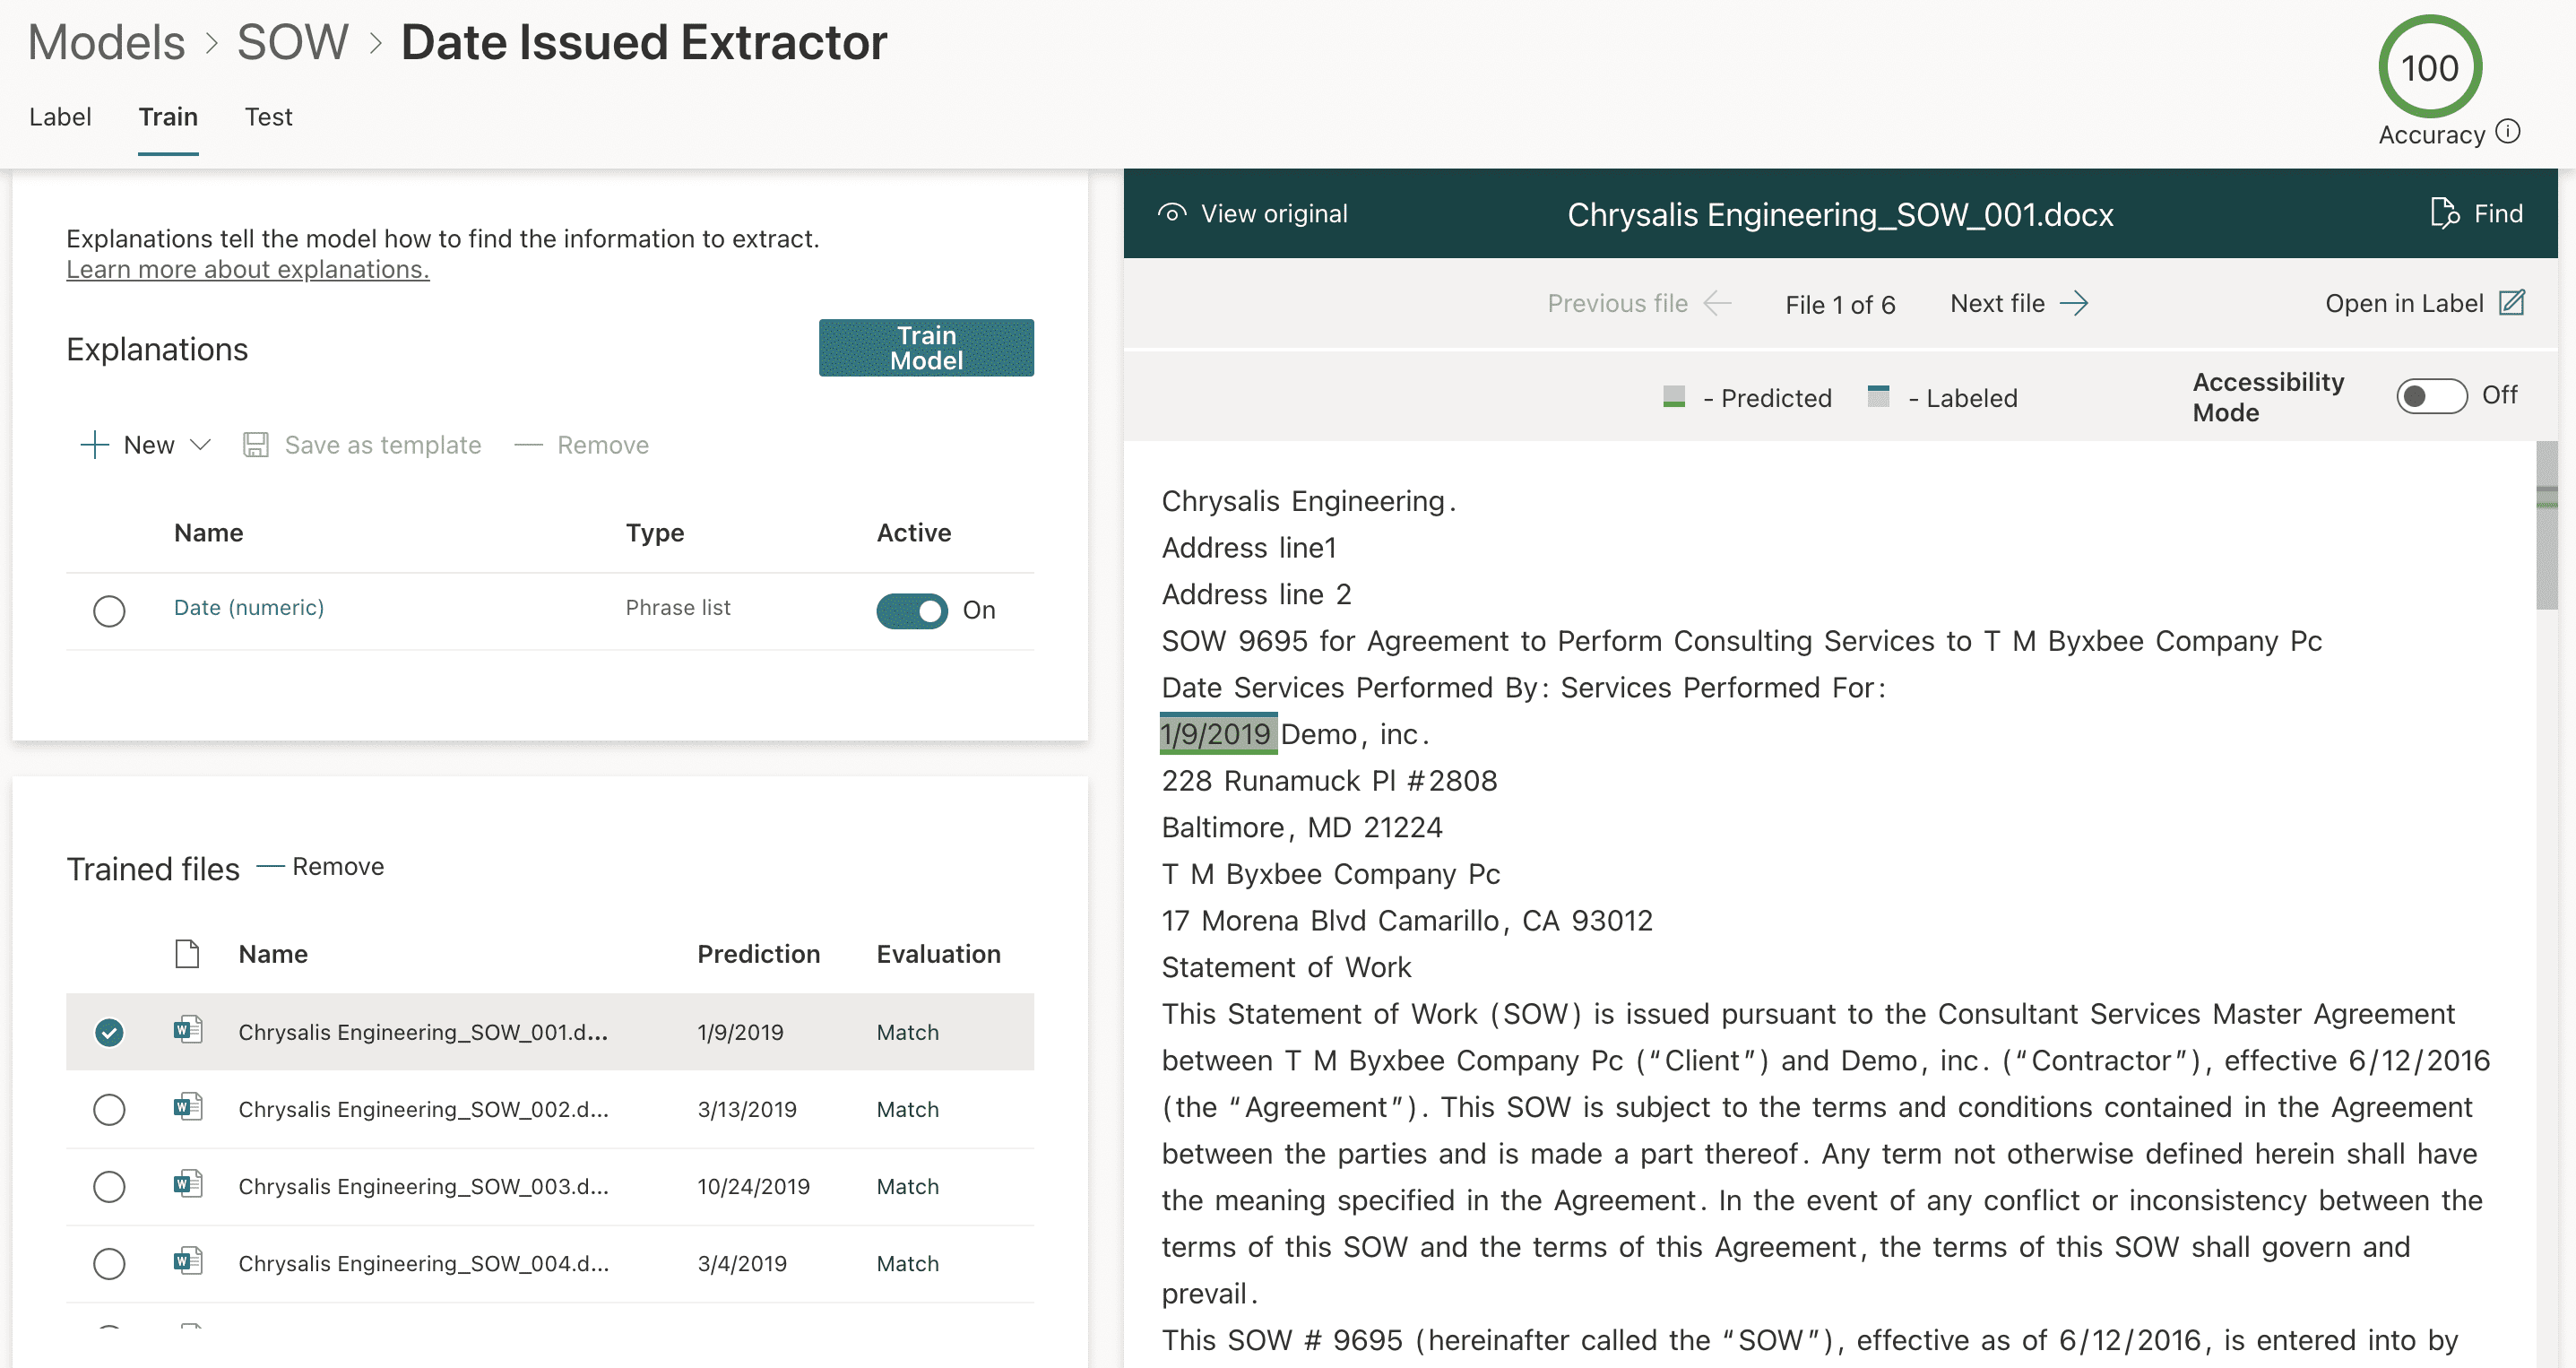
We choose Save and train and the evaluation process accurately predicts a match on the trained files, with the right-side preview pane highlighting the predicted label in green (Figure 15).
Our extractor is now completed, and we choose the Test tab and select Exit training. This takes us back to the main model page where we now move to the final step of applying our model to a document library.
Apply the model to a document library
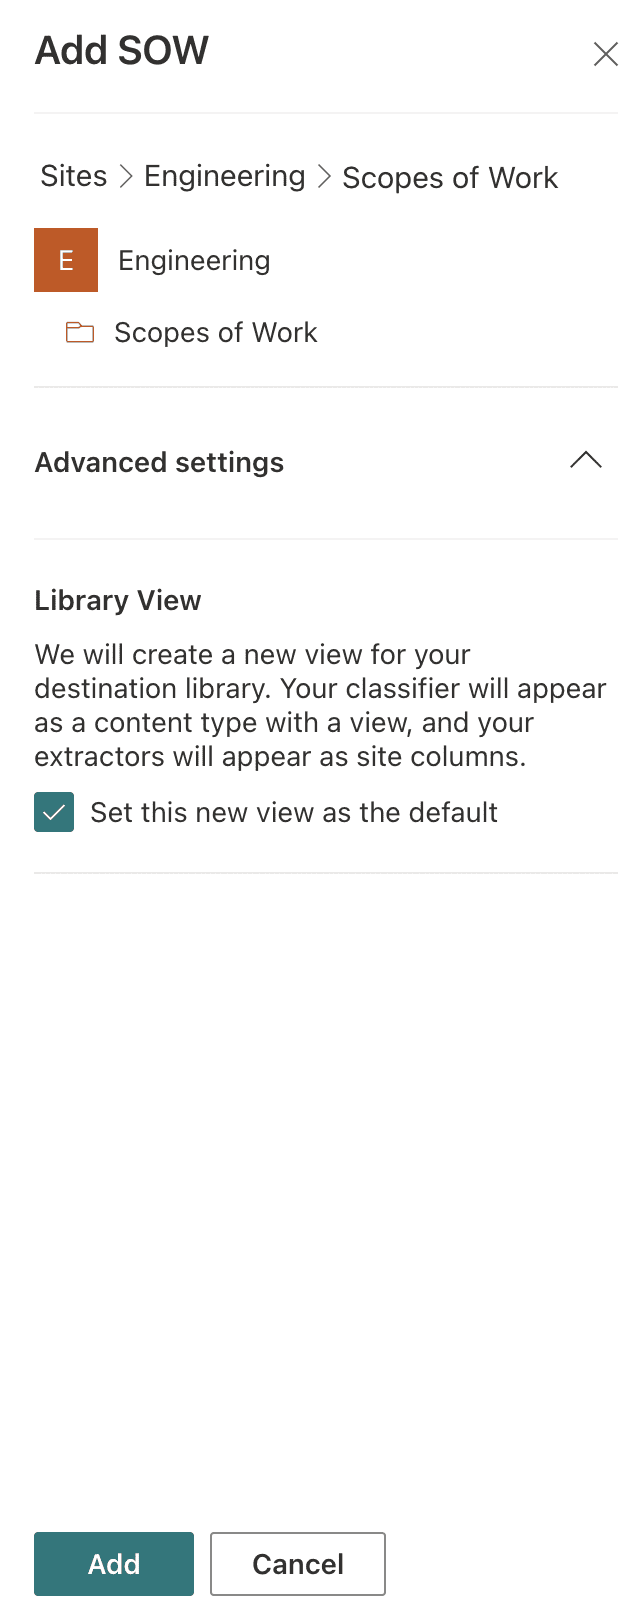
With our model now created, trained, and extractors included, we now apply the model to a document library (Figure 16).

We choose the Scopes of Work library within the Engineering SharePoint site (Figure 17).
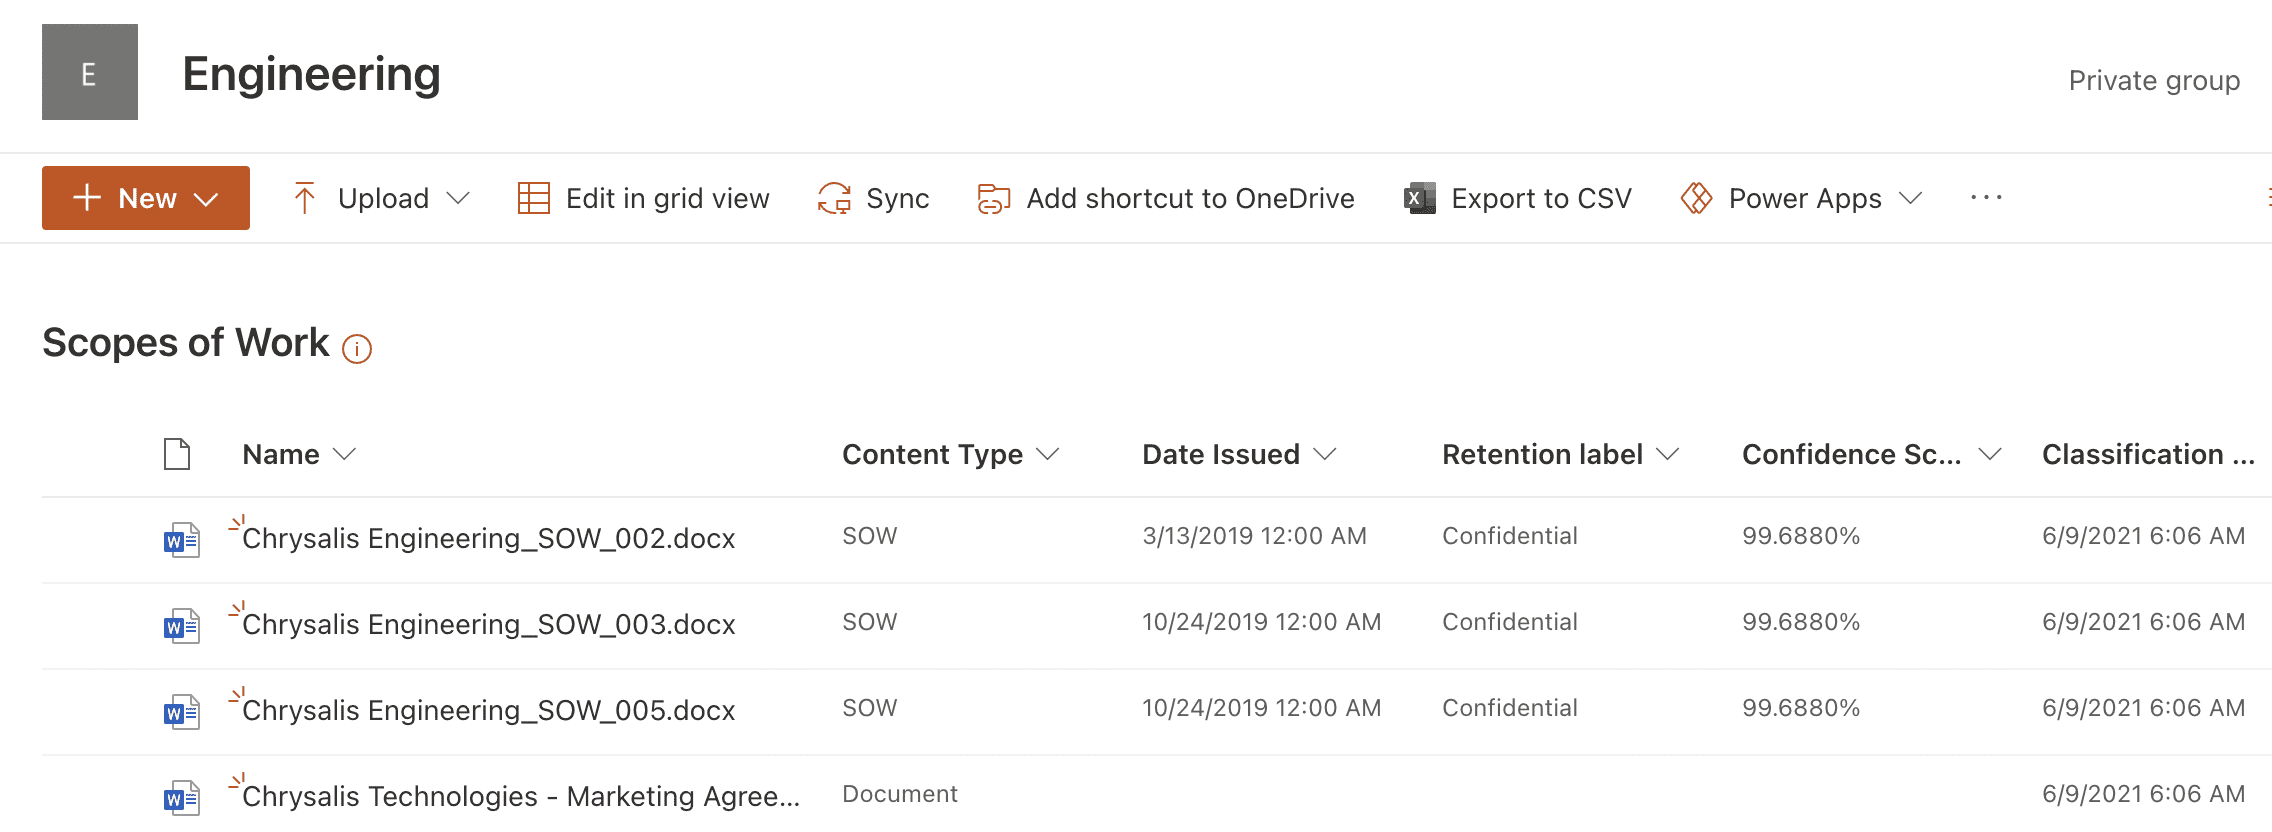
With the model applied, we navigate to the document library. We see that the column view for the library includes some new columns which show the Content Type, Date issued, Retention label, Confidence Score, and Classification date.
Figure 18 shows Scopes of work uploaded to the library and correctly identified as the content type of SOW, the issue date has also been extracted into a column, and the correct retention label has also been applied. Note however that the non matching Marketing agreement document is not matched to the model and remains as a standard content type.
Any documents uploaded to this document library going forward will be assessed and matched to the model where relevant. It’s also possible to manually classify and extract information from documents by selecting the files and choosing the Classify and Extract option from the menu.
Summary
SharePoint Syntex Document Understanding models are a very effective way to classify documents in your SharePoint Online document libraries, and automate the extraction of the information you need quick and easy access to from these documents. The ability to apply retention labels using models is also a big plus, and with sensitivity labels on the way, Syntex offers powerful compliance capabilities.
Document understanding models are only one of the models available with SharePoint Syntex however, and in the next part of this series, we will examine the other option which is forms processing models.