


Getting Started with Azure on a Budget

Cloud platforms are intimidating, yet you know you need to get your head wrapped around this space to potentially move the needle on your career, but at what cost? First, you’re required to enter your credit card information for your freemium trial period. That by itself can be a show stopper. Most trial periods are 30 days. What can you possibly learn in 30 days before your spend starts hitting your card? In this post, we will pull back the curtain on how you can kick the tires in Azure without breaking the bank. Here’s what we’ll look at:
- 30 day free (up to $200)
- 12 months free
- Always free
- Where do I see my charges
- How to avoid surprises
30 Day Free (Up to $200)
The first thing you’ll want to do is STOP. I say this because I want you to understand you have only 30 days to have free anything up to $200. My point is to be sure you can schedule time in the next 30 days to take advantage of this credit. You might be saying to yourself, “$200 won’t get me very far”. Not so fast. Unless you’re doing some crazy stuff, spinning up top tier VMs and letting them run or creating an Azure SQL Managed Instance, you should be ok.
- Browse to https://https://azure.microsoft.com/en-us/free/
- Click Start Free
- Follow the prompts, yes, you have to provide a credit card.
- Viola, you should be up and running in Azure.
Remember, you have your credit allocation and once you spend beyond your credit, you will be charged for the services you are using. Azure charges by the minute. I like this structure because once you shut it down, it’s not rounding up to the hour. You pay for what you use.
12 Months Free

This is something that flew under the radar when I was first noodling around in Azure years ago; you still have free access to chargeable (limited) resources and services within Azure! So you can still skill up, using some of the more common resources and services. Virtual Machines? Yes. Azure SQL Databases? Yes and much more which you can find here. There are a few caveats for the resources as you will see on the linked site. Such as:
- Virtual Machines (Linux and Windows)
- B1S tier
- 750 hours each
- File Storage
- 5GB
- SQL Databases
- 250 GB
Again, please refer to the linked site often as things will change.
Always Free
Just because you burned through your 30 days and are beyond the 12-month free space does not mean you are locked out of Azure. Simply being able to enter the portal and research is still available and yes, there are more than just simple assets that you can configure. You can find the complete list here. Below are just a sampling of what you have access to:
- Azure App Service
- Limited to 10 apps. Be careful, the default tier is Standard (chargeable). You need to change tiers (Scale up) to the Dev/Test F1 plan which is free.
- Functions
- 1,000,000/month. This is a serverless code. You can create triggered functions in Azure for free.
- You can kick the tires with this 5-minute “hello world” tutorial Create your first function in the Azure portal
- 1,000,000/month. This is a serverless code. You can create triggered functions in Azure for free.
- Azure DevOps
- 5 users with unlimited private Git repose
- Security Center
- Free policy assessment and recommendations
- Active Directory
- 500,000 objects.
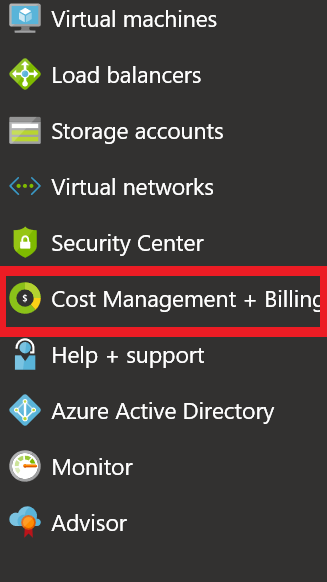
Where Do I See My Charges
You always want to make sure you’re not getting hit with unexpected charges. You can find this in the Azure Portal under Cost Management and Billing
You can drill in to your invoice to see where your charges may be coming from in order to stop or delete the offending service. I’ve heard stories of IT Pros getting hit with some surprise charges (present company not excluded) because we’re human. Meaning, we got distracted, forgot to turn something off or just didn’t know. Azure invoicing is great and allows you to easily track your Azure spend.
How to Avoid Surprises
I’ve been bitten by the surprise charge. I may or may not have discovered a charge while writing this post. It happens. Here are a few tips to avoid being surprised by Azure.
- Do not allow Azure to dictate your service tiers. If you allow defaults, via Azure CLI or PowerShell, be sure to explicitly identify your tiers/size depending on the resource.
- Note: In order to execute PowerShell Azure cmdlets, you need to install the Azure Az Module for PowerShell. You can find instructions here.
- If creating your Azure resources via the portal, pay close attention to the size/tier levels. For instance, the Azure App Service will create your app using the Standard tier if created using the defaults. You have to explicitly configure for the pricing tier (often noted at test/dev). Most resources will have a blade for changing the configuration.
- If you're testing virtual machines, (remember the B1S size is free for 1 year) you can keep them intact without incurring any charges by properly shutting down. This means, shutting down by using the Portal or Azure CLI (or PowerShell Az Module). The VM will shut down and placed in a deallocated state. Doing this releases resources (public IP, etc.) and as a result, you will not incur charges (computer/storage) to your account.
- NOTE if you shutdown from within the VM (Start->Shutdown), this will not release the resources and you'll still be charged. To prevent human error, configure Auto-shutdown for your VMs which will shut down to a deallocated state:
- Log into the Portal
- Locate your VM
- Find the Operations section
- Select Auto-Shutdown
- Try to keep all resources in the same Resource Group. This allows for easy cleanup (assuming you want to delete everything) after your playing around. Deleting the resource group deletes all resources within the resource group. You can delete the resource group through the portal, or by using the following PowerShell cmdlet.
>- ALWAYS check your Cost Management and Billing inside the Azure Portal. You may catch something before it starts to really add up.
So there it is. Hopefully, this provides some insight on how you can get started with Azure without breaking the bank. Most of the other cloud platforms provide similar free experiences. Be sure to read the fine print! At the end of the day, keep your VM sizes and pricing tiers in the free space and always make sure you are reviewing your charges. Sometimes you may have to bite the bullet on some "spend". Here are a few avenues in where you might be able to find some more Azure credit:
- Academic: Are you taking courses at a school that belongs to Microsoft Imagine
- Microsoft Partner: Is the company you work for a Microsoft partner. There are additional Azure benefits.
- Non-profit: Non/not for profits receive annual Azure credits.
- Microsoft Startup)
- Microsoft MVP program (if you're an MVP, you probably already know this)
Additional Resources
Now that you have a plan, what next? Here are some excellent free resources to level up in Azure. Start with the fundamentals, VMs, VNets, Resource Groups and go from there:
- https://petri.com
- Keyword search "Azure".
- https://docs.microsoft.com/en-us/azure
- This is my homepage. Documentation, tutorials and getting started guides for all services and assets. Curated daily in Github Azure Docs
- There are links to free video training on the Azure home page.
- https://docs.microsoft.com/en-us/learn/
- Great step-by-step documentation for all things Microsoft.
- Hands-on labs. Select Azure for your topic.
- You will need a Microsoft account.