In the last few articles, I shared with you some tools to help you find what you might need in PowerShell. While I wasn’t explicit, everything I showed you was for PowerShell 4.0, which would also apply to PowerShell 3.0 as well. What about PowerShell 5.0?
With the launch of Windows 10, this also means the delivery of PowerShell 5.0. Eventually PowerShell 5.0 will be available for older systems where some of the techniques I’ve been demonstrating might still work. In other words, there might be operating system limitations and you’ll simply need to try things out for yourself. Got it?
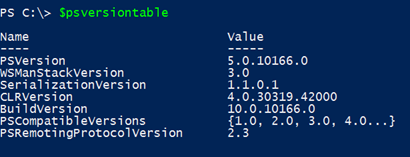
For the sake of reference, this is the system that I’m using. Jeff Hick’s Windows 10 build. (Image Credit: Jeff Hicks)
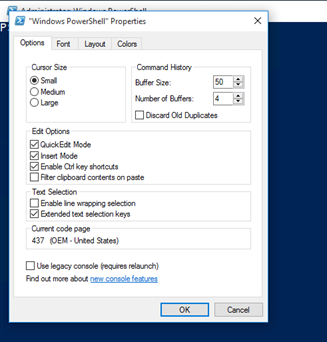
The first major difference is that the CMD.EXE console has been overhauled, although the command buffer settings I mentioned are still present. Windows 10 Console properties. (Image Credit: Jeff Hicks)
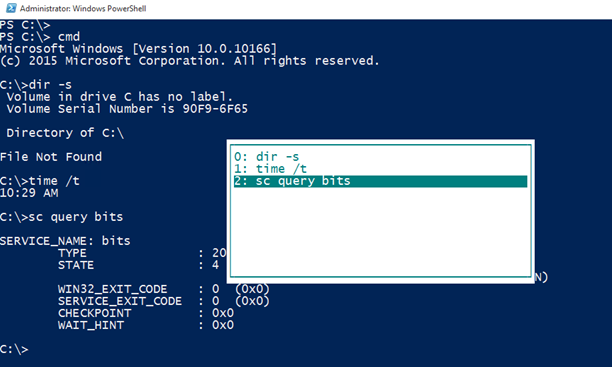
Unfortunately, the F7 technique does not work in PowerShell to access the command buffer. You can press F8 to insert commands at the prompt. Press Shift+F8 if you need to go backwards. But that’s it. Interestingly, if you are in a CMD prompt, F7 works as expected. Using F7 in a CMD session. (Image Credit: Jeff Hicks)
But for some reason when PowerShell is running it ignores the F7 key.
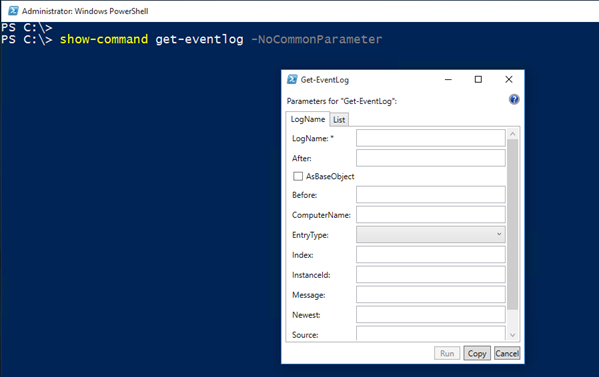
The Show-Command cmdlet still works and even offers a few new parameters. The one I appreciate is –NoCommonParameter. Show-Command with no common parameters. (Image Credit: Jeff Hicks)
This suppresses the CommonParameters section, where you could define parameters like WhatIf or Verbose. Otherwise the cmdlet works as it did in earlier versions. Watch when you use Run. On my desktop, the cmdlet inserted an extra control character at the end. Inserting a command. (Image Credit: Jeff Hicks)
Fortunately, it doesn’t appear to have any effect on running the command. I’m assuming this is a minor bug that will eventually disappear.
The Show-Command add-in is still in the PowerShell ISE, but there doesn’t appear to be a way to configure it to not show common parameters. But this is not a big deal. PowerShell ISE Add-ons. (Image Credit: Jeff Hicks)
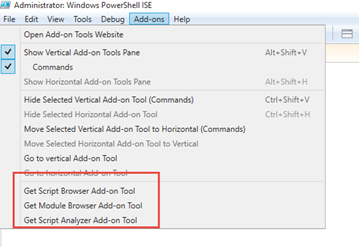
But speaking of the PowerShell ISE in 5.0, there are a few new tools. Under the Add-Ons menu you should see options to get a few new toys.
I’ll go ahead and get each one (although the Script Browser and Script Analyzer are in the same download), following on-screen instructions to download and install. Then we’ll take a quick look at them.
After you install them you should restart the PowerShell ISE. When you do you should see the new add-ons. New PowerShell ISE Add-Ons. (Image Credit: Jeff Hicks)
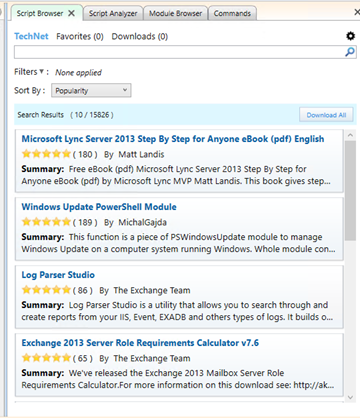
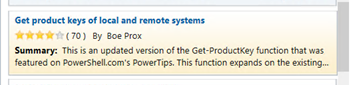
The Script Browser is potentially very useful. But be careful. Just because a script is up on Technet doesn’t necessarily mean it is a good script, will run or even run in your environment. With that in mind, I scroll down and find a script from fellow PowerShell MVP Boe Prox. A Technet script. (Image Credit: Jeff Hicks)
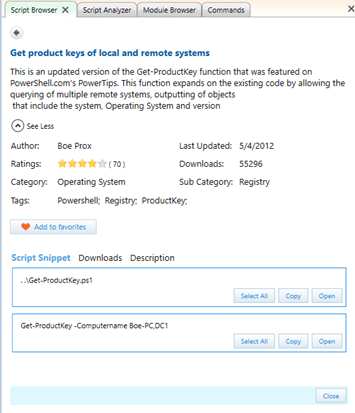
I can select it and then click Open to view some details: Script Details. (Image Credit: Jeff Hicks)
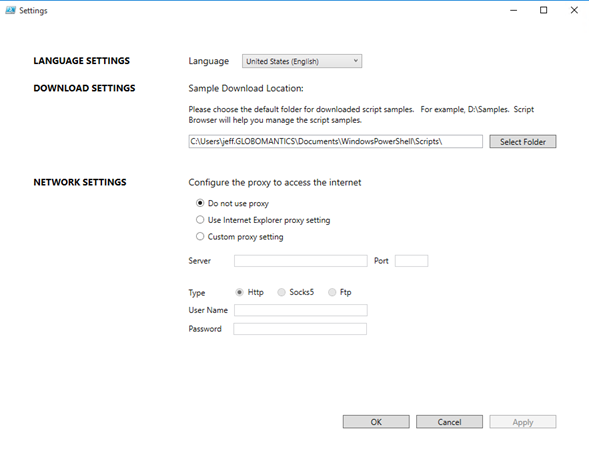
This looks promising and I trust Boe’s skills so I’ll go back and download the script. Although, you should check the configuration first by clicking the gear icon on the Script Browser. Configuring the Script Browser. (Image Credit: Jeff Hicks)
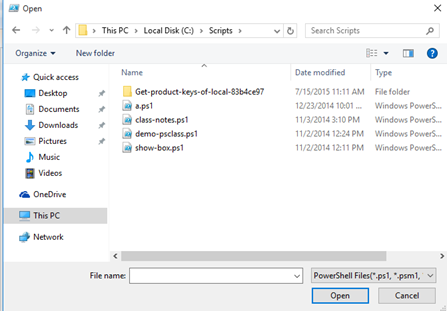
I’m going change the default location to my Scripts folder, C:\Scripts and then download the script. It will be placed in its own folder. Opening the downloaded script. (Image Credit: Jeff Hicks)
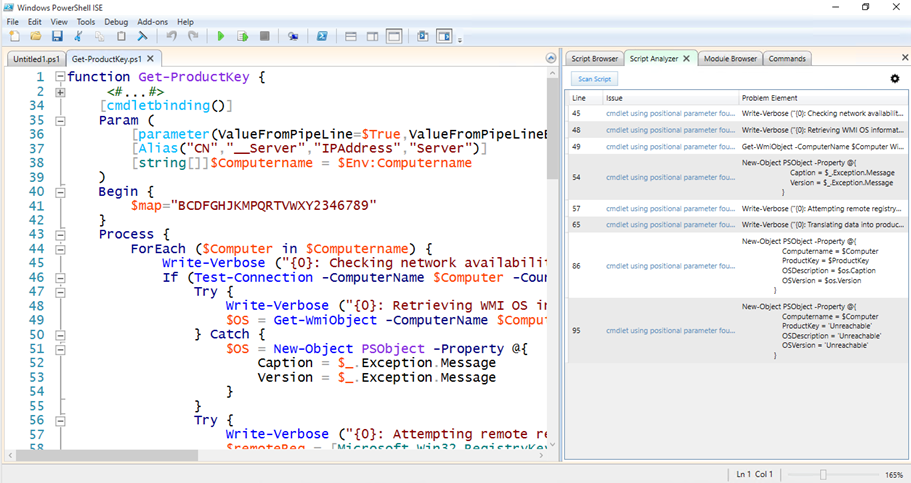
Finding and opening the file brings us to the next useful tool, the Script Analyzer. All I need to do is click Scan Script. Scanning a script. (Image Credit: Jeff Hicks)
All of the reported issues are minor so this should be good to run in a test environment.
The last new add-in is the Module browser which ties in to the new PowerShellGet module. I’m sure we’ll be covering this feature in more detail in future articles. But for now, think of PowerShellGet, also referred to as PSGet, as a PowerShell package manager. You can use the relate cmdlets to find and install additional PowerShell modules from the Internet and your own repositories.
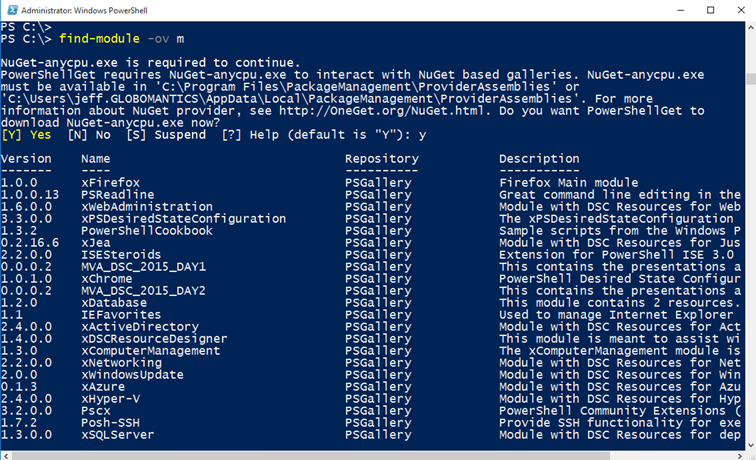
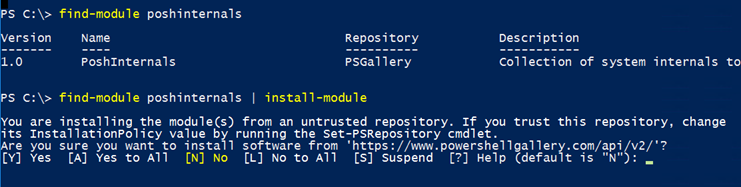
For now I’ll show you how to find and install modules from Microsoft’s online repository. First, I’m going to jump back to the console and demonstrate. Using the Find-Module cmdlet you can search for available packages. Using Find-Module. (Image Credit: Jeff Hicks)
I’m saving the results to a variable, $m, as well as displaying them in console. Because this is the first time I’ve used the module, I’m prompted to enable an additional command. Once I find a module I want I can install it. Installing a module with PSGet. (Image Credit: Jeff Hicks)
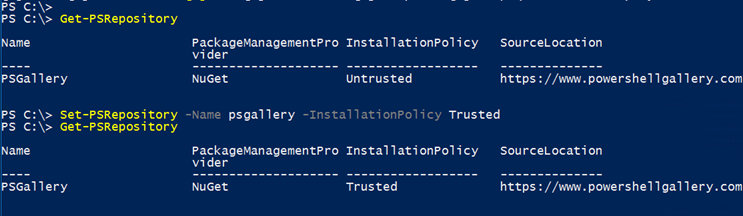
I know the PSGallery is run by Microsoft and is relatively trustworthy, so I’ll allow the installation. To avoid this prompt in the future, I can configure the repository as trusted. Configure a repository as trusted. (Image Credit: Jeff Hicks)
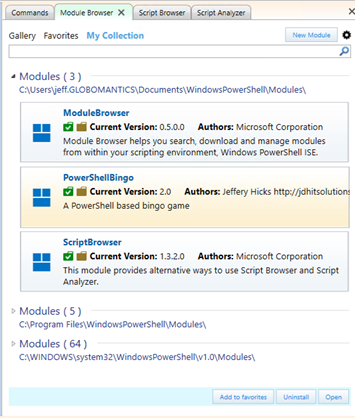
As with Technet scripts, there’s no guarantee that all of these packages are “good” PowerShell or will work in your environment. So let’s plan and test accordingly. Back in the PowerShell ISE, you can use the module browser to sift through all of the modules currently installed on your system. Click on My Collection. Browsing local modules. (Image Credit: Jeff Hicks)
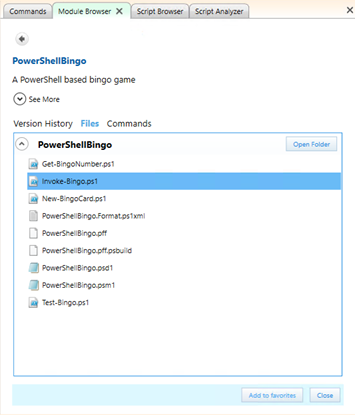
You can select a module and open it to get more detail. Getting module details. (Image Credit: Jeff Hicks)
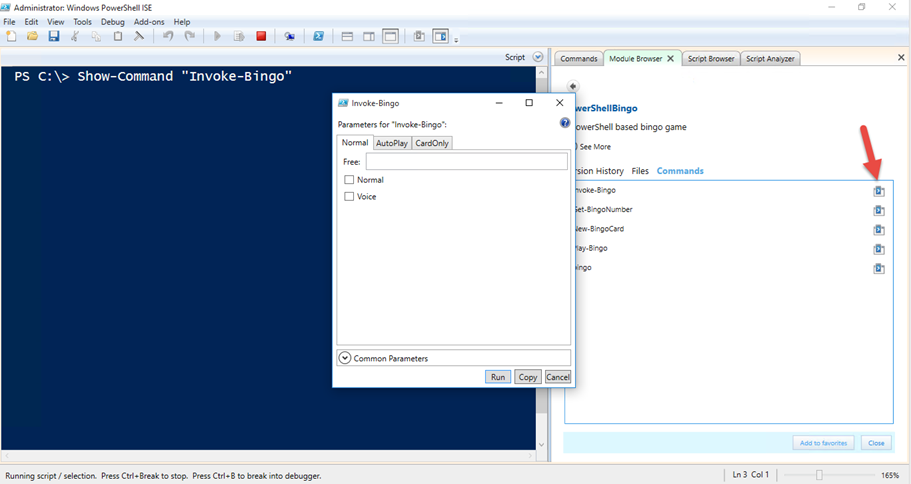
If you double-click on a file it will open in the ISE script pane. Or click on Commands and use the Show-Command link. Show-Command for a module command. (Image Credit: Jeff Hicks)
Without a lot of work it is easy to find commands and discover how to use them.
Sadly, one feature that doesn’t seem to work in the version of Windows 10 I’m using is the Module Browser’s Gallery feature. In fact, you might be seeing errors about a failing add-in when you start the ISE. If you took a moment to read the install notes you would have seen that the Module Browser requires PowerShell v5 on everything except Windows 10. I went ahead and installed it anyway as it mostly works, and I expect it will eventually work completely, just not yet. For now, I would consider the Module Browser experimental on Windows 10.
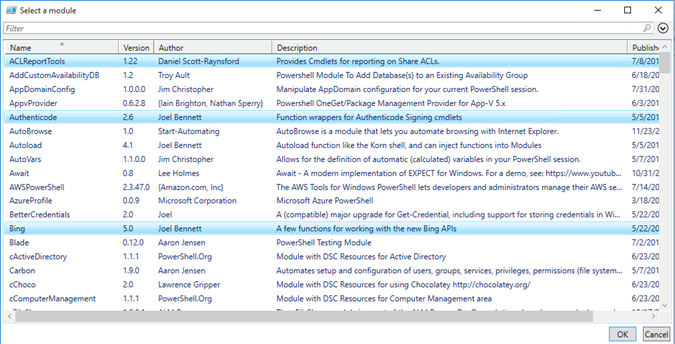
But all is not lost, you can use a script like this, in either the ISE or the console to graphically “browse” modules and install them.
You should see something like this:
Selecting modules to install. (Image Credit: Jeff Hicks)
PowerShell 5.0 will continue to make it easy for you to discover what you need so that you can "catch the big one" or at least get your work done in a timely manner so you can go comfortably on vacation and do some real fishing.
Stay connected with Petri for future articles on PowerShell 5.0 and Windows 10.