


Deploy a Remote Desktop Services Farm in Azure

In today’s Ask the Admin, I’ll show you how to quickly deploy a Remote Desktop Services (RDS) farm in Microsoft Azure.
One of the great benefits of cloud computing is that all the required components of an app can be automatically deployed simply by providing Azure with a template, no matter how large, small, or complex the solution. So, although deploying an RDS farm in Azure seems like it should be a very complex task, with the help of a template, we can get a farm up and running in a matter of minutes, and that’s what I’m going to show you how to do in this article.
For more information on Azure Resource Manager and resource groups, see What are Microsoft Azure Resource Groups? on the Petri IT Knowledgebase. And for further details on RDS deployment models, see Remote Desktop Services Deployment Options in Windows Server 2012 R2.
Microsoft provides a series of templates for deploying RDS farms on GitHub. I’m going to use the Basic RDS farm deployment template, which you can find here. The template deploys virtual machines (VMs) with Active Directory domain controller and DNS roles, an RD Connection Broker and RD Licensing Server with per-user licensing, an RD Gateway, and a customizable number of RD Session Hosts.
Deploy an RDS farm in Azure
Before you can complete the steps below, you’ll need to have an active Azure subscription. If you don’t have one, you can sign up for a free trial here.
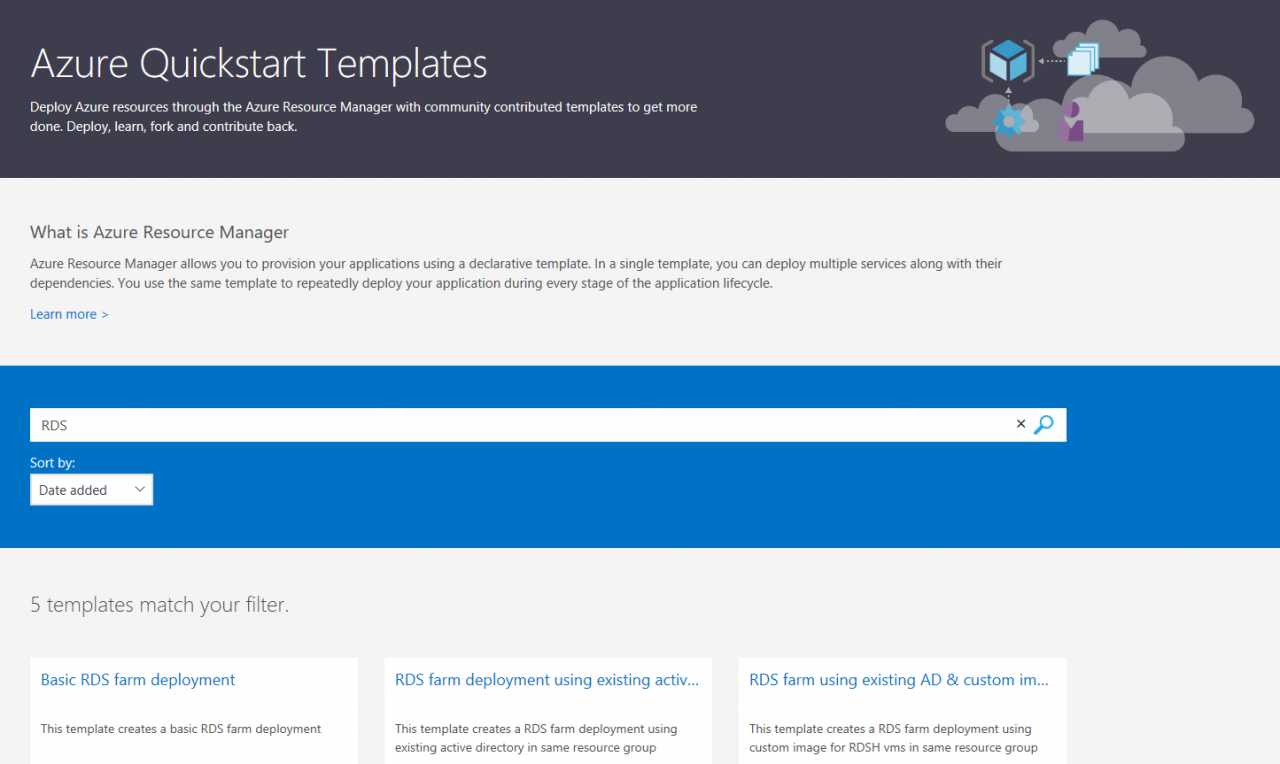
- To see the available RDS templates, click here.
- On the Azure Quickstart Templates website, click the link for the Basic RDS farm deployment template.
- On the Basic RDS farm deployment web page, there are two options. You can deploy the template right away by clicking Deploy to Azure, or you can view the template in GitHub by clicking Browse on GitHub.
- Let’s deploy the template straight away by clicking Deploy to Azure.
- You will be redirected to the Azure management portal. If you aren’t already signed in, you’ll need to provide your credentials.
Now you’ll need to fill in some details for the template’s parameters.
- On the Basic RDS farm deployment panel, select the subscription where you’d like to create the new RDS farm from the Subscription drop-down menu below BASICS.
- In the Resource group box, type the name of a new resource group. In this example, I’ll use the name PetriRDSFarm. If the resource group name is available for use, a green tick will appear on the right of the field.
- Alternatively, you can check Use existing, and select an existing resource group using the drop-down menu.
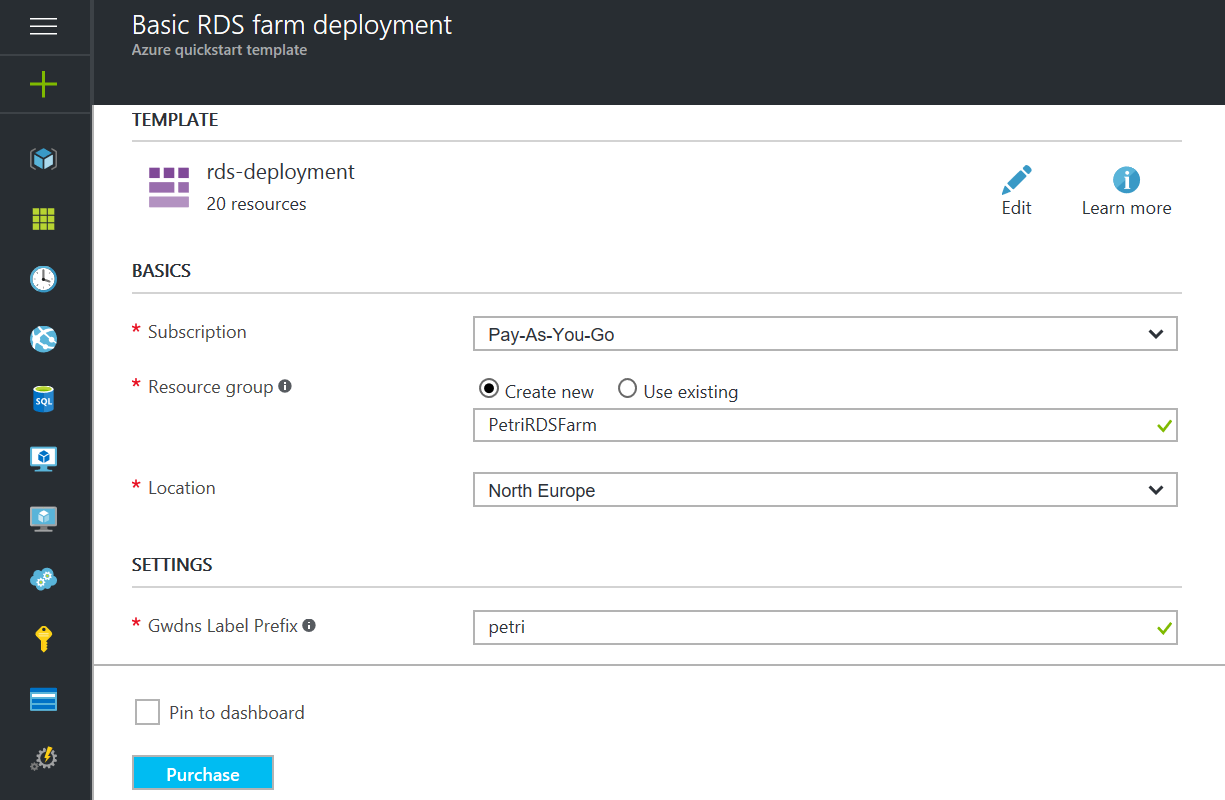
- Select a geographical region for the new farm using the Location drop-down menu.
Let’s continue to configure the farm with some additional options under SETTINGS.
- We need to specify a DNS label for the RDS Gateway Server so that it can be accessed from the public Internet. I’m going to use the label petri.
- The following fields are automatically filled out. An AD domain, contoso.com, will be created as part of the deployment. I recommend setting the domain admin username and password in the Admin Username and Admin Password fields, respectively.
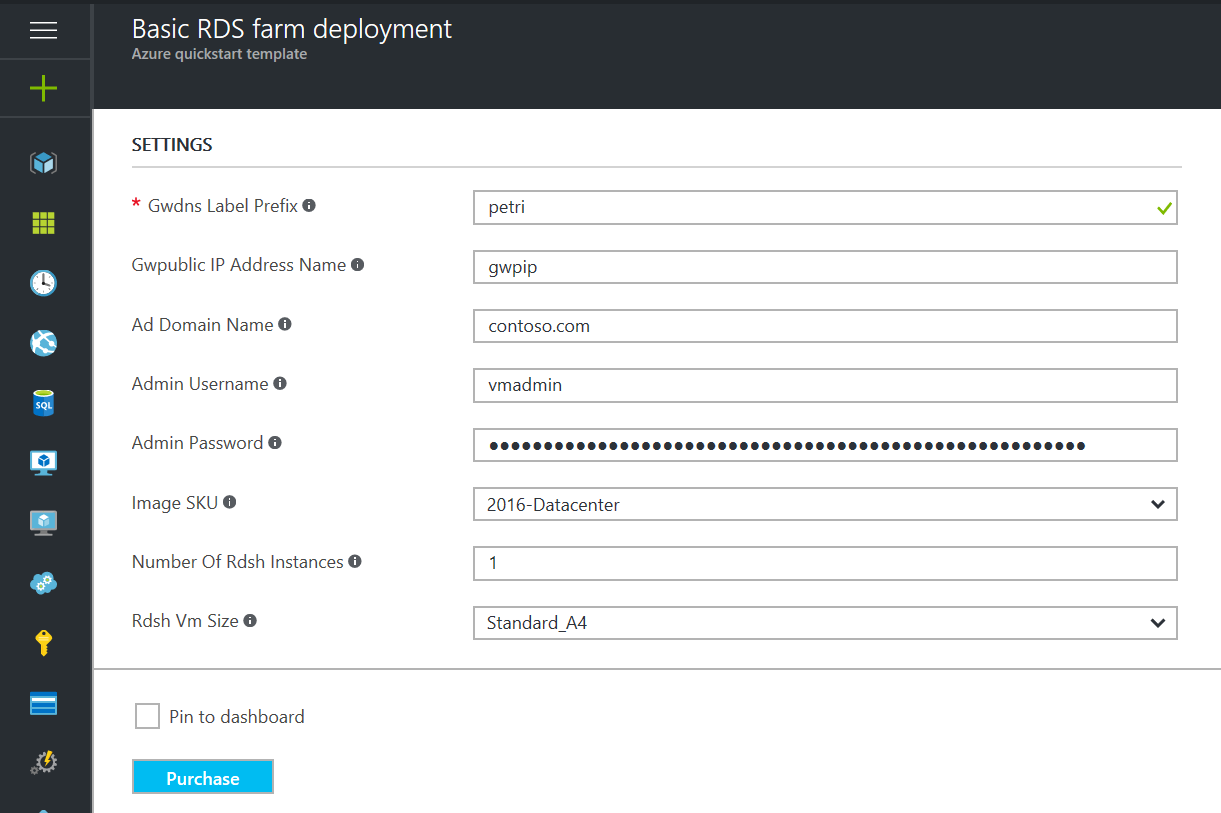
- If necessary, it’s possible to change the Windows Server image used for the VM deployments using the Image SKU drop-down menu.
- You can also choose the number of RD Session Hosts and the size of the VMs used for their deployment, with the Number Of Rdsh Instances and Rdsh Vm Size drop-down menus respectively.
- Finally, check I agree to the terms and conditions stated above, and then click Purchase. Optionally, for ease of access, you can also check Pin to dashboard.
The template parameters will be validated, and if successful, you’ll see a message appear in the notification center that the deployment has been submitted. Be prepared to wait an hour or more for the deployment to complete. Another notification will appear in the notification center when it’s ready for use.
Connect to the Farm
To connect to the RDS farm, follow the instructions below:
- Press WIN+R to open the Run box, then type mststc in the run box to open Remote Desktop Connection.
- Type the DNS address of your RDS farm deployment in the Remote Desktop Connection app. In my case, it’s petri.northeurope.cloudapp.azure.com. Petri is the Gwnds Label prefix that was entered in the SETTINGS section of the template deployment panel. The location for my deployment was North Europe.
- Click Connect.
- Enter the admin username and password you specified in the SETTINGS section of the template deployment panel when prompted.
In the real world, you would create users with standard user privileges in AD to connect to the farm.
In this article, I showed you how to deploy a basic RDS farm in Microsoft Azure.