Creating Your First PowerApps App Using a SharePoint List — Part 1
If you have been on the internet at all in the last year and read anything about the Office 365 ecosystem, you have heard of PowerApps.
PowerApps allows us common folks (non-developers) to create and publish web and mobile apps through an easy to use web-based tool. No Visual Studio, no coffee-based languages, and no dealing with getting something published to the fruit store. If you can use a web browser, you can build and publish your own app for you or your whole team to use. Pretty awesome stuff.
In this 2 part series, we walk through creating your first PowerApp using SharePoint Online list data. It will not be the sexiest app ever, but it will introduce you to the core concepts and give us a base to build on for future articles that will show more advanced functionality. I have a video that walks you through these same steps with PowerApps if you prefer the sound of voice instead of the reading of my prose.
Logging Into PowerApps.com
If you go to www.PowerApps.com, you will be redirected to your language version of the site. For now, skip over all of the marketing hoopla and instead, click Sign in at the top right-hand corner. Here you will want to log in with your Microsoft Account. To make the most out of this example, you should be using your Office 365 username and password. That will make life easier when we connect to your SharePoint Online content shortly. If you don’t have a PowerApps account, already you will be prompted to register for your free account. If you don’t have an account at all, then click Sign up free. Either way, we need you to get logged in to get to the dashboard to build that app.
Welcome to PowerApps
Now that you are logged in, you are taken to the home screen of the builder. One of the great things about PowerApps is you can do everything from the browser. If you prefer, there is a fat client (can we still call them that?) available to download by clicking the down arrow to the right of your name at the top of the screen. Everything works the same whether you use the web or the client. I am using the web because I am too lazy to install the client.
On this home screen, you will see lots of example apps. They are great and I recommend you try them out. For me, I like to create the examples and then reverse engineer how they are doing different things. Personally, that has been the easiest way to learn. Look at something that works and then figure out how/why it works. A great example is the button that changes the sort from ascending to descending in the app we are about to build together. That simple button turns out to use a few different concepts to provide its functionality. I actually plan to break it all down in a later article, so don’t figure it out quite yet or you will ruin the surprise.
Now that you are done looking at the examples, click on Apps on the left. If this is your first time in here, you will be greeted with a whole bunch of nothing. Let’s fix that by clicking Create an app on the right side.
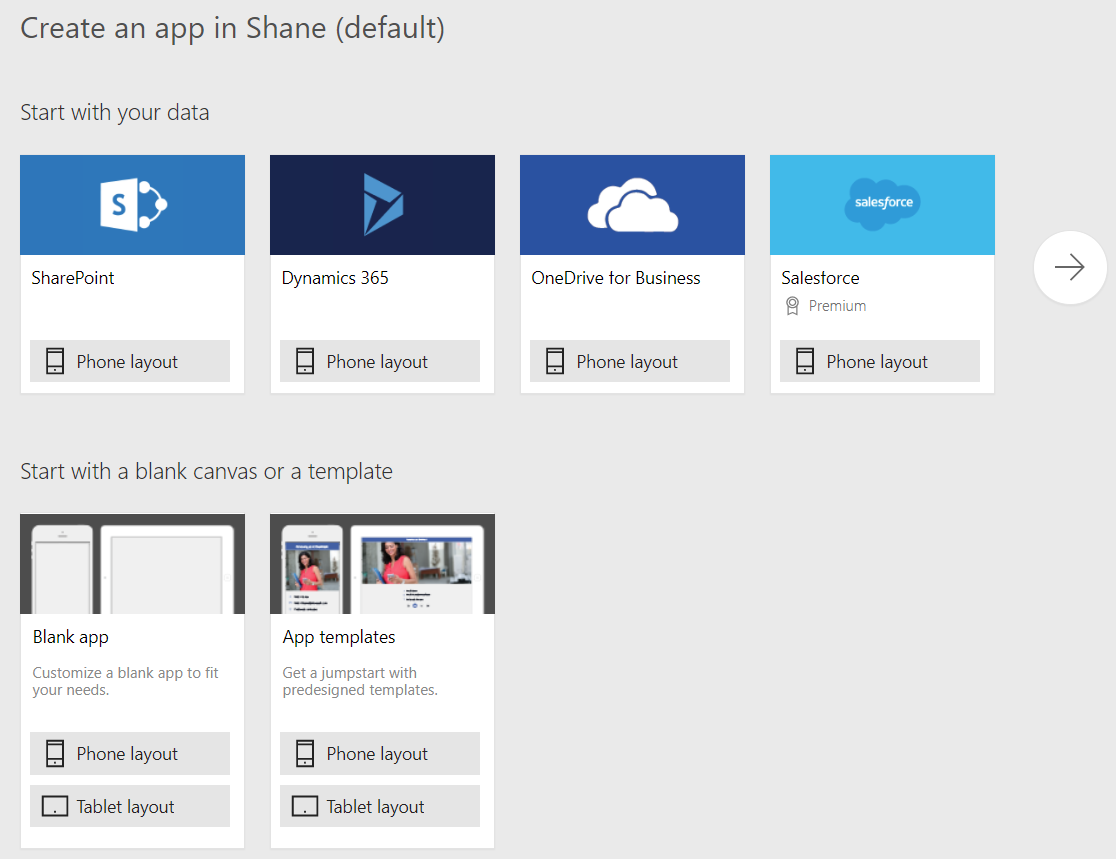
There are lots of fun options on this page.
For us to get started, we will take advantage of the SharePoint > Phone layout template by clicking the button Phone layout.
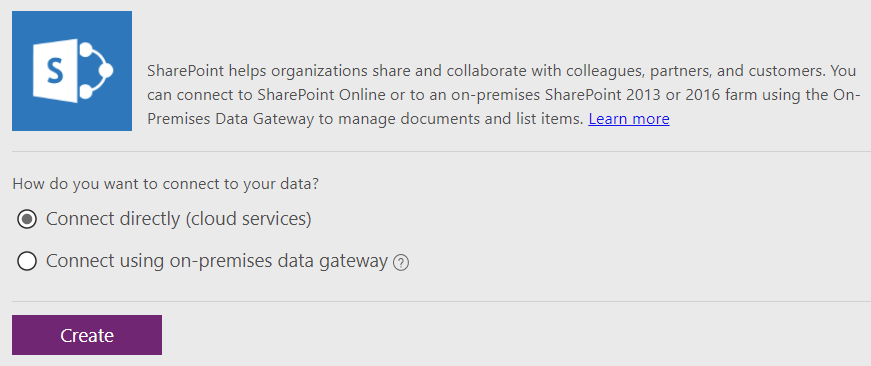
If this is the first time you have tried to use SharePoint as a connection, then you will need to setup your connection.
Here you will see you have two options. Connect directly is for connecting to SharePoint Online. Connect using on-premises data gateway takes a little setup work but will provide you the ability to build PowerApps by connecting to your on-premises SharePoint. For this walk-through, we will choose Connect directly and click Create.
If you want to learn more about setting up the on-premises data gateway check out this video: Install the on-premise Data Gateway for Power BI, PowerApps, Microsoft Flow, and Azure Logic Apps for more information.
You are now prompted to connect to a SharePoint site. In the box, you want to enter the URL of your SharePoint site, not the list URL. So typically, something like https://boldzebras.sharepoint.com is what you want to type in and then press Go.
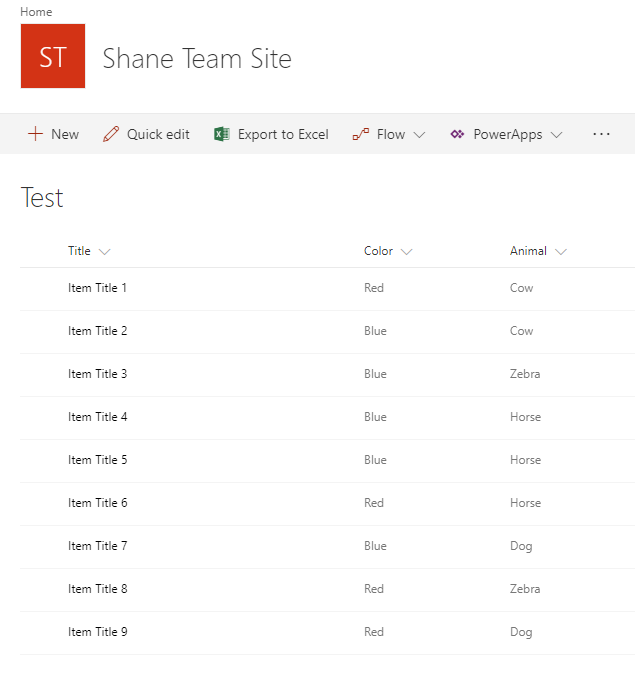
Here you will see all of the lists for the site you specified. Well, not really all of the lists, you will see the lists that PowerApps knows how to handle best. So typically, these are custom lists. PowerApps can connect to any list by manually entering the list name in the box, “Enter custom list name” but if you do this for a document library or picture library, it will not work exactly as you are hoping. While you are still learning, I recommend creating a custom list with a handful of columns and go from there. Once you are a PowerShell pro, you can come back to more complex lists. For this example, I have a simple list I created named Test that has three columns: Title, Color, and Animal. If you want to make the same list, I did it with PowerShell here. Click the list you want to use and click Connect.
Here is a screenshot of my very complicated list for learning.
Now sit back for a moment while PowerApps does all of the hard work and creates an app for you. Should take about 30 seconds, so don’t get too comfortable.
Checking Out Your App
If any wizards or tutorials pop up, skip or close them for now. You can go through them another day when you don’t have me waiting to show you things.
Believe it or not, you now have a completely working app. That is borderline magic. The first thing you should do is try it out. To do that, you can click the play button up on the top right of the screen. (You know, the triangle looking thing we used to have on our VCRs.) This will launch the preview tool and let you try things out without committing to it. Get used to using the preview tool; you will use it a lot when you start building your own apps.
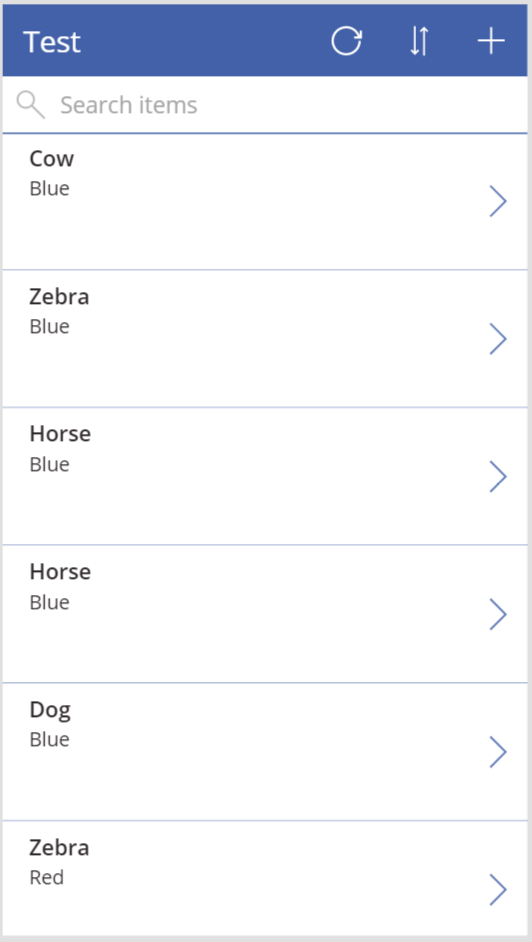
The preview app launches and is a complete working app. Click around and check it out. You made that. You can search or scroll through the list items and then click the arrow on the right to view the item. On the view screen, you can now edit or delete your item. If you go back to the home screen by clicking the arrow in the upper left, you will see you can also reload your data, change the sort order, or create a new list item. That is a lot of functionality for the handful of mouse clicks you have done thus far. Here is a screenshot of my app.
Now you might notice as you browse around, things aren’t perfect. For example, on the item search screen, I don’t see my item title. Don’t worry, fixing it is easy. When you are done checking out your work, click the X in the top right corner to return to the editor.
Alright, I think that is enough to call it a day. Congratulations, you have a fully functional PowerApp. In the next article, we will pick up here with PowerApp to teach you a couple of core concepts. After we make something nice, we will save it and publish it for all of your friends to see. Should be a lot of fun. Also, if you really want to watch the video version of the article is right here Video:Learn PowerApps.
Shane


