


How to Configure PowerShell SSH Remoting in Windows 10
- Blog
- PowerShell
- Post
Microsoft introduced Secure Shell (SSH) as a transport for PowerShell Remoting in PowerShell 6. Older versions of PowerShell (Windows PowerShell) are restricted to HTTP/HTTPS and Windows Remote Management (WinRM). WinRM/HTTP is fine for Active Directory (AD) environments. Authentication and communications are secured. WinRM/HTTPS is for accessing workgroup computers, i.e. computers not joined to an AD domain.
But to use HTTPS, you need to get, provision, and manage certificates. And that’s a pain. Additionally, you need to configure Trusted Hosts on devices before they will accept WinRM/HTTPS connections.
To solve these issues, Microsoft introduced SSH as a transport option for PowerShell Remoting in PowerShell 6. SSH uses passwords and public/private key pairs for authentication, so certificates are not mandatory like when using HTTPS. Because SSH is only supported in PowerShell 6 and later versions, you’ll need to install the latest version of PowerShell in Windows. Windows 10 comes with legacy Windows PowerShell 5.1 installed by default.
There are two main steps to configuring PowerShell Remoting to use SSH. The first step is to configure the computer that you want to connect to remotely. You will need to perform the following actions:
- Install the latest version of PowerShell. At the time of writing, it is PowerShell v7.
- Install and configure the OpenSSH server
Once that’s done, you’ll need to configure your management PC. I.e., the computer from which you would like to manage the remote device:
- Install the latest version of PowerShell.
- Install the OpenSSH client
Configure the remote device
Let’s start by configuring the device that you want to connect to remotely.
Install the latest version of PowerShell
The best way to install PowerShell is to grab the latest .msi installer file from GitHub here. Once you’ve installed PowerShell, the latest version of PowerShell and Windows PowerShell 5.1 will work side-by-side. Some cmdlets are only supported in Windows PowerShell. So, in this tutorial, we will need to use Windows PowerShell and the latest version of PowerShell that we just installed.
Install OpenSSH
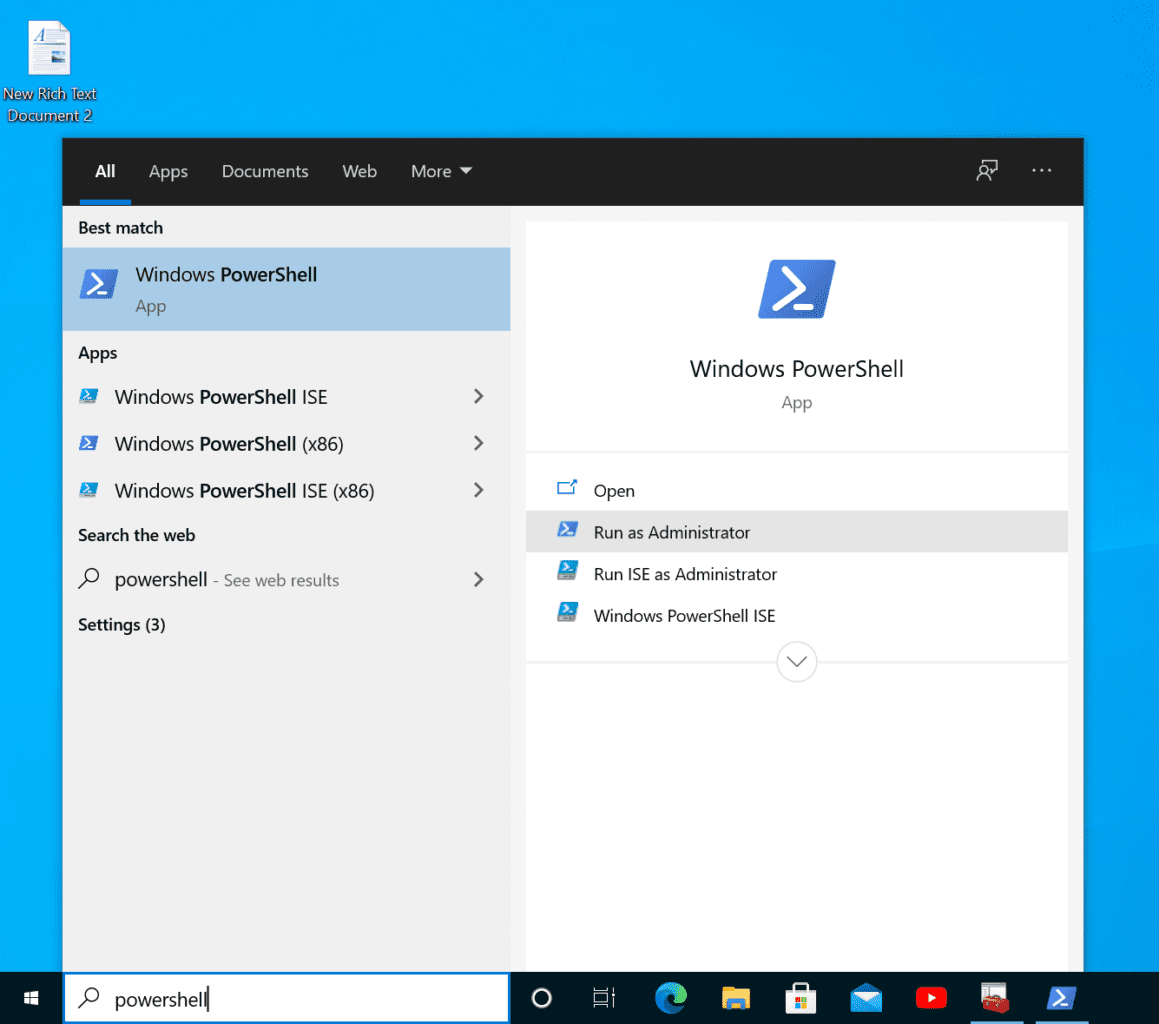
The first step is to install OpenSSH in Windows. To do this, we’ll use Windows PowerShell and the Add-WindowsCapability cmdlet. To open Windows PowerShell, type windows powershell into the search box on the taskbar, click the arrow (>) to the right of Windows PowerShell in the search results, and in the list of options on the right, click Run as Administrator. You may be asked to enter administrator credentials or give consent to run PowerShell.
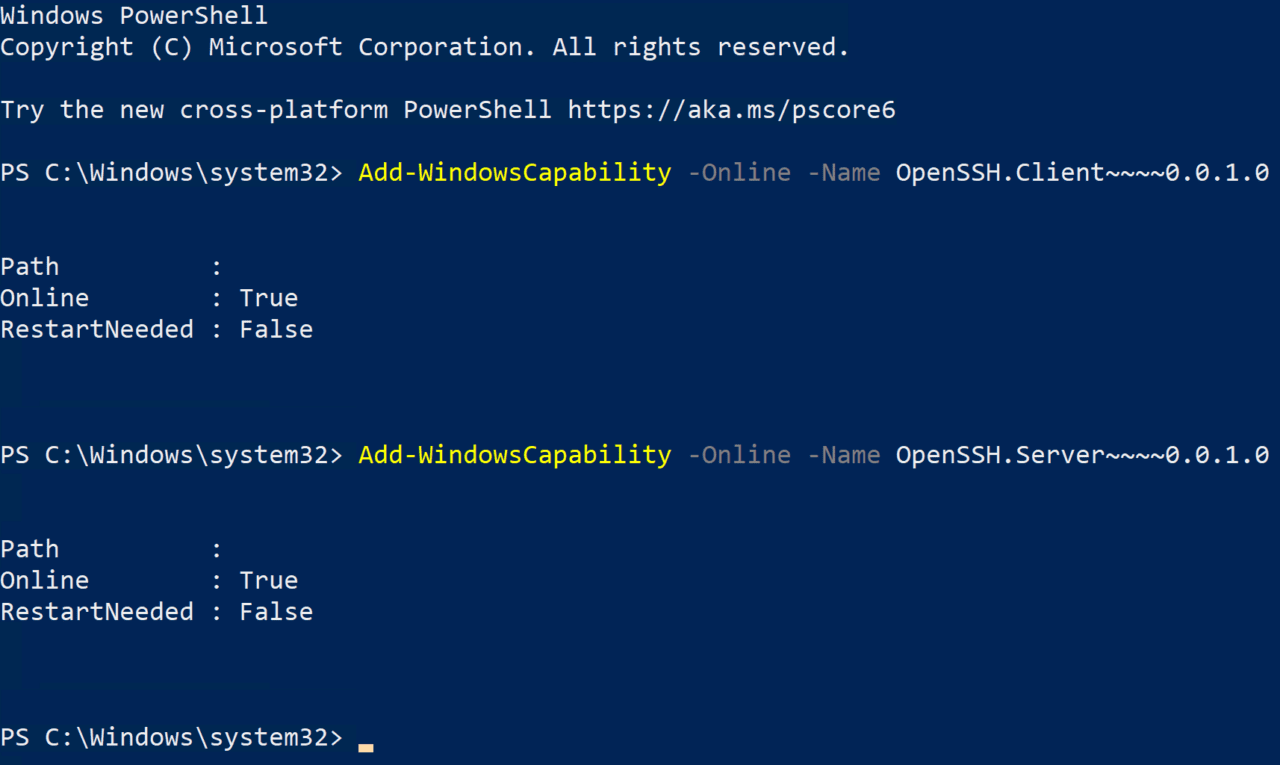
In the PowerShell window, run the following two commands to add the OpenSSH client and server components to the device. The client isn’t strictly needed, but it will help us to test if the SSH server is working. Installing the OpenSSH server component also creates and enables a Windows Firewall inbound connection rule on TCP port 22 for all network connection profiles.
Add-WindowsCapability -Online -Name OpenSSH.Client~~~~0.0.1.0
Add-WindowsCapability -Online -Name OpenSSH.Server~~~~0.0.1.0
Now let’s start the sshd service and set it to start automatically:
Start-Service sshd
Set-Service -Name sshd -StartupType 'Automatic'
To test that SSH is working, you can connect to it locally from the PowerShell window using the SSH command. Run the command below, replacing ‘russell’ with your username on the local device.
ssh russell@localhost
Type ‘yes’ to say you want to connect and then enter your account password. To quit the SSH session, type exit and press ENTER.
Configure SSH for PowerShell Remoting
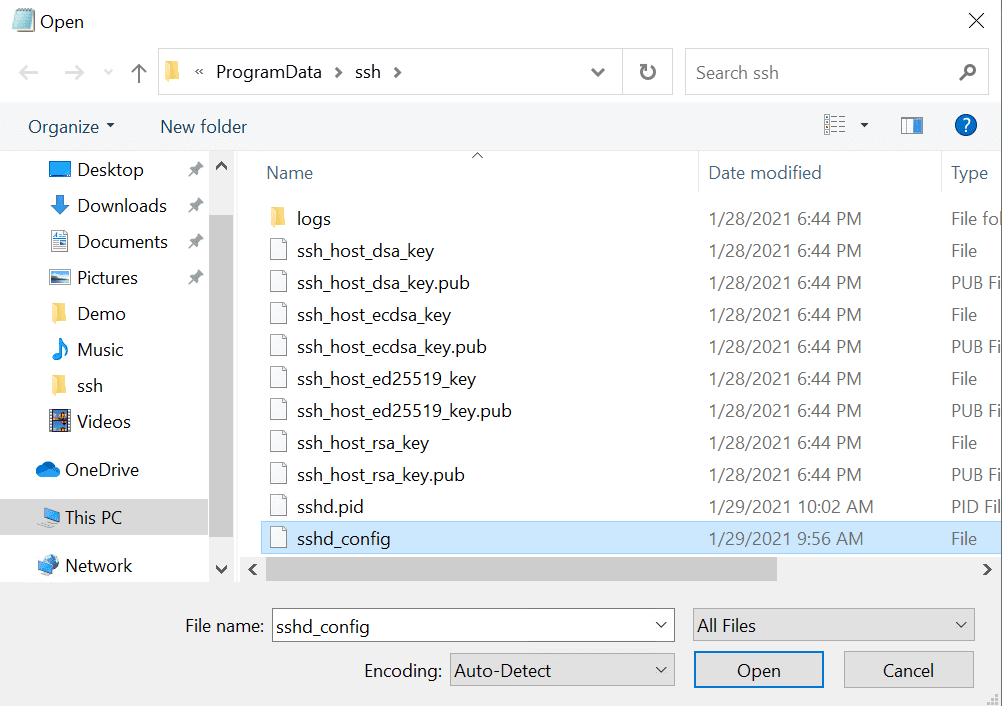
Now that SSH is working on the device, we can configure it to work with PowerShell Remoting. We need to edit the sshd_config file, which is in C:\ProgramData\ssh. Because sshd_config is in a protected directory, we’ll need to run Notepad as an administrator to edit it.
- Type notepad in the search box on the taskbar, make sure that Notepad is selected in the search results. In the options on the right, click the down arrow to expand the available options, and click Run as administrator.
- In Notepad, click CTRL+O to open a file.
- In the Open dialog, paste C:\ProgramData\ssh into the File name field and press ENTER.
- Using the dropdown menu to the right of the File name field, change Text documents (*.txt) to All Files.
- Double click sshd_config in the list of files to open it.
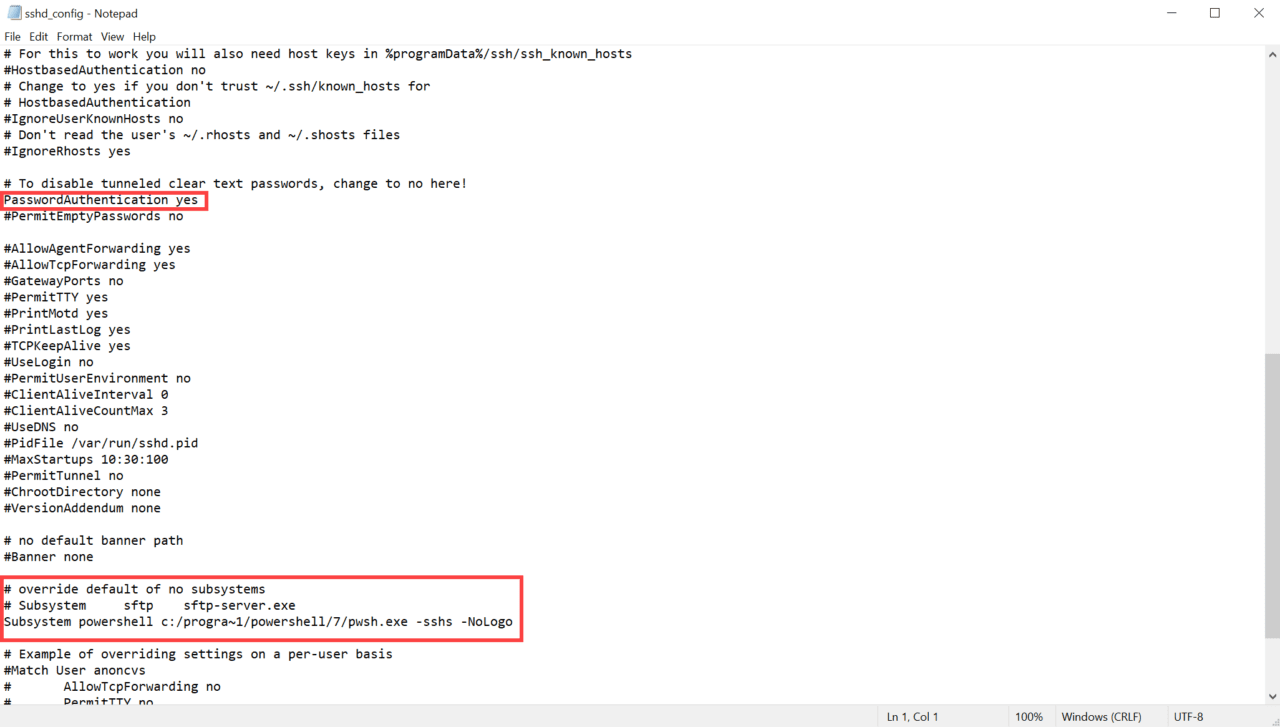
In the file, find the following line:
#PasswordAuthentication yes
Edit it to remove that hash at the beginning of the line so it looks like this:
PasswordAuthentication yes
Finally, we need to create a PowerShell host process on the target computer as an SSH subsystem. Change the # override default of no subsystems section of sshd_config from this:
# override default of no subsystems
Subsystem sftp sftp-server.exe
To this:
# override default of no subsystems
# Subsystem sftp sftp-server.exe
Subsystem powershell c:/progra~1/powershell/7/pwsh.exe -sshs -NoLogo
Note that you might need to change the path to the PowerShell (pwsh.exe) runtime if you are using an older or later version of PowerShell. In the file path we use the 8.3 short name for ‘Program Files’. That’s because there’s a bug in OpenSSH for Windows that stops you using spaces in subsystem executable paths.
Now save and close the file.
To apply the changes, restart the sshd service using the Restart-Service PowerShell cmdlet:
Restart-Service sshd
Test PowerShell Remoting and SSH
Before we connect remotely to the device, let’s check that PowerShell Remoting is working locally first. The following steps need to be performed in PowerShell, not Windows PowerShell because it doesn’t support SSH as a remoting protocol. To open PowerShell, type powershell in the search box on the taskbar. In the search results, be sure to click PowerShell and not Windows PowerShell.
In the PowerShell window, create a new remote session on the local device using New-PSSession. Enter the password for your account when prompted.
$session = New-PSSession -HostName localhost
Now let’s check the session details using Get-PSSession. As you can see in the #IMAGE, SSH is listed under Transport.
Get-PSSession

Configure your management device
Now all that’s left to do is configure the device from which you manage the remote PC. Grab the latest version of PowerShell from GitHub here and install it. Now install the OpenSSH client using Windows PowerShell. Repeat the steps above but this time the OpenSSH server component isn’t necessary. Just install the client component:
Add-WindowsCapability -Online -Name OpenSSH.Client~~~~0.0.1.0
And that is it! If you have direct network connectivity to the remote device on port 22, you should be able to establish a PowerShell Remoting session using SSH. You can connect using Enter-PSSession as shown below. Specifying the -Hostname parameter ensures PowerShell uses SSH as the connection protocol.
Replace WIN10-1 with the name of the remote device you’d like to connect to. PowerShell uses the username of the local computer if you don’t specify one. To log in using a domain user account, use the username:domain format as shown below:
Enter-PSSession -HostName WIN10-1 -UserName russell:ad.contoso.com
Invoke-Command and New-PSSession also support the SSH protocol, providing that you either use the -Hostname or -SSHTransport parameter.
In an upcoming article, I’ll show you how to configure PowerShell Remoting and SSH public key authentication.