


Windows 7 is the next generation of operating system due from Microsoft and it is now set for a planned release in the final quarter of 2009 which would be just a bit shy of the three years since the release of Windows Vista.
This article series is an overview of BitLocker and Encrypting File System (EFS) in Windows 7.
[NOTES FROM THE FIELD] – Microsoft has now released their Release Candidate for Windows 7; I wrote a brief article Windows 7 Release Candidate (Build 7100) – Early Details on this already and at this time there is a tentative release date for Windows 7 this fall supposedly near the end of October time frame.
In my A Security Comparison Overview of BitLocker and Encrypting File System (EFS) in Windows 7 – PART 3 BitLocker To Go in Windows 7 article, I reviewed some of the feature details of BitLocker and in Walkthrough for BitLocker on Windows 7 I did a walkthrough of the steps for enabling BitLocker on your Windows 7 system.
In this article I will walk through the steps of getting a removable USB drive (thumb drive) enabled with BitLocker Drive Encryption.
Reasons for BitLocker To Go
Using BitLocker Drive Encryption in any version of Windows that supports it is one of the best ways to protect portable systems such as laptops from loss of data and information when the laptops themselves are lost or stolen.
BitLocker To Go is natively available in Windows 7 Enterprise Edition and Windows 7 Ultimate Edition at this time.
BitLocker To Go is a great security solution for devices such as removable hard drives and especially USB drives and other flash card type memory as its use can prevent data loss that results from the loss or theft of those devices.
Flash drives and other USB memory is now in the 64GB and 128GB range and the cost for the drives is decreasing. Device costs drop rapidly when a technology hits critical mass or when the next generation technology approaches (and for the most part manufactures want to flush out a bulk of their remaining stock). Often when this occurs the value of the lost device becomes incidental subconsciously to the handler s – “yeah, I lost that drive somewhere but it’s only $25.00.” The problem comes not from the value of the lost device but the intrinsic cost of the lost data on it which could be worth millions in research cost to a company in a race to be first to market with their product or in bad public relations as in the example of a bank that has lost customer account information.
Some Backward Compatibility for BitLocker To Go
BitLocker To Go is available in Windows 7 Enterprise Edition and Windows 7 Ultimate Edition at this time but it can be leveraged with the BitLocker To Go Reader that is copied to the protected device, providing read-only access to the data from computers running Windows Server 2008, Windows Vista, Windows XP with SP3, or Windows XP with SP2.
[NOTES FROM THE FIELD] – When any type of flash memory is protected with BitLocker, the BitLocker To Go Reader is copied to the drive, providing read-only access when the drive is accessed from computers running Windows Server 2008, Windows Vista, Windows XP with SP3, or Windows XP with SP2, if the user has the required password to unlock the drive.
This allows for backwards compatibility and use of the devices in read only mode on these older versions of the operating system.
Administrators running supported Windows Domains can configure settings in Group Policy that manages these settings for corporate, domain connected devices for end users.
BitLocker To Go can be setup independently without requiring that the system partition on a given system to be protected with the traditional BitLocker feature to leverage it for the removable devices.
BitLocker To Go – The Walkthrough
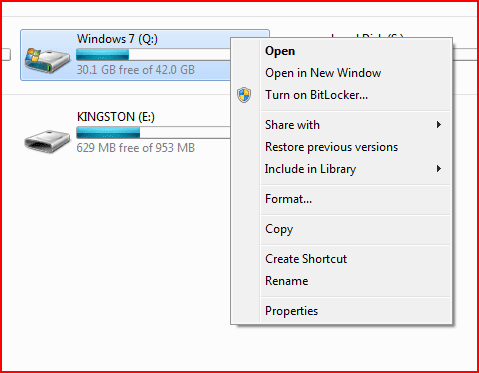
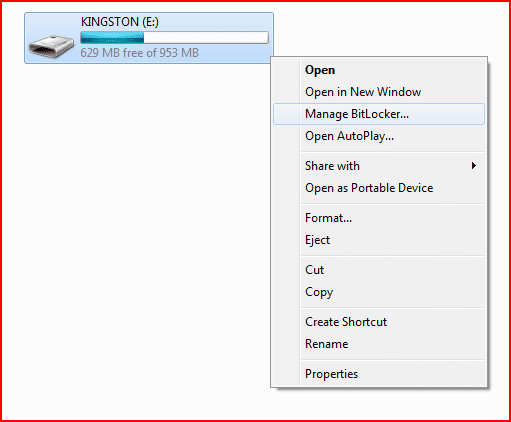
So in order to fully leverage BitLocker To Go such as a in a scenario where it is in use on a USB key drive all you really need to do is plug it into the system and wait for autorun to show the drive (or if autorun isn’t enabled by accessing the drive in Windows Explorer) as you can enable and manage BitLocker To Go right from the right click context menu as show below
For the purposes of this walkthrough we are going to work the steps through the Control Panel
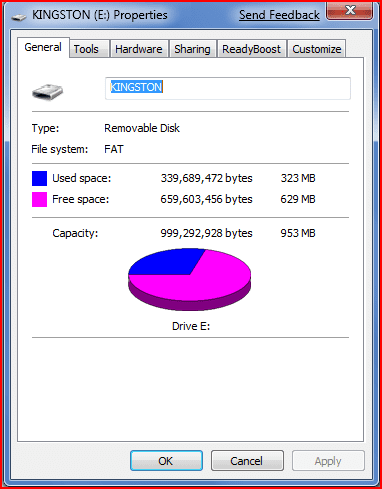
[NOTES FROM THE FIELD] – Just as a point of reference, we are working with a device that could otherwise not leverage file based encryption such as Encrypting File System (EFS) as it is formatted with the File Allocation Table (FAT) file structure.
To begin we go to the Control Panel and choose the System and Security category and then choose the BitLocker Drive Encryption subcategory.
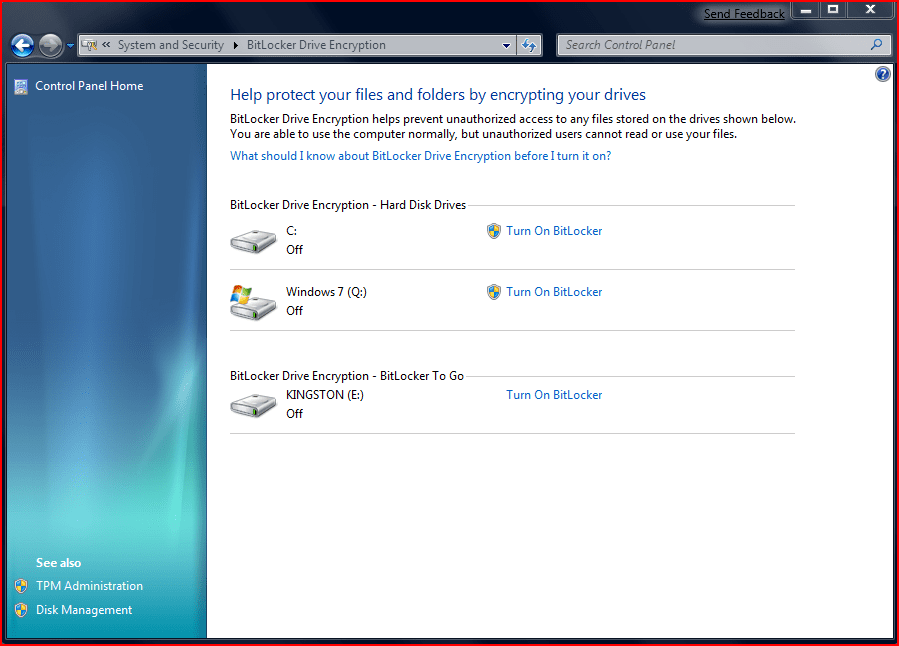
Once you do that you’ll see the “Help protect your files and folders by encrypting your drives” screen and we are going to choose “KINGSTON (E:)” to turn on BitLocker by selecting the “Turn On BitLocker” link option next to the volume description for the USB drive.
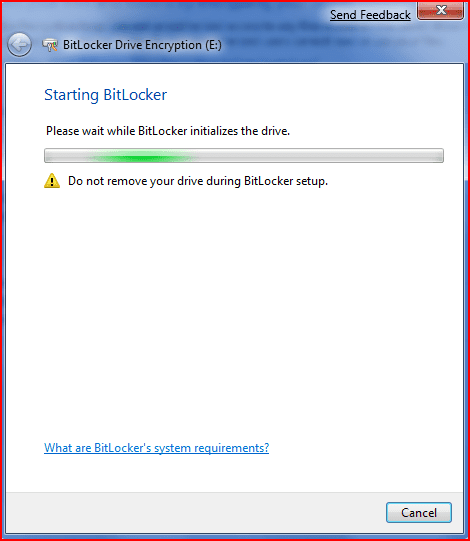
This will start the initialization process of BitLocker Drive Encryption.
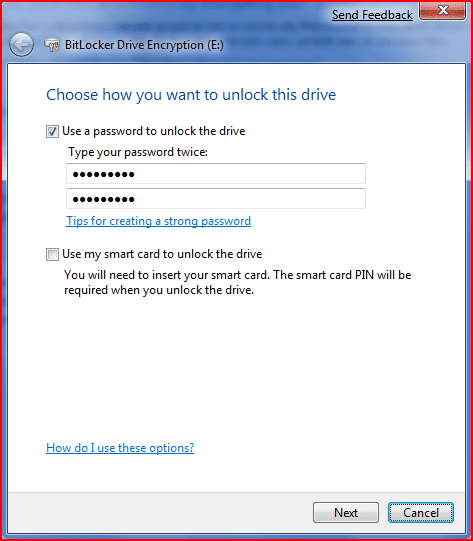
Once it is full initialized we are presented with the “Choose how you want to unlock this drive” page and we will select the “Use a password to unlock this drive” checkbox and enter a password twice before hitting NEXT to continue.
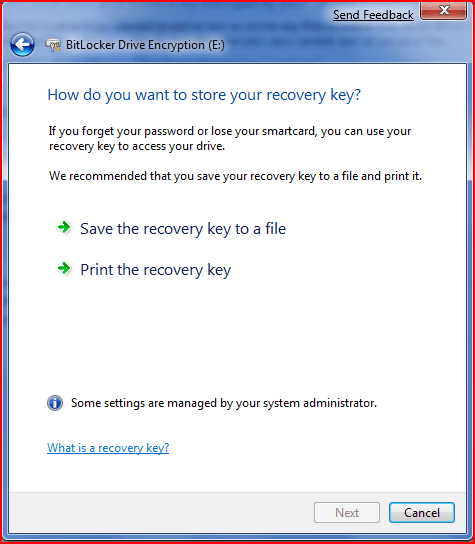
The next step of the process has us arriving at the “How do you want to store your recovery key” page, where there are two options to choose from. For the purposes of this walkthrough we are going to choose the “Save the recovery key to a file” option and choose NEXT to continue.
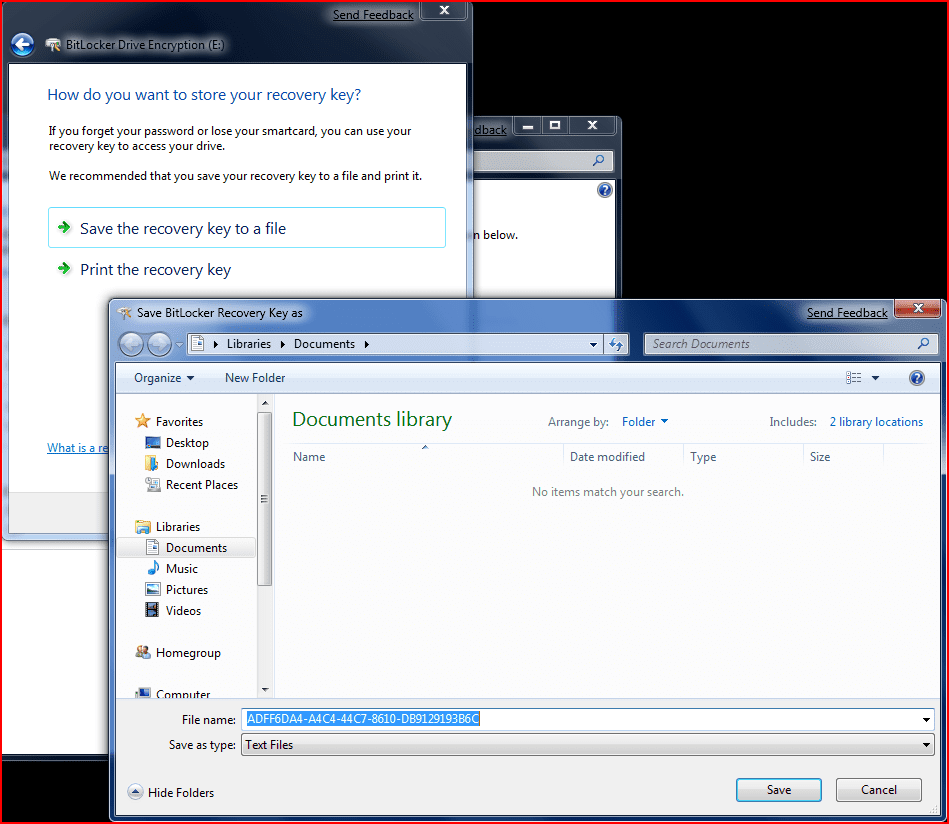
The BitLocker Drive Encryption setup routine will then prompt you for the location to save the file as shown below. You’ll notice a file name is provided by default as well as a location for the file (in the Libraries \ Documents subfolder).
After you make sure of the details for the file itself and its location you’d hit SAVE to continue where the setup process would complete and you’d arrive at the “Encrypt the drive” page. Hit START ENCRYPTING to continue.
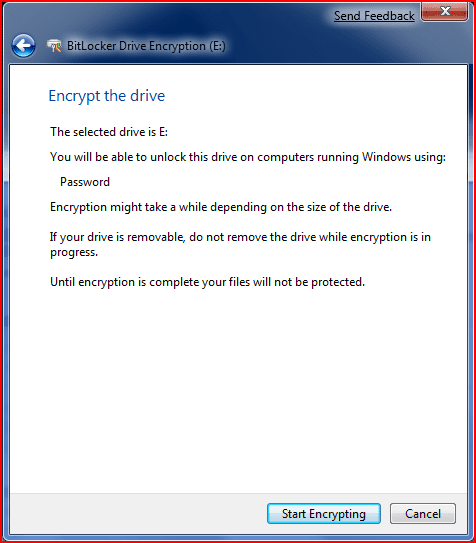
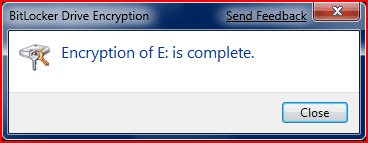
The process would continue from here and the drive will be encrypted and will show complete when finished.
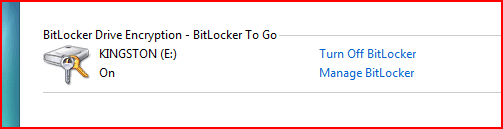
If you look back out on the “Help protect your files and folders by encrypting your drives” screen in the control panel you will see that the drive shows as protected by BitLocker Drive Encryption – BitLocker To Go.
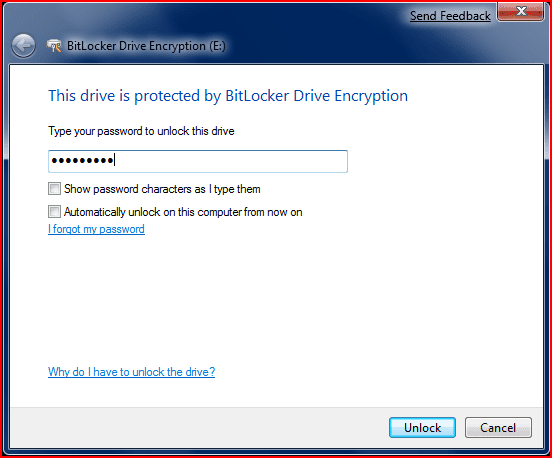
If you were to remove the drive and wait a couple of seconds and plug it back in you’d be prompted to enter a password to access the drive.
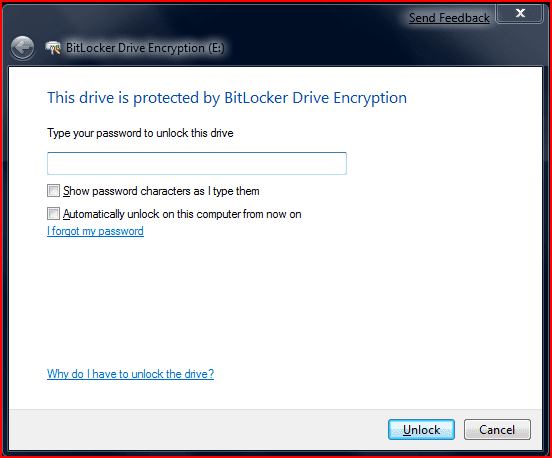
[NOTES FROM THE FIELD] – From this screen you have the option to “Show password characters as I type them” by selecting the checkbox as well as configuring the ability to choose the “Automatically unlock on this computer from now on” option which will store the password for this device on the system so that you do not need to enter it again (when using the particular device on that particular system).
I personally do not recommend this option as it removes a layer of security. While it is a stretch, if I managed to get your thumb drive AND your laptop I might be able to access the data if you chose this option. Additionally, I could also try a suspected “favorite” system like a desktop machine known to always be used by you in an attempt to access the data.
Once I get that access it is all over as I can copy it all off to another device I might have and then it is mine forever at that point.
Again, it sounds like a stretch but it does reduce the advantage of that security layer when you chose the “Automatically unlock on this computer from now on” option.
For the purposes of this walkthrough we will leave both of these options in their default state of unselected and just enter our password to access the device.
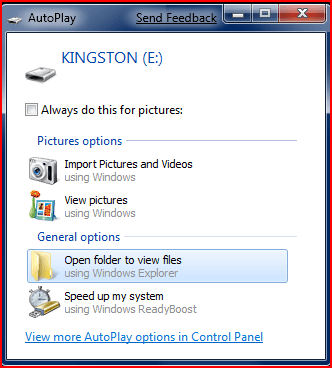
Once that is done the drive will be unlocked for access and the autoplay menu will show up automatically (if the system is configured to handle the drives in this manner) so that you can access the drive. If it doesn’t for some reason you can use Windows Explorer to access the drive as well.
Locking the drive again only requires that you remove it from the system; the activity is automated for the user.
And that’s it – your USB drive is now protected via BitLocker Drive Encryption and locked with the password of your choice.
That’s a wrap for my BitLocker To Go Walkthrough Windows 7 article – I hope you found it a good investment of your time.
In my next article I am planning to do a walkthrough of the steps to leverage the BitLocker To Go secured device on legacy operating systems.
I am always looking forward to any feedback you have on this or any of the articles I have written so feel free to drop in some comments or contact me directly.
Additionally, I would welcome any suggestions topics of interest that you would like to see and based on demand and column space I’ll do what I can to deliver them to you.
Best of luck in your studies.