In this Ask the Admin, I’ll show you how to share network resources using Windows 7 HomeGroup.
If you’ve recently migrated from Windows XP to Windows 7, or are still in the process, you’ll be glad to hear that it’s much easier in Windows 7 and later operating systems to share and locate resources on your local network.
If you’ve ever tried to set up a local network and share printers or files in a workgroup, i.e. with no domain controller or Active Directory, then you’ll know that in Windows XP and other legacy Windows operating systems, this seemingly simple task could prove to be something of a headache.
- Related: Windows XP End of Support Guide
Improvements in Windows 7 allow administrators and home users to share resources easily using a feature called HomeGroups. If a network is detected during setup and Home is selected as the network type, Windows 7 automatically creates a HomeGroup if one isn’t detected on the local network.
How Do Windows HomeGroups Work?
HomeGroups use the Peer Network Resolution Protocol (PNRP), which is based on IPv6, to determine the names and IP addresses of computers on the local network. Computers can then publish resources and make them available to other devices.
When a corporate user takes their domain-joined Windows 7 notebook home, if they select Home as the network type when connecting to a home network, the notebook can access printers and files shared by the HomeGroup. The domain-joined notebook is not able to share any of its resources with other members of the HomeGroup. Alternatively, system administrators can use Group Policy to prevent domain-joined notebooks joining or creating HomeGroups.
Set Up a HomeGroup in Windows 7
Log in to Windows 7 and make sure you are connected to a home network. To change the designated network type:
- Right click the network icon in the bottom right of the desktop taskbar.
- Select Open Network and Sharing Center from the menu.
- Under View your active networks, click the currently designated network type if it’s not set to Home network.
- In the Set Network Location dialog, select Home network from the list and wait for Windows to apply the necessary changes.
- Now let’s create a HomeGroup.Once the changes have been applied, click Choose homegroup and sharing options in the Network and Sharing Center.
- In the Share with other home computers running Windows 7 dialog, click Create a homegroup.
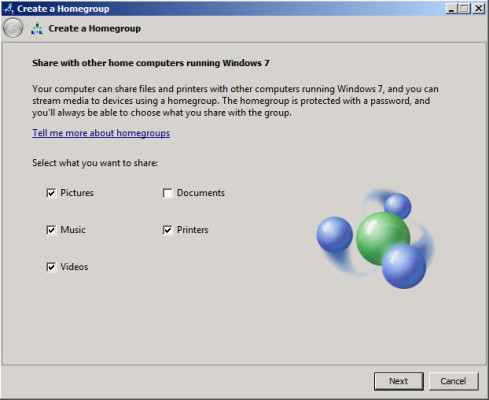
- In the Create a HomeGroup dialog, select the items that you would like this computer to share in the HomeGroup and click Next.
Choose the resources to share in a Windows 7 HomeGroup. (Image: Russell Smith)
- After a few seconds, you’ll be shown the password for the HomeGroup. Make a note of it, although you can access the password anytime on this computer via the HomeGroup Control Panel applet.
- Click Finish to complete the procedure.
Join a Computer to a HomeGroup
Now that we have a HomeGroup on the local network, other computers can join the group and access or share resources. All you need is the password from the previous steps. Remember that any computer you want to add to a HomeGroup must have the network type set to Home.
- Go to the Start menu on the computer you want to add to the HomeGroup, and select Control Panel.
- In the Search Control Panel box in the top right, type homegroup.
- In the search results, click HomeGroup.
- Click Join now to join this PC to the HomeGroup. If you don’t see the Join now button, it means that no HomeGroup can be detected on the local network.
- In the wizard, choose which resources on this PC you want to share with the HomeGroup and click Next.
- When prompted, enter the password for the HomeGroup and click Next.
- You should now see a confirmation message that the PC has been connected to the HomeGroup. Click Finish.
Now that the HomeGroup has two PCs, you will be able to access the resources you selected in the HomeGroup wizard from both computers. HomeGroup resources are accessible from Windows Explorer.


