


As described in previous articles, User Account Control (or UAC) is included in Windows to help prevent unauthorized changes to your computer. UAC notifies you when changes are going to be made to your computer that require administrator-level permission. These types of changes can affect the security of your computer or can affect settings for other people that use the computer.
Editor’s Note: In this article you’ll learn how to limit notifications from and/or disable UAC in Windows 7, but we also have tutorials that show you how to disable UAC in Windows Vista or disable UAC in Windows 8 as well.
When you are notified by UAC that there is a pending change to your computer, you should carefully read the contents of each dialog box before allowing changes to be made to your computer. It’s usually safe to allow changes to be made to Windows settings without you being notified. However, certain programs that come with Windows can have commands or data passed to them, and malicious software can take advantage of this by using these programs to install files or change settings on your computer. You should always be careful about which programs you allow to run on your computer.
In Windows 7, UAC settings has a slider to change the level of the notifications and allows you to choose one between the following four options:
Always notify – With this option, you’ll be notified before programs make changes to your computer or to Windows settings that require the permissions of an administrator. When you’re notified, your desktop will be dimmed, and you must either approve or deny the request in the UAC dialog box before you can do anything else on your computer. The dimming of your desktop is referred to as the secure desktop because other programs can’t run while it’s dimmed. This is the most secure setting, and is similar to what the Windows Vista UAC looked like.
Notify me only when programs try to make changes to my computer – You will be notified before programs make changes to your computer that require the permissions of an administrator. You will not be notified if you try to make changes to Windows settings that require the permissions of an administrator. Also, you will be notified if a program outside of Windows tries to make changes to a Windows setting. This is the default setting.
Notify me only when programs try to make changes to my computer (do not dim my desktop) – You will be notified before programs make changes to your computer that require the permissions of an administrator, and you will be notified if a program outside of Windows tries to make changes to a Windows setting.. However, you will not be notified if you try to make changes to Windows settings that require the permissions of an administrator. This setting is the same as “Notify only when programs try to make changes to my computer,” but you are not notified on the secure desktop. Because the UAC dialog box isn’t on the secure desktop with this setting, other programs might be able to interfere with the dialog’s visual appearance. This is a small security risk if you already have a malicious program running on your computer.
Never notify – You will not be notified before any changes are made to your computer. If you are logged on as an administrator, programs can make changes to your computer without you knowing about it. If you are logged on as a standard user, any changes that require the permissions of an administrator will automatically be denied. This is actually somewhat similar to using Windows 7 in the permission model of Windows XP. This is the least secure setting. When you set UAC to never notify, you open up your computer to potential security risks.
Personally, and unlike my recommendations on disabling UAC for Vista, I now think it’s a good idea to leave UAC on if possible. Adjusting your notification options can make that a little easier to do.
If you do disable UAC, be aware of which programs you run as they’ll have the same access to the computer as you do. This includes reading and making changes to protected system areas, your personal data, saved files, and anything else stored on the computer. Programs will also be able to communicate and transfer information to and from anything your computer connects with, including the Internet.
There are many ways to disable UAC on your computer. Here are a few…
Option A – Disable UAC Through User Account Control Settings
This is the method that should be used by most users wanting to disable UAC.
Go to User Account Control Settings.
Type in UAC, or go to the System and Security applet.
Click on the “Change User Account Control Settings” link.

BTW, you can also type in this command from the Run menu:
C:\Windows\System32\UserAccountControlSettings.exe
To turn off UAC, move the slider to the Never notify position, and then click OK. If you’re prompted for an administrator password or confirmation, type the password or provide confirmation.

To turn UAC back on, move the slider to choose when you want to be notified, and then click OK. If you’re prompted for an administrator password or confirmation, type the password or provide confirmation.
You will need to restart your computer for UAC to be turned off.
Option B – Disable UAC Through Group Policy
This is the method that should be used by administrators wanting to disable UAC across several computers at once.
This can be done via Local Group Policy or via Active Directory-based GPO, which is much more suited for large networks where one would like to disable UAC for many computers at once.
If using Local Group Policy you’ll need to open the Group Policy Editor (Start > Run > gpedit.msc).
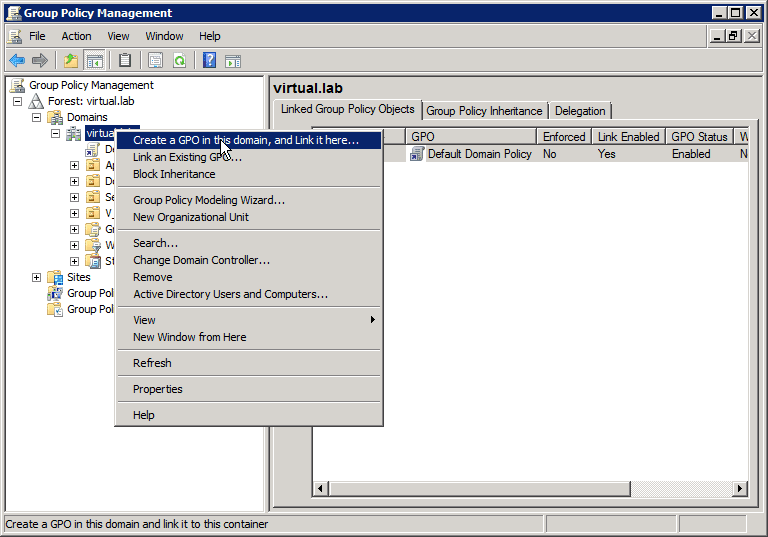
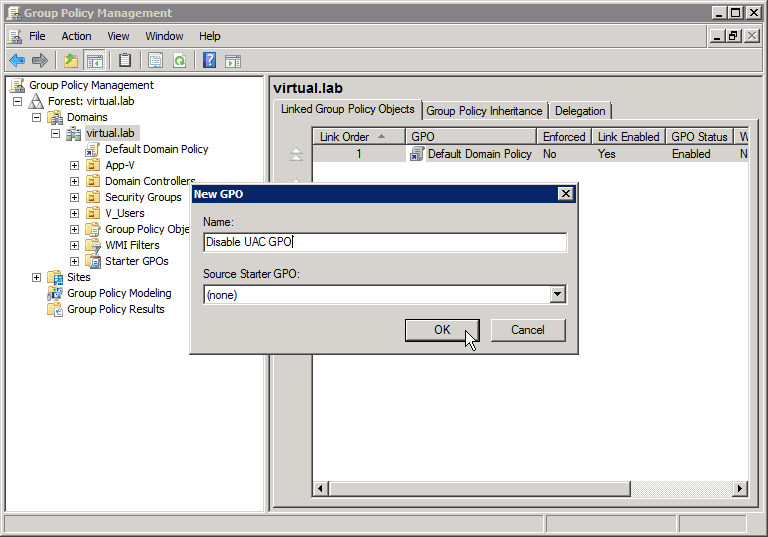
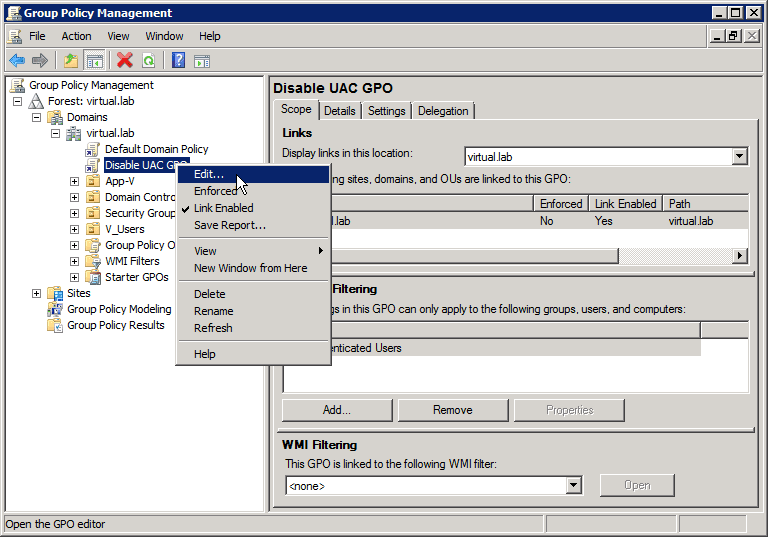
If using in AD-based GPO, open Group Policy Management Console (Start > Run > gpmc.msc) from a Windows Vista/7/2008 computer that is a member of the domain. In the GPMC window, browse to the required GPO that is linked to the OU or domain where the computers are located, then edit it, or, if needed, create a new GPO.
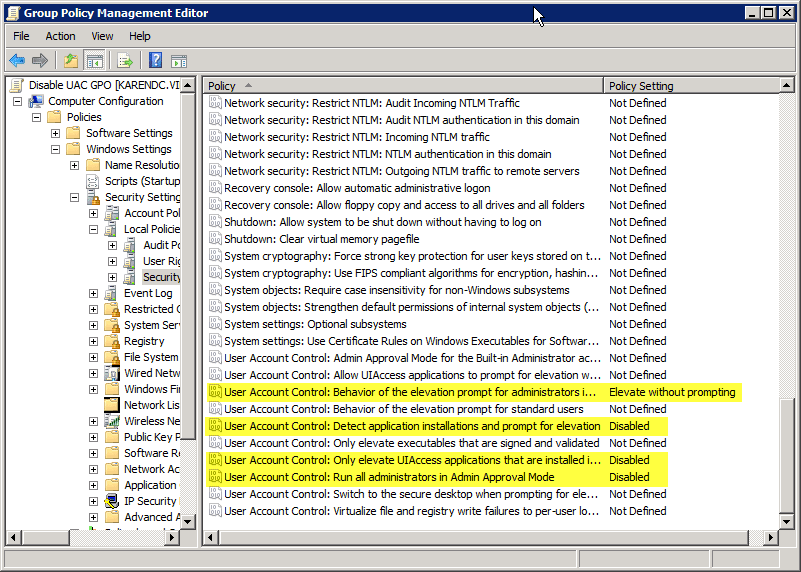
In the Group Policy Editor window, browse to Computer Configuration > Windows Settings > Security Settings > Local Policies > Security Options.
Make the following changes:
- User Account Control: Behavior of the elevation prompt for administrators in Admin Approval Mode – Set its value to Elevate without prompting.
- User Account Control: Detect application installations and prompt for elevation – Set its value to Disabled.
- User Account Control: Only elevate UIAccess applications that are installed in secure locations – Set its value to Disabled.
- User Account Control: Run all administrators in Admin Approval Mode – Set its value to Disabled.
Restart the computer when done.
Option C – Disable UAC Through the Registry
Another method to disable UAC is through the computer’s Registry.
Warning!
This document contains instructions for editing the registry. If you make any error while editing the registry, you can potentially cause Windows to fail or be unable to boot, requiring you to reinstall Windows. Edit the registry at your own risk. Always back up the registry before making any changes. If you do not feel comfortable editing the registry, do not attempt these instructions. Instead, seek the help of a trained computer specialist.
Click Start, click Run, type regedit, and then click Enter.
If prompted to enter your credentials by UAC, do so and/or press Yes to continue.
Navigate to the following registry subkey:
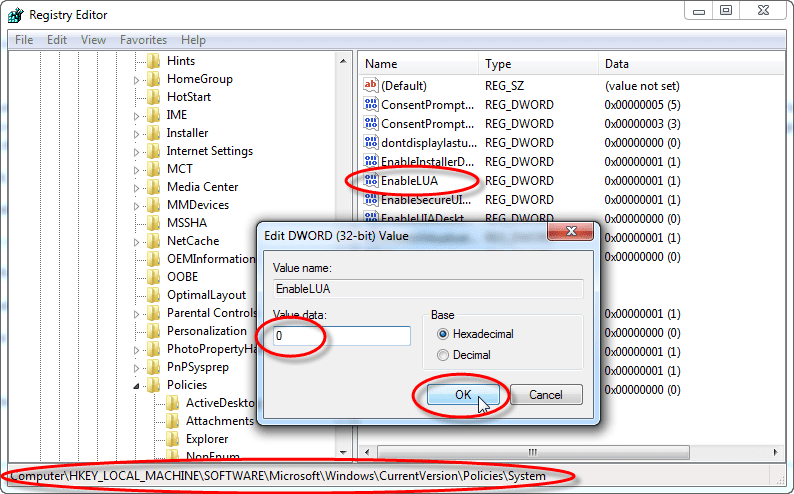
HKEY_LOCAL_MACHINE\SOFTWARE\Microsoft\Windows\CurrentVersion\Policies\System
In the details pane, locate the EnableLUA key (REG_DWORD type).
On the Edit menu, click Modify. In the Value data box, type 0 (zero), and then click OK.
Exit Registry Editor, and then reboot the computer.