How to Create a Fenced vApp in vCloud Director
One of the cooler things that you can do with vCloud Director from VMware is create a fenced vApp. This allows someone to deploy a vApp with the exact same configuration multiple times with the VMs containing the same MAC addresses and IP addresses and not cause any conflicts. This is especially helpful in many application-related functions such as training, development, and QA.
vCloud Director and Creating a Fenced vApp
In a previous blog post “How to Create a Multi VM vApp,” I explained how to build the vApp that we will be fencing. This will serve as our foundation. The vApp contains a pair of VMs with static IP addresses.
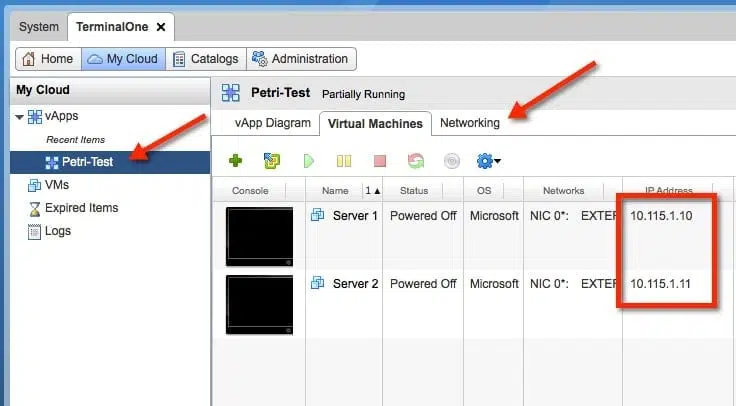
Now, I’ve browsed to the vApp list and selected the one created I created earlier. As you can see in the image below, the vApp contains two VMs, and I’ve highlighted the IP addresses. We will then click on the networking tab of the VM.
- In the image below you can see the options available when looking at the networking tab of our vApp. We want to allow this VM to be fenced, so I have checked the box for Fence vApp. This allows us to choose whether we want to use both NAT and Firewall for this fenced vApp.
- It’s important to also check the box for retain IP address, because we want it to keep the values already configured.

After we have configured the vApp for fencing we can adjust the VM startup order if needed. To do this, edit the properties of the vApp show in step three below.
- Click on the Start and Stop VM tab. This will allow for the order and actions of the start up to be configured, as well as any delays that might be required. This could be very handy if you were building a vApp with a multi-tiered application that had a specific startup order. And there also should be some time configured between VMs starting to allow for the different parts of the app to be ready for the next VM.

- Our vApp is now prepared for fencing and we are ready to add it to a catalog. In step four (shown below), locate the vApp that we configured for fencing and right-click on it. Click Add to Catalog to copy the vApp into the catalog of our choice.

- There are a few choices to be made in step five before the copy to catalog process begins. We will need to name the vApp – this is what users will see when looking at the catalog. We are also allowed to enter a description, choose the Virtual Datacenter, and choose which catalog we want to add this vApp to.
- The most important part of this process is shown in the red box in the image below. We need to make sure the radio button for Make Identical Copy is selected. If we don’t do this the vApp will want to reconfigure the VMs during the deployment.

We are now looking at the catalog to which we added the vApp. We can see that our Fenced named vApp is now presented as a catalog item.

Now when a user deploys the new vApp that we created from the catalog they will get an identical copy of the vApp that was configured earlier. It will be deployed in a fenced model that will have our preconfigured static IP addresses. This will allow anyone to run multiple copies of this vApp that will not conflict with each other.
Since we enabled NAT as part of our configuration, each VM within the vApp will receive a NAT’d IP address so it is available outside of the fence. If we did not want this behavior we could have left NAT out of our setup.